Genshin Impact
 Honkai: Star Rail (HSR)
 Zenless Zone Zero(zzz)
 Wuthering Waves
 Arknights: Endfield
 GODDESS OF VICTORY: NIKKE
 Last War: Survival Game
 Mobile Legends: Bang Bang
 King Shot
 PUBG MOBILE
 NTE (Neverness to Everness)
  Delta Force
 Whiteout Survival
 Identity V
 Last Z: Survival Shooter
 SD Gundam G Generation ETERNAL
 Honor of Kings
 Free Fire
 Dark War Survival
 AFK Journey
 Valorant
 Marvel Rivals
 Where Winds Meet
 Rise of Kingdoms
 Pokémon Trading Card Game Pocket
 Arknights
 Tiles Survive
 Poppo Live
 Bigo Live
 PlayStation Network Card
 Heartopia
 ChatGPT
 Valorant Vouchers
 Roblox
 Lineage 2M
 Miliastra Wonderland
 FC 26 Coins
 MICO
MICO Sugo
Sugo Likee
Likee Chamet
 Etheria: Restart
 APEX
APEX Fortnite
 MONOPOLY GO!
 Royal Match
 Candy Crush Saga
 Blue Protocol: Star Resonance
 Reverse: 1999
 Arena Breakout
 Infinity Nikki
 Love and Deepspace
 Pokémon Go
 Clash Royale
 Brawl Stars
 Clash of Clans
 Chaos Zero Nightmare
 Blood Strike
 Umamusume: Pretty Derby
 Hot Selling Games


 Like
Like

Norma is an S-Rank Fire Stunner, but instead of the standard field-hogging shield-breaker, she plays like a highly offensive off-field sub-DPS. Her entire kit revolves around gathering [Personal Resources] to drop auto-attack turrets that melt enemy resistance while she stays safely off-screen. What makes her truly broken is her unique scaling—she converts CRIT Rate directly into massive free CRIT DMG and Daze multipliers. Because her gadgets handle the heavy lifting and passively buff the squad's overall output, she slots in perfectly as a quick-swap enabler or a crazy efficient secondary damage dealer for players who want to maximize their burst windows.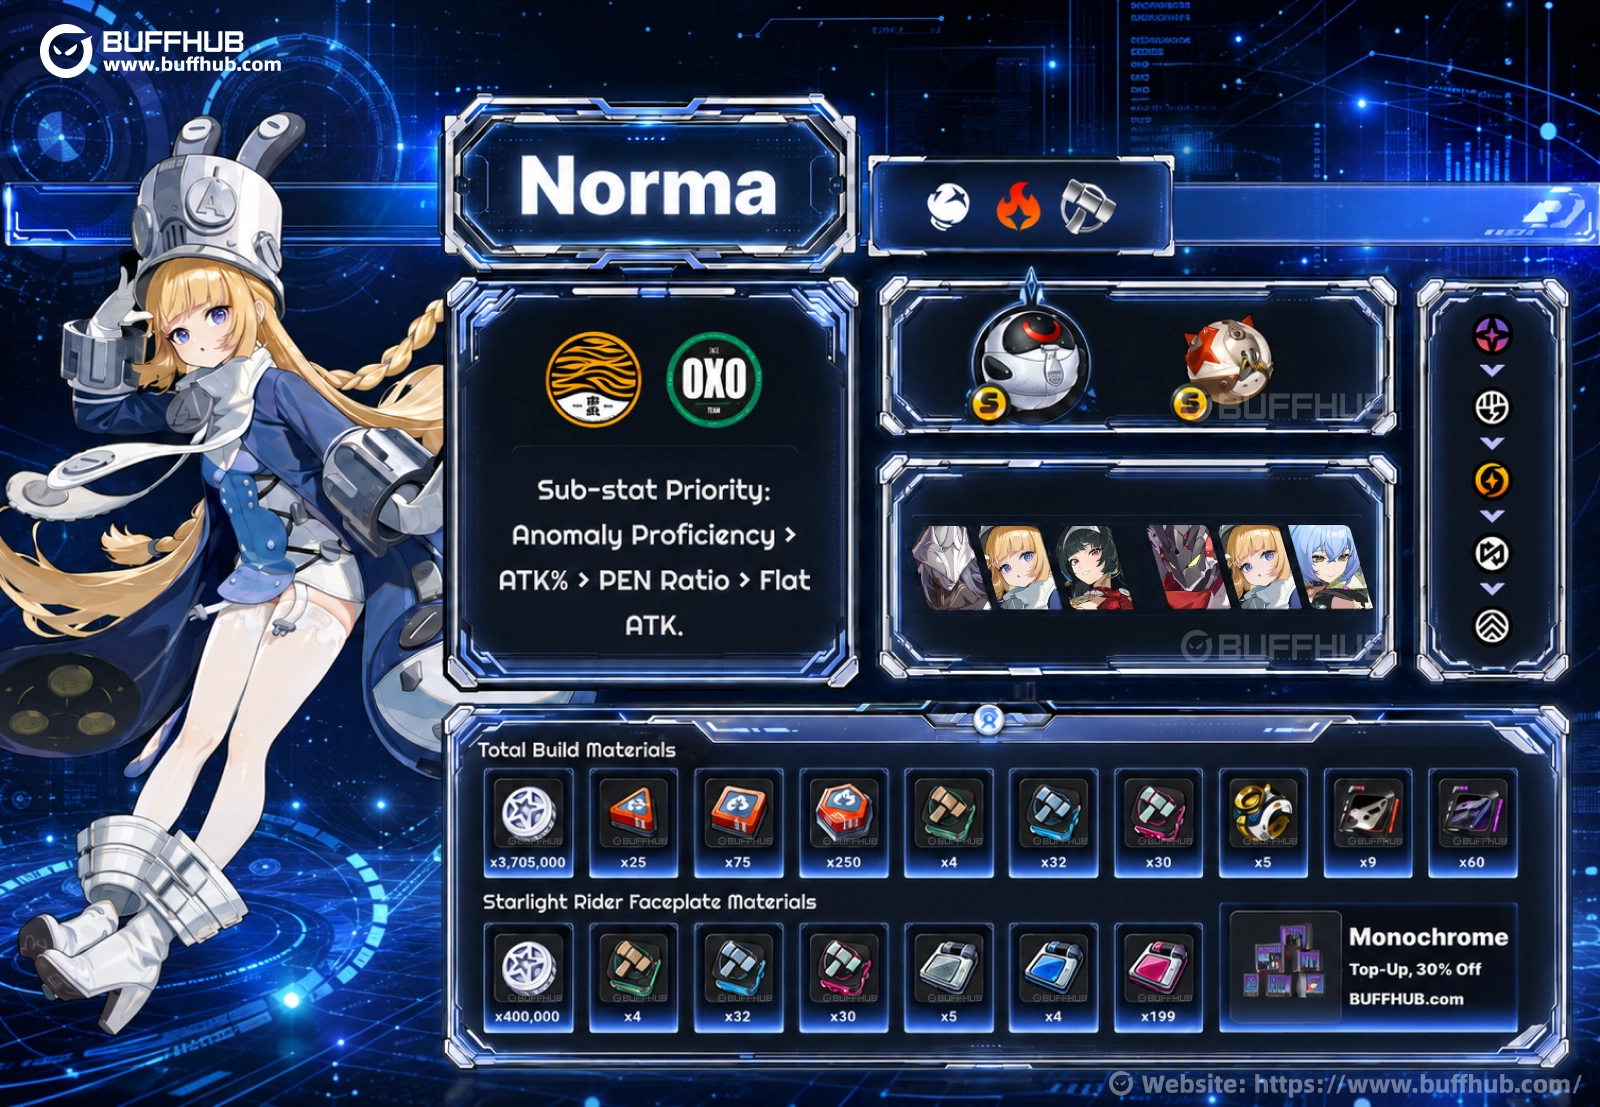

- Enjoy Up To 22% Off On Game Top-ups.
- 3-minute Delivery For Non-stop Gaming.
- Trusted 4.9/5 On Trustpilot, 10/10 Among Players.
- Official Partnership Route, Protect Your Game Wallet.
How Do Norma's Skills Work?
To master this Fire carry, you need to understand how she manages her resources and turrets. Her playstyle is all about fast setups and smart swapping. Here is a breakdown of her core mechanics:


- Personal Resources (PR): This is her fuel. She gains it automatically while off-field, when entering combat, or by using her ultimate.
- Basic Attack (Hat Trick): When wearing her hat, she can throw it to attack. The hat stays on the field, sucking up PR while you swap to another character. Once it fills up, it flies back to her, instantly refunding the energy.
- EX Special (Mmhm Barrage): This is her bread and butter. Piloting her turret, she enters the [Firepower Barrage] state for 40 seconds and drops two auto-attack turrets. These turrets are smart: they fire Armor-Piercing rounds (high Daze) at normal enemies, and High-Explosive rounds (high DMG) at stunned enemies.
- Core Passive (Precision Guidance): This is what makes her broken. For every 1% of CRIT Rate, she gains 0.9% CRIT DMG and 0.6% extra Daze on her heavy attacks.
- Additional Ability (Swarm Advantage): If you run her with an Attack or Rupture teammate, her attacks inflict [Weakened]. This debuff shreds enemy stun resistance, extends the stun duration by 3 seconds, and buffs your entire team's damage by 40%.
Best Combat Rotation
- Enter the field to instantly gain 50% PR.
- Hold Basic Attack to use Hat Trick, leaving the hat on the field to gather resources.
- Trigger a Quick Assist to safely swap to your main DPS.
- Once she has enough energy, swap her back in to cast EX Special: Mmhm Barrage and deploy your turrets.
- When PR is over 80%, use her Quick Assist to force an instant Chain Attack, dealing massive burst damage.
What is the Best Weapon for Norma?
Gearing up your stunner requires focusing on her unique stat needs. Because of her core passive, you want to stack as much CRIT Rate as humanly possible.
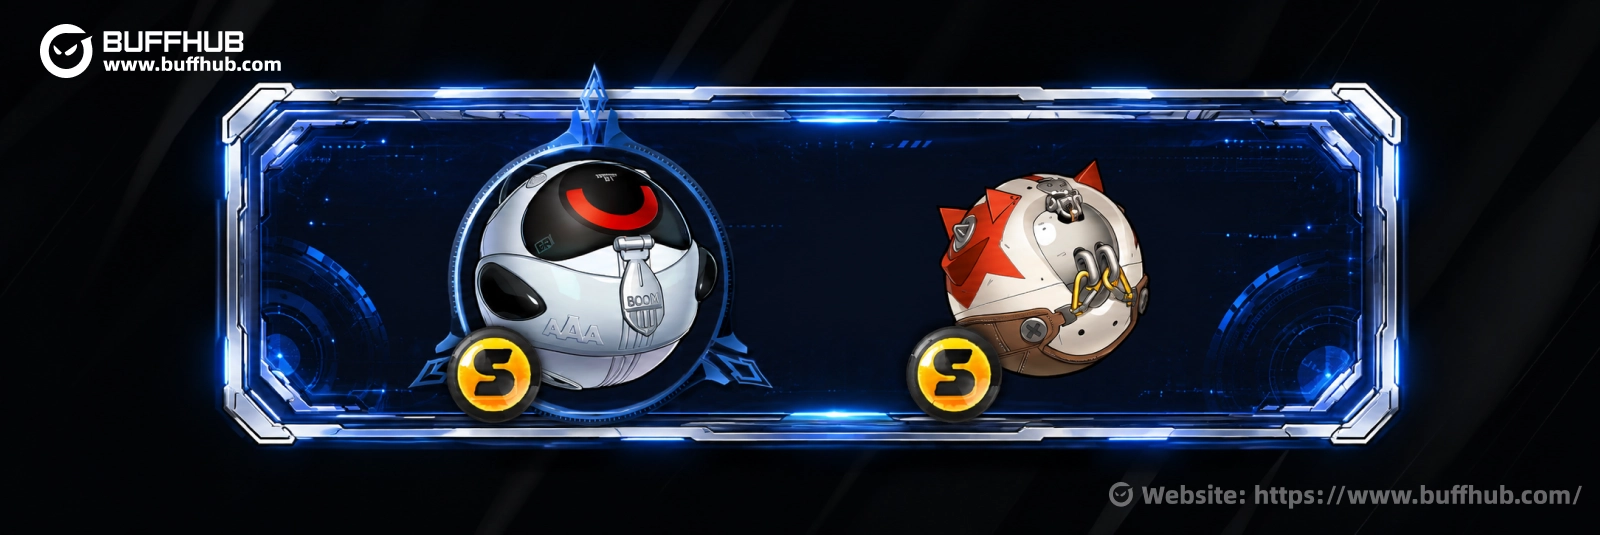
- Best-in-Slot (BiS): Head Lackey (S-Rank)
This signature W-Engine is tailor-made for her. At level 60, it provides a massive 713 Base ATK and a crucial 24% CRIT Rate secondary stat. That raw CRIT Rate directly feeds into her passive, instantly boosting her Daze application and CRIT DMG without relying entirely on perfect artifact rolls. - Best Alternative Option: Hellfire Gears (S-Rank)
If you do not have her signature W-Engine, Koleda's signature is an amazing lower-tier alternative. It grants 684 Base ATK and 18% Impact. The passive regenerates energy while she is off-field (which fits her rotation perfectly) and boosts her Impact by up to 20% after using an EX Special Attack, ensuring she still breaks shields incredibly fast.
Which Gear and Stats Maximize Norma's Damage?
To get the most out of this character, you need a mix of Daze application and critical hit consistency.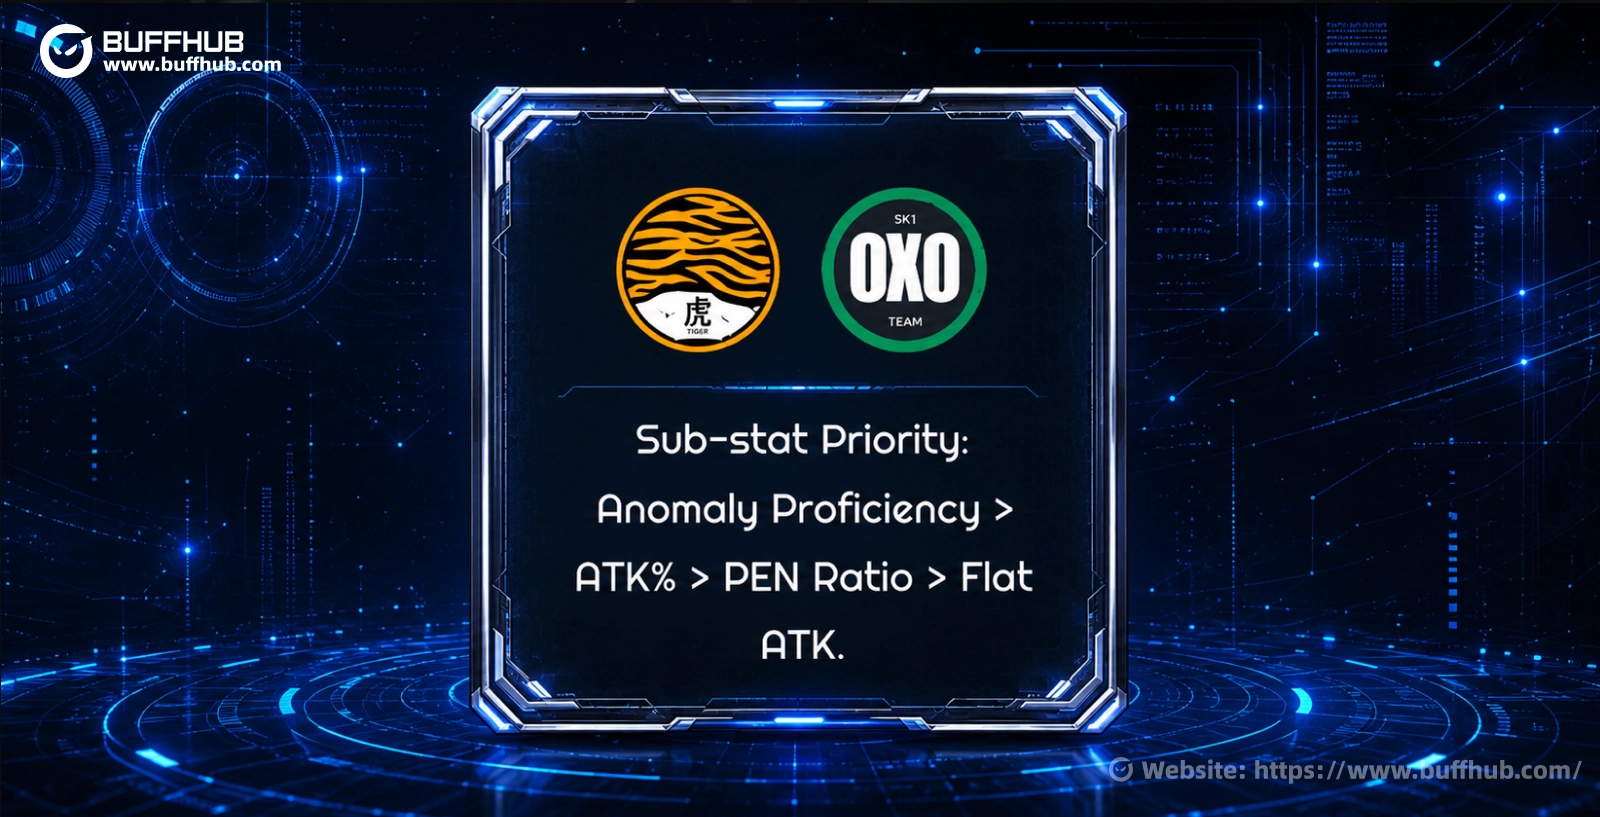
Recommended Artifact Sets:
- 4-Piece King of the Summit: This is non-negotiable. It increases her base Daze by 6%. More importantly, when she uses an EX Special or Chain Attack, it boosts the entire squad's CRIT DMG by 15%. If her personal CRIT Rate is 50% or higher, that team buff doubles to 30%.
- 2-Piece Woodpecker Electro: Grants a flat 8% CRIT Rate, pushing you closer to that golden 50% threshold for your 4-piece set bonus and core passive.
Main Stat & Sub-Stat Priority:
- Slot 4: CRIT Rate (Mandatory)
- Slot 5: Fire DMG% or Impact
- Slot 6: Energy Regen or ATK%
- Sub-stats: CRIT Rate > CRIT DMG > ATK% > PEN. Aim for a bare minimum of 50% CRIT Rate on her character sheet.
What Are the Best Team Comps for Norma?
She needs to be paired with Attack or Rupture agents to trigger her [Weakened] debuff passive.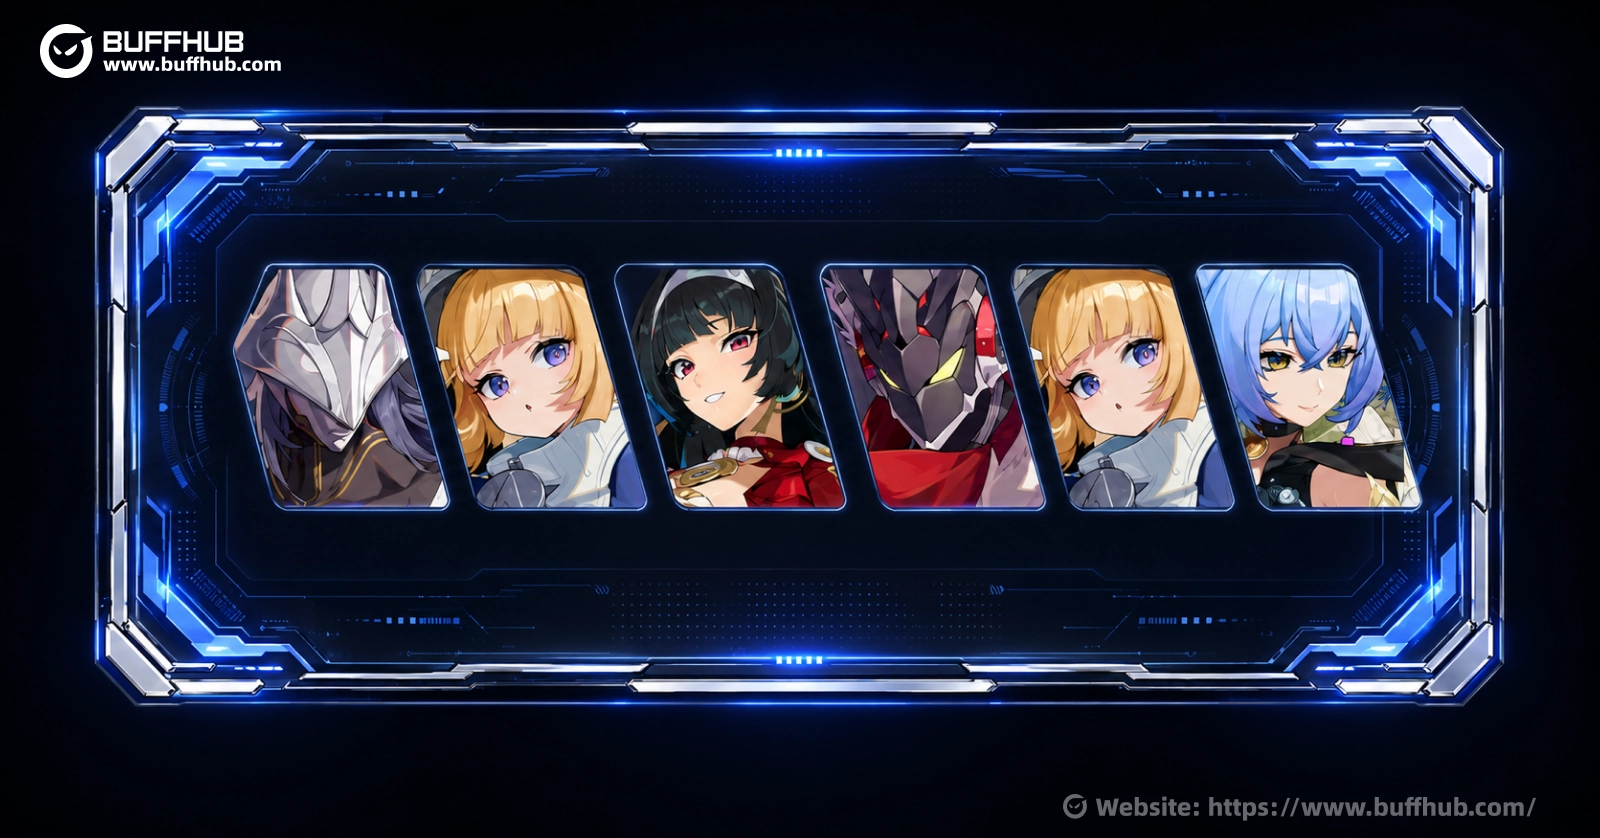
The Starlight Hyper-Carry Team:
- Main DPS: Starlight - Billy (Physical Rupture)
- Sub-DPS / Stunner: Norma (Fire Stun)
- Support: Lucia (Ether Support)
How it works: Billy is a hyper-carry who needs a Stun or Support teammate to activate his Blazing Starlight passive, which buffs his Ultimate and EX Special damage by up to 40%. Our Fire Stunner provides the stuns he desperately needs while shredding enemy resistance and providing a 40% team-wide damage buff during her turret phase. Meanwhile, Lucia hands out massive shields, healing, and Sheer Force buffs to keep Billy's HP management mechanics safe while further amplifying the squad's burst damage.
The Ether Burst Rotation Team:
- Main DPS: Pyrois (Ether Attack)
- Sub-DPS / Stunner: Norma (Fire Stun)
- Support: Astra Yao (Ether Support)
How it works: This team is built around absurd burst windows and nonstop Chain Attack loops. Pyrois gains massive value from running alongside a Stun unit thanks to his Additional Ability, which grants 35% extra CRIT DMG to his Enhanced Basic Attacks, EX Special, Chain Attacks, and Ultimates while also restoring 200 Decibels whenever a Chain Attack triggers. Norma fits this setup perfectly because her off-field turrets rapidly stack Daze, extend stun duration through [Weakened], and massively increase the squad's total damage during enemy vulnerability windows.
Astra Yao pushes the composition even further. While inside her Idyllic Cadenza state, she grants the entire squad 20% DMG and 25% CRIT DMG, while her Core Passive provides a massive ATK steroid whenever teammates rotate in through Quick Assists or Chain Attacks. Because both Norma and Pyrois naturally trigger constant assists and swaps, Astra can continuously fire follow-up Tremolos and Tone Clusters without stealing field time. The result is an extremely aggressive quick-swap team that floods bosses with Ether and Fire damage while keeping Pyrois permanently buffed during stun phases.
(Note: More team combinations are currently being tested in the community and will be updated soon).
What Materials Are Needed to Upgrade Norma?
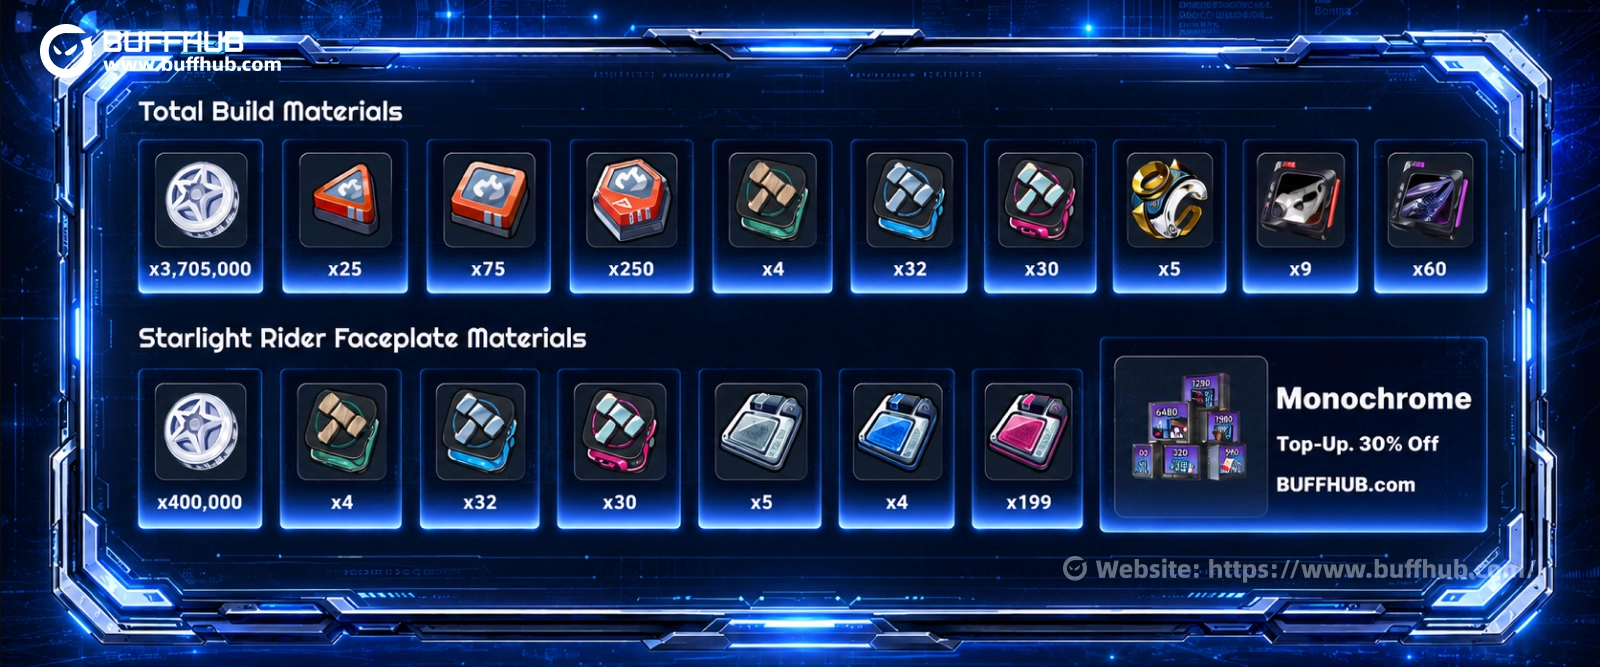
To max out this S-Rank agent to Level 60 and upgrade her skills, you will need to farm the following materials:
- Currency: 4,505,000 Denny
- Stun Seals: 4x Basic, 32x Advanced, 30x Buster Certification Seals
- Skill Chips: 25x Basic, 75x Advanced, 250x Specialized Burn Chips
- Boss Drops: 9x High-Tier Boss Material, 60x Low-Tier Boss Material (Currently unknown, to be updated)
- Rare Mats: 5x Hamster Cage Pass
Signature W-Engine Upgrade Materials (Lv.60):
- Denny: 400,000
- Stun Component: 4x Basic Stun Component
- Reinforced Stun Component: 32x
- Specialized Stun Component: 30x
- W-Engine Battery: 5x
- W-Engine Power Supply: 4x
- W-Engine Energy Module: 199x
Which Mindscape Cinema (Constellations/ Awakenings) Are Worth Getting?
| Level | Effect | Value / Verdict |
|---|---|---|
| C1 | Turret duration increases to 12s. EX Special rounds shred enemy All-Attribute RES by 15% for 15s. | High Value. The RES shred is a massive team-wide DPS increase. Great stopping point. |
| C2 | [Weakened] debuff increases Stun DMG by 6% per stack. Hat Trick recovers 25 Energy (20s cooldown). | Great Quality of Life. Solves any energy issues and makes her burst window hit much harder. |
| C3 | Skill Levels +2. | Average. Standard number bump. |
| C4 | Chain Attacks restore 50 extra Decibels for the team and herself. | Good Utility. Helps you loop Ultimates much faster in prolonged boss fights. |
| C5 | Skill Levels +2. | Average. Standard number bump. |
| C6 | Activating Ultimate summons a continuous missile barrage for 12s, dealing 280% ATK as Fire DMG every 0.75s. | Whale Territory. Turns her into an absolute off-field damage monster. |
Is Norma Worth Pulling?
Yes, absolutely.
She completely power-creeps traditional stunners. Instead of just hitting enemies until a bar fills up, she provides off-field damage, massive team-wide DMG buffs, resistance shredding, and insane CRIT scaling. If your account relies on burst-heavy hyper-carries (like Starlight - Billy or Pyrois), pulling this character will make your rotation infinitely smoother and drastically reduce your clear times.
Frequently Asked Questions (FAQ)
ZZZ Norma Build: Does this Fire Stunner suffer from energy regeneration issues in combat?
When figuring out how to build this Fire Stunner, energy management is a common concern. At base C0, you need to be smart about her field time. Because her EX Special costs 40 Energy and drains more if you hold it, you must rely on her Hat Trick basic attack to bank resources while she is strictly off-field. If you find your optimal rotation feeling clunky or slow, slotting an Energy Regen piece in Slot 6 will smooth out her EX Special uptime perfectly.
Norma Guide: What is the optimal CRIT Rate threshold for her best build?
To maximize her off-field Fire DMG and shield-breaking potential, you should aim for a hard minimum of 50% CRIT Rate on her stat sheet. Hitting this breakpoint ensures you trigger the maximum 30% team CRIT DMG buff from the King of the Summit 4-piece artifact set. More importantly, because her core passive directly converts CRIT Rate into a massive Daze multiplier, every single point of CRIT you farm makes her stun enemies noticeably faster.
How do the auto-attack turrets optimize your team's burst window?
Her turrets are exactly what make her a top-tier off-field sub-DPS. When she casts her EX Special Attack, she enters the [Firepower Barrage] state for 40 seconds and leaves two turrets behind. These gadgets adapt to the combat state: they fire Armor-Piercing rounds to rapidly build Daze on normal enemies, and seamlessly switch to High-Explosive rounds for pure Fire DMG once the boss is Stunned.
Who are the best teammates to trigger her squad damage buffs?
For the best team comps, you absolutely must run her with at least one Attack or Rupture character to activate her Swarm Advantage passive. This is arguably her strongest utility tool. It allows her off-field attacks to constantly stack a [Weakened] debuff on enemies. This crucial debuff increases the target's Stun DMG Multiplier, extends their vulnerability window by 3 full seconds, and provides a massive 40% DMG boost to your entire hyper-carry squad.


 Jul 31, 2026
 Zenless Zone Zero(zzz)