

The best Edgar build in Brawl Stars uses Let’s Fly as his Gadget, Hard Landing as his Star Power, and a combination of Shield Gear and Super Charge Gear. This setup improves his ability to reach vulnerable enemies, survive the first few seconds after landing, and regain access to the Super that controls most of his gameplay.


Edgar is an aggressive Assassin who fights at extremely short range. His basic attacks heal him when they connect, while his very fast reload speed allows him to throw several attacks in quick succession. He can overwhelm squishy Brawlers once he reaches them, but a badly timed jump can leave him surrounded with no safe way out.

The key to playing him well is not mechanical complexity. It is patience. You need to track enemy ammo, defensive Gadgets, knockbacks, stuns, and escape Supers before committing. A fully charged Super does not always mean you should jump immediately.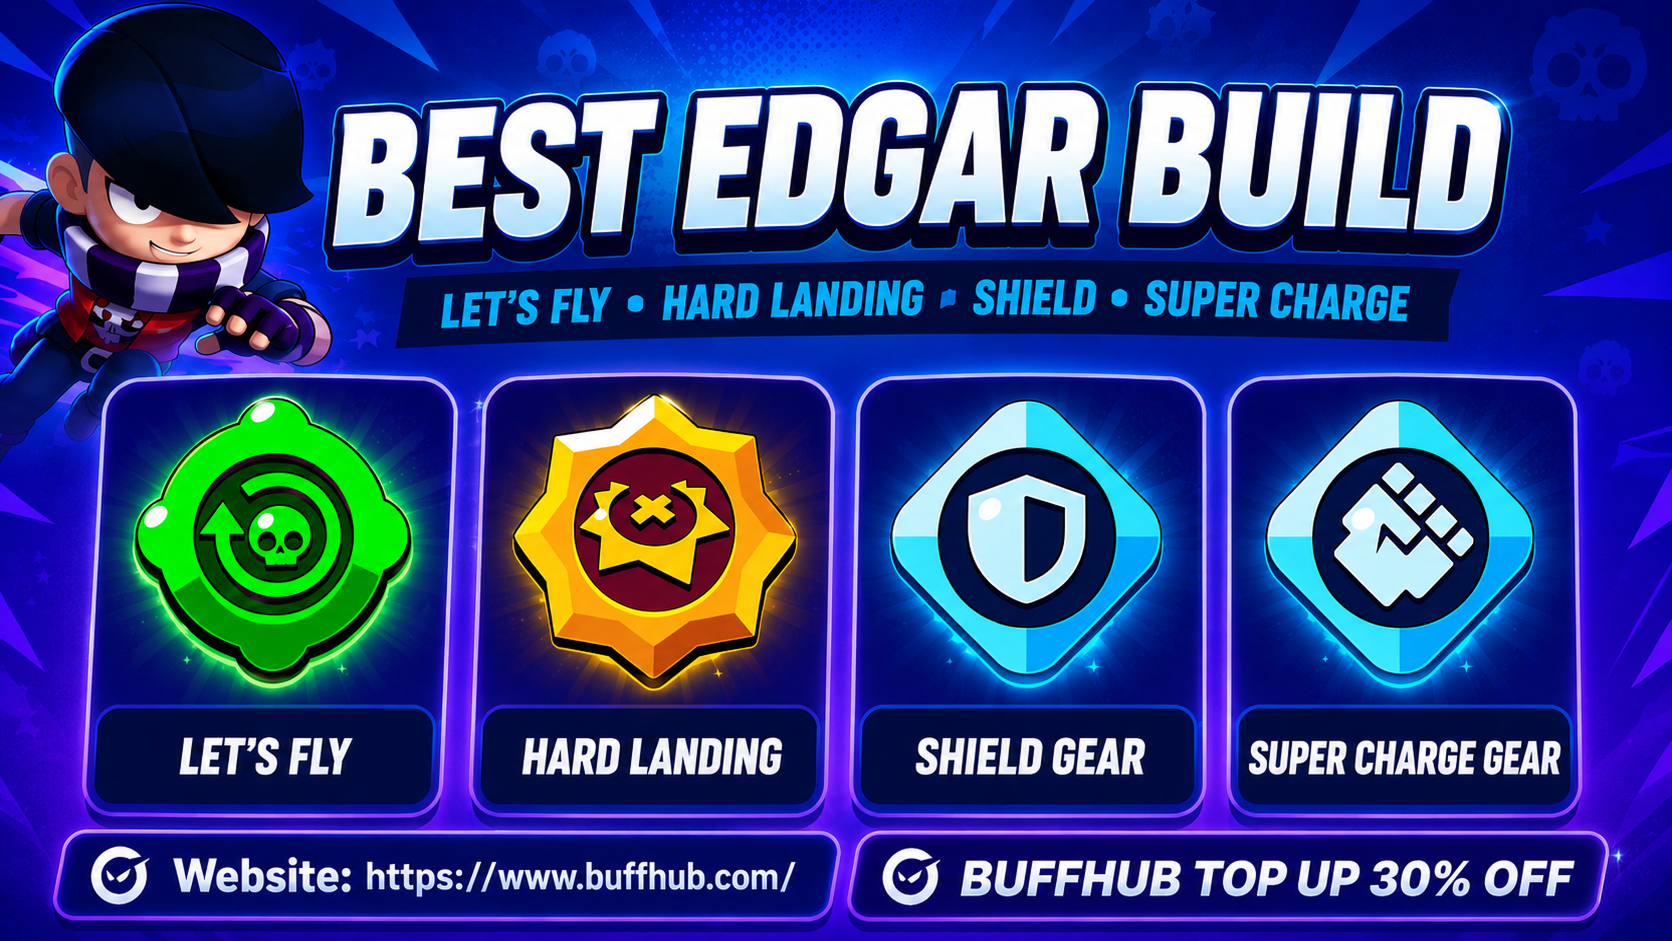
What Is the Best Edgar Build in Brawl Stars?
| Build Slot | Recommended Choice | Main Purpose |
|---|---|---|
| Gadget | Let’s Fly | Provides another engage, wall-crossing tool, chase option, or emergency escape. |
| Star Power | Hard Landing | Adds burst damage when landing with the Super or Let’s Fly. |
| Gear 1 | Shield | Provides 900 extra temporary health before Edgar enters close-range combat. |
| Gear 2 | Super Charge | Charges his Super 10% faster and reduces the time spent waiting behind cover. |
| Hypercharge | Outburst | Improves his engage, reload cycle, pressure, and ability to chain attacks. |
This is the safest general-purpose Edgar build for most maps and modes. Let’s Fly gives him more ways to enter or leave a fight, while Hard Landing improves the opening burst before the enemy can respond. Shield Gear covers some of his natural fragility, and Super Charge Gear helps him create more opportunities throughout the match.
The supplied community build data also supports this setup. Let’s Fly appears in around 60% of the collected builds, while Hard Landing has a pick rate of approximately 54%. Shield and Super Charge are the two most commonly selected Gears, at roughly 27% and 26%.
These percentages do not mean the alternative choices are weak. They show which options are more flexible across different maps and matchups. Edgar still benefits from switching his build when facing heavy burst damage, tanks, or highly defensive teams.
Who Is Edgar and What Is His Playstyle?
Edgar is an Assassin designed around sudden engagements, rapid attacks, and self-healing. He has one of the shortest attack ranges in the game, so he cannot pressure opponents by trading shots from a distance. Instead, he waits behind walls or inside bushes until he has a safe opportunity to close the gap.
His Super charges automatically over time. This trait allows him to remain in cover without completely losing access to his main ability. Once the jump is ready, he can cross walls and land next to a target before receiving a temporary movement speed boost.
The best targets are usually throwers, marksmen, weakened damage dealers, and other squishy Brawlers without reliable crowd control. He performs much worse against enemies who can knock him back, stun him, silence him, or survive long enough for their teammates to arrive.
A strong Edgar player creates pressure before even using the Super. An enemy thrower may leave an important position simply because they know he can jump over the wall. Holding the ability can therefore be more valuable than immediately spending it on a risky attack.
How Do Edgar’s Skills Work?
Main Attack
Edgar attacks with two very quick punches at close range. Each successful hit restores part of his health, allowing him to survive damage while continuing to attack. His reload speed is extremely fast, so he can unload several attacks in a short period if the enemy remains within range.
This healing makes him dangerous in a direct damage race, but it does not make him a true tank. He cannot heal when his attacks miss, and crowd-control effects can interrupt the entire exchange. If a target pushes him away before the first punches connect, he may lose the fight without recovering any health.
Positioning after the jump is therefore critical. Landing slightly ahead of the enemy’s escape direction often works better than landing behind them. The temporary movement boost helps Edgar stay close, but it cannot compensate for a poor landing against a fast target.
Super
Edgar’s Super allows him to jump over walls, obstacles, and other Brawlers. After landing, he receives a temporary speed boost that helps him chase the target or reposition around nearby cover.
The jump does not automatically guarantee a takedown. Before using it, check the enemy’s health, ammo, Super, Gadget, and nearby teammates. A low-health Brawler can still be dangerous when they have a knockback or defensive ability ready.
His Super also has defensive value. It can be used to leave a losing fight, cross a wall to escape pressure, or reposition toward teammates. Spending every jump as an engage makes the character much easier to punish.
Outburst Hypercharge
Outburst strengthens Edgar’s normal all-in playstyle. It improves his movement, damage, and protection while also making his post-Super attack cycle more dangerous. After jumping, he gains increased charging speed and reload speed for a short period.
The faster reload allows him to attack more often, which also means more opportunities to heal. When several vulnerable enemies are grouped together, a well-timed Hypercharge can let him move from one target to the next without losing momentum.
The strongest timing is shortly before using the Super. Activating Outburst too early wastes part of the duration while he is still waiting behind a wall. It should cover the landing, the first attack sequence, and any follow-up jump or chase.
What Is Edgar’s Best Combat Rotation?
Edgar does not have a complicated fixed rotation. His usual sequence begins by charging the Super safely behind cover and watching the enemy team for a mistake. Once a suitable target has spent most of their ammo or used a defensive ability, he can activate Hypercharge when available and jump toward their escape path.
Hard Landing deals damage immediately when he lands, after which he should begin attacking without delay. The healing from his punches is a major part of his survival, so every moment spent moving without attacking gives the opponent more time to recover.
Let’s Fly can then be saved for the next target, used to cross a nearby wall, or kept as an escape. Jumping into all three opponents at once is rarely a good decision unless they are already weakened or Outburst gives Edgar enough pressure to continue chaining attacks.
Why Is Let’s Fly the Best Gadget for Edgar?
Let’s Fly sends Edgar’s scarf toward the closest Brawler or wall in the aimed direction. When it connects with an enemy, he jumps behind that target. When it connects with terrain, the scarf can pull him toward the wall and help him cross it.
This Gadget solves the biggest weakness in his kit: reaching enemies. He normally depends heavily on the Super to start a fight, but Let’s Fly gives him another movement option. It can be used to chase an escaping Brawler, surprise someone behind cover, reach a gem carrier, or save his normal Super for the retreat.
The Gadget has an 18-second cooldown, so it should not be wasted on small repositioning. Every activation should either create a clear attack opportunity, prevent an enemy from escaping, or protect Edgar from being trapped.
Let’s Fly also has strong synergy with Hard Landing. Because the Star Power activates when he lands through either movement ability, the Gadget becomes more than simple mobility. It adds another source of immediate burst damage.
When Should You Use Hardcore?
Hardcore gives Edgar a temporary shield that protects him from incoming damage. The shield becomes weaker over time, which means it must be activated shortly before the enemy begins attacking.
This option is useful when reaching the opponent is not difficult but surviving the initial burst is. It performs well in close areas where enemies cannot easily escape, or against teams that deal predictable damage without strong displacement effects.
Hardcore does not fix poor positioning. If Edgar cannot reach the target, the shield simply expires without creating value. For that reason, Let’s Fly remains the better all-round Gadget on most maps.
Is Hard Landing or Fisticuffs Better for Edgar?
Hard Landing is the recommended Star Power for the standard Edgar build. It causes his Super and Let’s Fly Gadget to deal damage when he lands. Based on the supplied build data, the effect deals approximately 1,486 damage to nearby enemies and can reach around 2,980 damage on a direct hit.
This extra damage improves his opening burst and reduces the number of attacks needed to finish a squishy target. It is particularly useful against Brawlers who may escape or activate a defensive ability after the first second of combat.
Hard Landing also fits the aggressive purpose of Let’s Fly. Since both movement tools can trigger the effect, the Star Power influences more engagements and gives Edgar a better chance to secure quick eliminations.
Fisticuffs increases the healing he receives from the damage dealt by his attacks. It is better during longer fights where he can remain close to the target and continue punching without interruption.
The healing option can perform well against high-health enemies with limited crowd control. However, it offers little value if Edgar is knocked back, stunned, silenced, or defeated before landing multiple attacks. It improves a favorable close-range fight but does not solve his most difficult counters.
| Star Power | Best Situation | Verdict |
|---|---|---|
| Hard Landing | Quick eliminations, squishy targets, Let’s Fly combos, and burst-focused builds. | Best overall choice |
| Fisticuffs | Longer fights against enemies with high health and limited crowd control. | Strong situational alternative |
What Are the Best Gears for Edgar?
Shield Gear
Shield Gear grants 900 additional health as a consumable shield. It begins regenerating after Edgar reaches full health and remains safe long enough for the recovery process to complete.
The extra protection is valuable because he often takes heavy damage immediately after landing. Those additional health points can give him enough time to connect the first attack, begin healing, and turn a close damage race in his favor.
Shield performs best in modes where there are natural breaks between engagements. If Edgar can retreat, return to full health, and rebuild the shield, he gains value from it several times during one match.
Super Charge Gear
Super Charge Gear makes his Super charge 10% faster. Since the jump controls most of Edgar’s pressure, reducing the passive wait time gives him more opportunities to threaten the enemy team.
This Gear is especially helpful on maps where opponents refuse to approach short-range areas. Edgar can stay protected behind a wall and still reach his next engage earlier.
The combination of Shield and Super Charge is reliable because it improves both sides of his gameplay. One Gear helps him reach the fight sooner, while the other makes the fight less dangerous once it begins.
Damage Gear
Damage Gear increases Edgar’s damage by 15% while he is below half health. It works well with his kit because he frequently fights at low health, and the additional damage can also increase the value of his attack-based healing.
This is usually the best alternative for Heist or highly aggressive maps. When attacking the Safe, direct damage matters more than preserving a regenerating shield. It can also help him finish enemies before they activate a defensive ability.
Gadget Cooldown Gear
Gadget Cooldown Gear is useful when Let’s Fly is central to the match. Reducing the wait between scarf jumps gives Edgar more chances to cross important walls or chase vulnerable targets.
It is more map-dependent than Shield or Super Charge. On a map with limited wall interaction, the extra Gadget availability may not create enough value. On a closed map with several useful jump angles, it can become one of his strongest choices.
What Are Edgar’s Best Alternative Builds?
| Build Type | Gadget | Star Power | Gears |
|---|---|---|---|
| General Build | Let’s Fly | Hard Landing | Shield and Super Charge |
| Survival Build | Hardcore | Fisticuffs | Shield and Super Charge |
| Heist Build | Let’s Fly | Hard Landing | Damage and Super Charge |
| Mobility Build | Let’s Fly | Hard Landing | Gadget Cooldown and Super Charge |
The general build is the best place to start because it covers the most common situations. The survival setup works against teams that cannot easily interrupt Edgar once he starts attacking, while the Heist configuration sacrifices protection for higher damage.
The mobility build is designed for maps where walls create repeated Let’s Fly opportunities. It is less forgiving than the standard setup, but an experienced player can use the extra movement to control several lanes and pressure targets who normally feel safe behind terrain.
Which Game Modes Are Best for Edgar?
| Game Mode | Rating | General Performance |
|---|---|---|
| Brawl Ball | 5/5 | Excellent mobility, strong scoring tricks, and reliable pressure around walls. |
| Gem Grab | 4/5 | Strong at punishing isolated gem carriers and cleaning up weakened teams. |
| Knockout | 4/5 | Effective as a late draft pick against throwers and marksmen without crowd control. |
| Solo Showdown | 4/5 | Can wait safely for the Super and punish isolated enemies, but matchups matter heavily. |
| Heist | 4/5 | Fast reload and Damage Gear can create strong Safe damage on suitable maps. |
| Hot Zone | 3/5 | Can remove one defender quickly but struggles to hold open zones under constant fire. |
| Wipeout | 3/5 | Useful against the right composition but risky when eliminations decide the entire match. |
| Bounty | 3/5 | Can reach high-value targets but may give away too many stars after a poor jump. |
How Should Edgar Play in Brawl Ball?
Brawl Ball is one of Edgar’s strongest modes because the Super can be used for both combat and scoring. When the goal is lightly defended, he can throw the ball toward open space and jump onto it before shooting. This makes it difficult for opponents to predict the exact scoring angle.
Let’s Fly creates another layer of pressure. It can help him cross a wall without spending the normal Super, leaving the jump available for a final approach or escape. The Gadget can also catch defenders who hide behind common pieces of cover near the goal.
He should not always carry the ball. Sometimes the better play is to remove the enemy defender while a teammate advances. His presence forces opponents to save ammo and defensive abilities, which can create space even when he does not secure the elimination.
How Should Edgar Play in Gem Grab?
In Gem Grab, Edgar should avoid jumping onto the first enemy he sees. It is usually better to wait until the opposing team spends ammo while fighting his teammates. Once their damage is temporarily unavailable, he can enter the fight and clean up weakened targets.
The enemy gem carrier is the highest-value target, but not always the safest one. If the carrier has strong protection, Edgar can first eliminate a nearby support or damage dealer and then use the next movement ability to continue the chase.
His Super should sometimes be saved for the retreat. After collecting several dropped gems, jumping back over a wall is often more valuable than trying to secure one additional takedown.
Is Edgar Good in Heist?
Edgar can deal heavy damage to the Safe because of his fast reload speed. He performs best on maps where walls or bushes give him a protected route into the enemy base.
Damage Gear is usually better than Shield in this mode. Once he reaches the objective, the goal is to deal as much damage as possible before defenders force him away. Super Charge remains valuable because it helps him regain access to the map-crossing jump.
He is much weaker on open Heist maps. Long-range defenders can damage him before he reaches the Safe, and waiting for the passive Super may allow the enemy team to build a large lead.
Which Brawlers Counter Edgar?
Edgar struggles most against Brawlers who can stop his attack cycle. His healing only works when the punches connect, so knockbacks, stuns, silence effects, and forced movement can completely remove his main defensive mechanic.
Point-blank damage dealers such as Shelly, Bull, Darryl, El Primo, Jacky, and Chester are dangerous because they are comfortable fighting at the same range. Jumping directly onto them while they have full ammo is usually a losing play.
Control-focused Brawlers such as Gale, Otis, Buzz, Sandy, Surge, Cordelius, and Fang can interrupt his engage or prevent him from attacking. These matchups become more manageable after the enemy spends the relevant Super or Gadget, but they should never be approached without checking those resources.
Other Brawlers rely on specific defensive tools. Rico can punish close-range aggression with his Gadget, Penny can use her barrel to block and damage him, while Spike, Pearl, R-T, Doug, and Clancy may survive or reverse the fight through their own abilities.
Many of these counters are not impossible to defeat. Edgar can sometimes jump in, force the defensive ability, and escape before returning for a second attack. The important point is that he should not fully commit while the counter still has every resource available.
Which Brawlers Work Well with Edgar?
Edgar works best with teammates who can limit enemy movement or pressure opponents from long range. He needs someone else to force ammo, control open lanes, and prevent the entire enemy team from focusing on his approach.
The supplied community guide highlights Damian as a useful partner. When Damian restricts enemy movement or traps several opponents in one area, Edgar can use Hard Landing and Outburst to attack the grouped targets. The combination makes it harder for enemies to spread out and avoid his short-range damage.
Long-range damage dealers are also valuable teammates. They can pressure tanks and anti-assassins that Edgar does not want to fight directly. Once those counters lose health or retreat, he gains more freedom to attack the remaining backline.
Teams made entirely of short-range Brawlers are less reliable. Without ranged pressure, opponents can hold open ground and force Edgar to wait for every engagement. A balanced composition gives him more chances to find isolated or distracted targets.
What Should You Upgrade First for Edgar?
Let’s Fly should usually be the first major build upgrade because it changes how Edgar moves around the map. It provides an additional way to cross walls, reach enemies, or escape without depending entirely on his normal Super.
Hard Landing is the next important purchase for the recommended build. The extra landing damage gives him a much stronger opening and works with both his Super and Gadget.
Shield and Super Charge Gears should follow. Together, they improve his ability to create engagements and survive after committing. Damage Gear can be added later for Heist and aggressive matchups.
Outburst is his largest late-game power spike. The Hypercharge improves the part of his kit that already makes him dangerous and gives him much more team-wipe potential. Hardcore, Fisticuffs, and the remaining Gears can be unlocked afterward for matchup-specific setups.
Is Edgar Worth Upgrading in 2026?
Yes, Edgar is worth upgrading if you enjoy aggressive Assassins and understand matchup-based drafting. He has strong mobility, rapid attacks, built-in healing, and the ability to punish squishy Brawlers who cannot defend themselves at close range.
Let’s Fly gives him more active control over engagements, while Hard Landing improves his ability to secure quick eliminations. Outburst also gives him one of the most dangerous short team-fight windows when the enemy composition lacks reliable control.
However, he is not a universal pick. Heavy crowd control, point-blank tanks, and defensive Gadgets can shut him down. He also offers very little ranged pressure while waiting for the Super to charge.
Players who need a strong last-pick Assassin for Brawl Ball, Gem Grab, Knockout, Showdown, or selected Heist maps will get good value from upgrading him. Players looking for a safe first pick that works against every team composition should invest in a more flexible Brawler first.
Frequently Asked Questions
What is the best Edgar build in Brawl Stars in 2026?
The best general Edgar build uses Let’s Fly, Hard Landing, Shield Gear, and Super Charge Gear. This setup gives him mobility, landing damage, extra protection, and faster access to his Super.
Is Hard Landing or Fisticuffs better for Edgar?
Hard Landing is better for most matches because it adds immediate burst damage to both Edgar’s Super and Let’s Fly Gadget. Fisticuffs is a strong alternative when fighting high-health enemies who cannot interrupt his attacks.
Should Edgar use Let’s Fly or Hardcore?
Let’s Fly is the better all-round Gadget because it helps Edgar reach enemies, cross walls, chase targets, and save his normal Super. Hardcore is more useful when reaching the enemy is easy but surviving their opening damage is difficult.
Why does Edgar die immediately after using his Super?
Edgar usually dies after jumping because the target still has full ammo, a knockback, a stun, or nearby teammates. Wait until the enemy uses those resources and avoid landing in the center of the entire opposing team.
What is Edgar’s best game mode?
Brawl Ball is generally his strongest mode. His Super can cross walls, create scoring plays, pressure defenders, and help him reposition around the ball. He is also effective in Gem Grab, Knockout, Solo Showdown, and selected Heist maps.
Is Edgar easy to play?
His basic controls are easy to understand, but using him consistently requires good matchup knowledge. The difficult part is knowing when to jump, which target to choose, and which defensive abilities must be baited before committing.