


Sandrone, the Seventh Fatui Harbinger known as "Marionette," is a five-star Cryo Claymore character in Genshin Impact. She deals much of her damage through Fagio's Charged Attack beams and the Stellar-Conduct reaction rather than through ordinary Claymore strikes. The key to building her is keeping Fagio in Decoding mode while maintaining Cryo and Electro application.



Sandrone is primarily an on-field damage dealer, although her Burst can also fit shorter field-time teams. The distinction matters when choosing Artifacts: direct Stellar-Conduct damage scales with her ATK, Elemental Mastery, CRIT and reaction-specific bonuses, but does not benefit from a normal Cryo DMG Bonus goblet. An ATK% goblet is therefore the more useful starting point. Her teams need reliable off-field application and enough protection to keep Fagio's beam firing without interruption.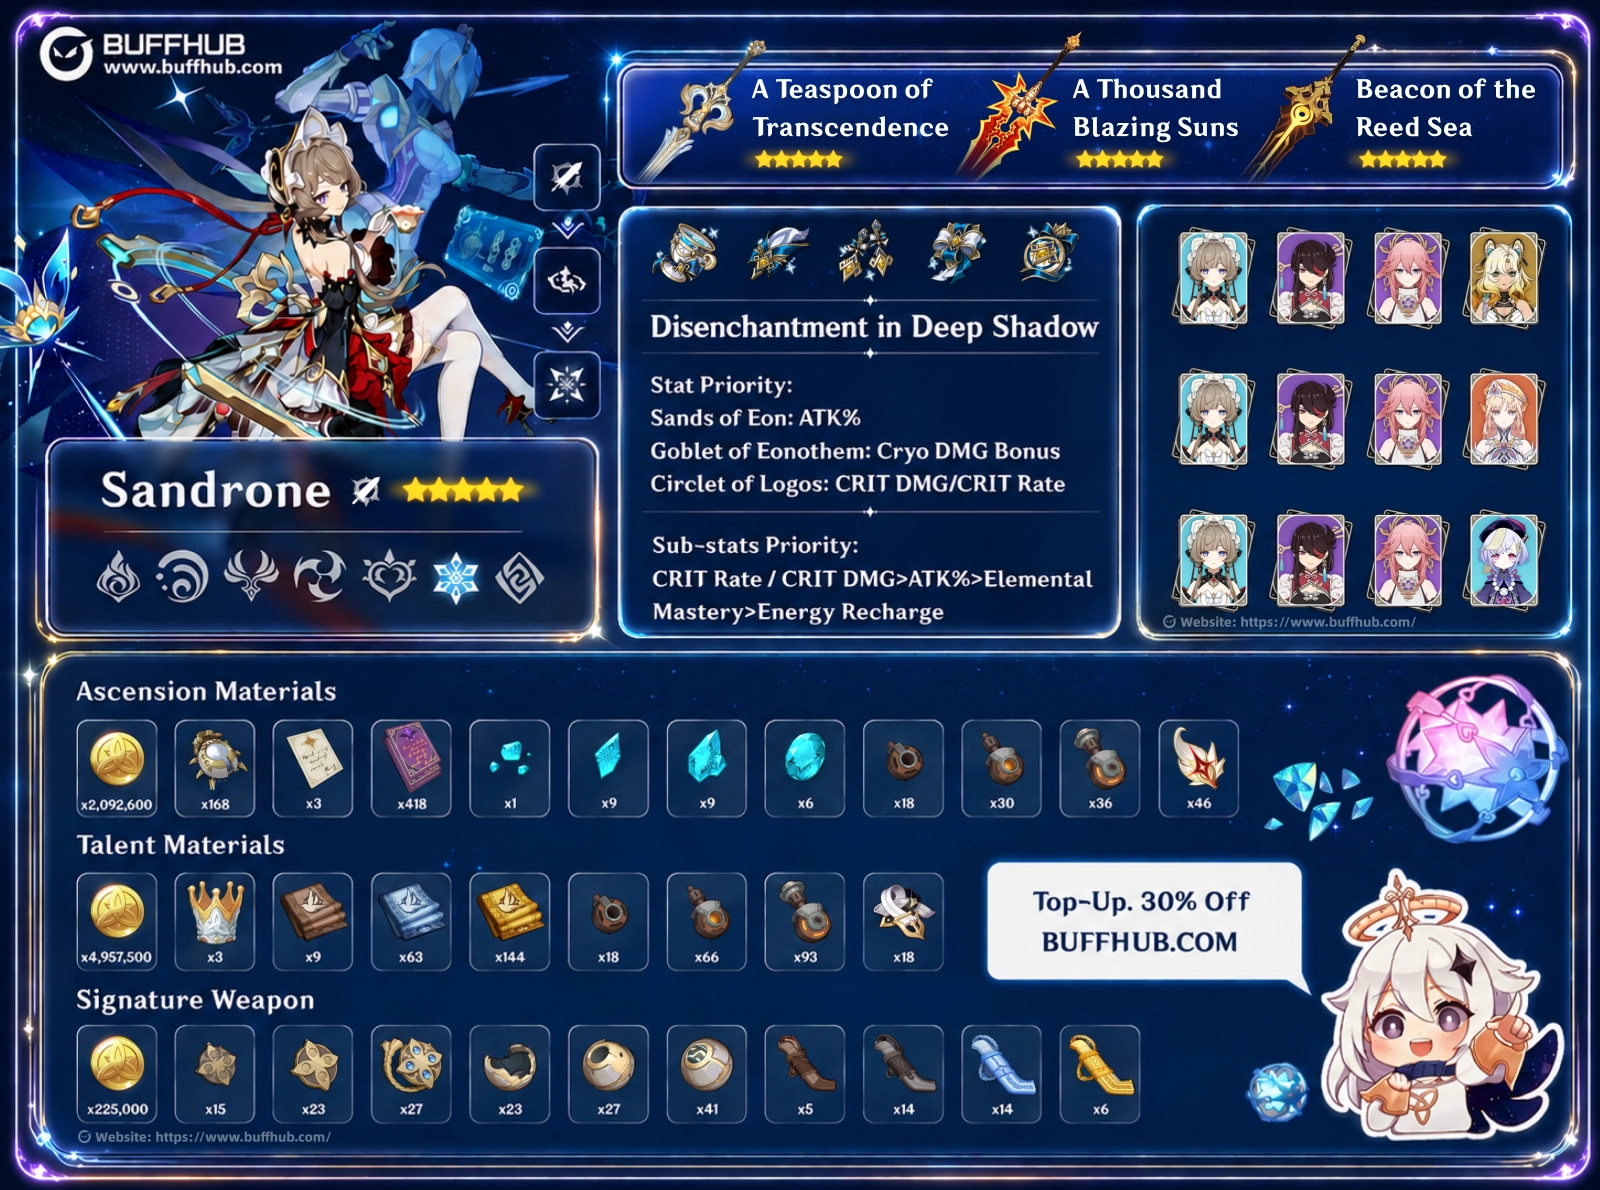













How Do Sandrone's Skills Work?
Fagio, Sandrone's mechanical companion, is responsible for much of her damage. Her Charged Attack summons Fagio in Decoding mode. As it fires, Decoding Power rises until the machine enters Power Overdrive and its attacks slow down. Sandrone's Elemental Skill rapidly reduces that meter, letting her return to the stronger beam sequence. The important distinction is that she needs a reaction setup to turn those condensed beams into Stellar-Conduct damage.
- Normal Attack and Charged Attack — Formule Phenomenale: Self-Evident Proposition: Sandrone's normal combo has three strikes, but her Charged Attack is the centerpiece. It deploys Fagio to fire AoE Cryo hits and condensed beams. During Radiance: Stellar-Conduct, the condensed beams count as direct Stellar-Conduct reaction damage. At Talent Lv.10, the listed condensed-beam multiplier is 161.5% in this state, compared with 242.3% for the regular Cryo version; these are different damage categories and should not be compared as if they used identical multipliers.
- Decoding Power: The meter reaches a maximum of 100. Once Fagio enters Power Overdrive, its attacks become less frequent and it cannot immediately return to Decoding mode. The meter falls when Fagio is no longer in Decoding mode, and it falls much faster when Sandrone is off-field. Using her Skill is the usual way to reset the cycle during combat.
- Elemental Skill — Formule Phenomenale: Differential Analysis: Sandrone boards the Tea Party Tactical Assault Hovermech for up to six seconds, fires two nearby Prism Shots and rapidly reduces Fagio's Decoding Power. Its cooldown is four seconds. The second Prism Shot becomes direct Stellar Glimmer reaction damage in the appropriate Radiance state. Use the Skill to refresh the beam, not simply because it deals a large standalone hit.
- Elemental Burst — Formule Phenomenale: Q.E.D.: Sandrone launches a bombardment followed by a Convective Inhibition Ray. At Talent Lv.10, its bombardment hits have 158.8% multipliers each; the final ray uses a 397% multiplier when treated as Stellar-Conduct reaction damage. The Burst costs 60 Energy and has a 15-second cooldown. Her first Ascension passive improves the ray further when Decoding Power has been reduced and Refined Tactics stacks have been collected.
- Stellar-Conduct and Polestar Field: With Sandrone in the party, Superconduct can become Stellar-Conduct, generating a Polestar Field that enables Radiance: Stellar-Conduct. A Cryo Swirl can instead become Stellar Swirl. Stellar-Conduct takes priority when both Radiance conditions apply. Her passive also increases the reactions' base damage by 0.7% per 100 ATK, up to 14% at 2,000 ATK.
Two passive talents explain her stat choices. A Lady's Code of Conduct grants 8 Elemental Mastery for every 100 ATK, capped at 160 EM, while Stellar Jubilee increases the base damage of the converted reactions according to her ATK. This is why reaching roughly 2,000 ATK is a useful early target, not proof that any particular artifact roll is mandatory. During Stellar-Conduct, much of her beam damage also benefits from EM and CRIT. Ordinary Cryo DMG Bonus helps her conventional Cryo hits, but it does not increase direct Stellar-Conduct damage.
Skill Upgrade Priority
Normal Attack > Elemental Burst > Elemental Skill is the practical order for an on-field Sandrone. Despite the talent's name, investing in Normal Attack mainly improves Fagio's Charged Attack, her most repeated damage source. The Burst comes next because its final ray deals substantial direct reaction damage, especially after Refined Tactics has built up. The Skill is essential to her rotation, but leveling it does not change its basic role of rapidly reducing Decoding Power.
If resources are limited, upgrading the Normal Attack before pushing every talent to Lv.10 gets more value from the time Sandrone spends on the field. Players using her chiefly for a shorter Charged Attack and Burst sequence can invest in the Burst earlier. These priorities concern talent levels, not whether the Skill should be used in combat: she still needs to cast it repeatedly to keep Fagio functioning.
Recommended Combat Rotation
For her usual C0 on-field setup, prepare off-field Electro and Cryo support first, then use Charged Attack → Skill → Charged Attack → Skill → Charged Attack → Skill, adding Burst when its Energy is ready and the appropriate buffs are active. A complete Charged Attack sequence lasts roughly four seconds, matching the Skill's four-second cooldown. At C1 or higher, Fagio accumulates Decoding Power more slowly, so two longer Charged Attack sequences usually fit better than three shorter ones.
- Set up the field: Apply off-field Electro and the team's defensive or buffing abilities. Trigger Stellar-Conduct to create a Polestar Field, then bring Sandrone on-field while the relevant effects remain active.
- First Charged Attack: Hold Charged Attack and allow Fagio to fire its condensed beams in Decoding mode. Stay in the Polestar Field when possible so the hits receive their Stellar-Conduct effects.
- Reset with Skill: Near the end of the charged beam sequence, cast Elemental Skill to reduce Decoding Power and reposition. Avoid canceling the Skill before enough time has passed to clear the meter.
- Repeat the beam sequence: At C0, use a second Charged Attack and Skill, followed by a third Charged Attack and Skill if the enemy and support durations allow. At C1+, favor two longer beam sequences because the overheat meter rises more slowly.
- Use Burst during the buff window: After reducing Decoding Power, cast Burst while Radiance and relevant support buffs are still active so the final ray benefits from Refined Tactics. Burst can also be placed between Charged Attacks. If Energy is insufficient, prioritize completing the beam sequence instead of delaying the entire rotation indefinitely.
Do not treat the Polestar Field as permanent. Continued Cryo and Electro application is needed to keep the reaction setup working, and interruptions can shorten the number of beam hits. If a team's buffs expire before a third Charged Attack, shorten the field time and refresh supports on the next cycle rather than forcing an extra beam under weaker conditions.
What is the Best Weapon for Sandrone?

Best-in-Slot: A Teaspoon of Transcendence
At Lv.90, Sandrone's signature five-star Claymore has 674 Base ATK and 44.1% CRIT DMG. Its R1 passive, White Fairy's Queening, grants 28% ATK. Charged Attack hits also grant a five-second reaction-damage bonus of 16% per stack for Stellar-Conduct and Stellar Swirl, up to three stacks, with a 0.2-second interval between stack gains. That is up to 48% from the three stacks at R1, not 20% per stack as stated in the older article.
The weapon matches Fagio's repeated Charged Attack hits and Sandrone's ATK-based passive conversion. It is a strong upgrade when you want to invest further in her, but it is not required to run the character. If you already have a well-leveled five-star Claymore or a suitable refined four-star option, compare the expected gain against the cost of obtaining another limited weapon before pulling.
Alternative 5-Star Claymores
A Thousand Blazing Suns provides 741 Base ATK and 11% CRIT Rate at Lv.90. Its R1 passive grants 20% CRIT DMG and 28% ATK after using a Skill or Burst, with its duration extended by Elemental damage from Normal or Charged Attacks. Sandrone can make use of that passive, although she does not receive the weapon's separate Nightsoul's Blessing enhancement. It is a useful option if already owned rather than a necessary second weapon to chase.
Beacon of the Reed Sea offers 608 Base ATK and 33.1% CRIT Rate. At R1, its ATK bonuses depend on the Elemental Skill hitting an opponent and on the wielder taking damage; neither should be treated as constantly active without checking the fight. The CRIT Rate makes it easier to build Sandrone's artifacts, but remember that Disenchantment in Deep Shadow can provide another conditional 16% CRIT Rate.
If you lack a five-star choice, Forged by the Golden Melody, Blade of Atonement and Tidal Shadow can serve different budgets. Blade of Atonement benefits from Sandrone triggering reactions reliably, which is easier with strong off-field Electro application. Tidal Shadow requires consistent healing for its passive. An upgraded alternative may be enough for a team that still needs better supports or artifacts.
Which Gear and Stats Maximize Sandrone's Damage?
Best Artifact Set: Disenchantment in Deep Shadow
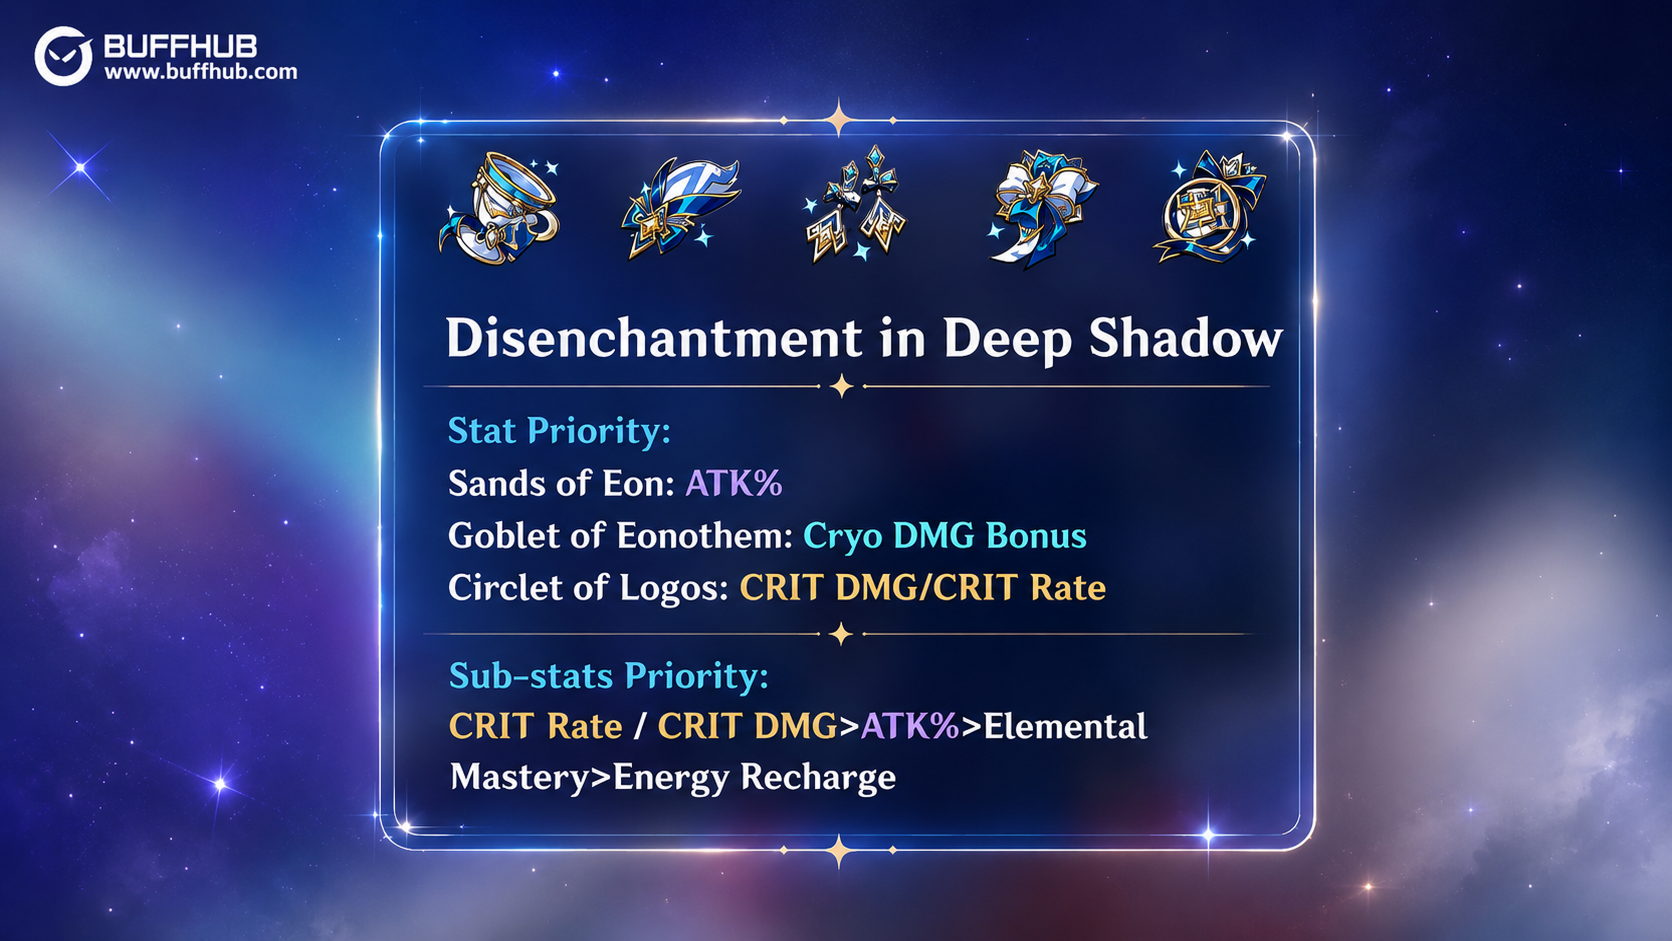
Four-piece Disenchantment in Deep Shadow is a strong fit for Sandrone's Stellar-Conduct kit. Its effects can be checked separately:
- Two-piece: ATK +18%.
- Four-piece: Superconduct Reaction DMG +80% and Stellar-Conduct Reaction DMG +40%. When the wearer attacks an opponent affected by either reaction, that attack receives 16% increased CRIT Rate.
The CRIT bonus is conditional on the affected target; it should not be added to Sandrone's character-sheet CRIT Rate as an always-active stat.
Much of her damage comes from direct Stellar-Conduct hits, so this set is more relevant than conventional Normal Attack or Cryo damage sets. If you have not farmed it yet, existing Gilded Dreams pieces or mixed ATK% and Elemental Mastery two-piece sets can fill the gap. There is no reason to discard good temporary artifacts before you can equip a functional four-piece set.
Artifact Stat Priority
Sandrone has two ATK-related passive thresholds: 2,000 ATK reaches the maximum 14% base-reaction increase, and the same total grants the full 160 Elemental Mastery from A Lady's Code of Conduct. Since direct Stellar-Conduct damage uses ATK, EM and CRIT rather than a normal Cryo DMG Bonus, the standard main-stat plan is different from a conventional Cryo damage dealer.
- Sands of Eon: ATK% is the default. Elemental Mastery can be considered if it has clearly better substats or the team already provides substantial ATK buffs.
- Goblet of Eonothem: ATK% is preferred for direct Stellar-Conduct damage. Cryo DMG Bonus improves ordinary Cryo hits but does not multiply her principal direct reaction damage, so it is not the default choice.
- Circlet of Logos: CRIT Rate or CRIT DMG, depending on weapon, team buffs and the conditional 16% CRIT Rate from the four-piece set. Avoid pushing effective CRIT Rate beyond 100% at the expense of other stats.
Sub-Stats Priority
- CRIT Rate and CRIT DMG: Balance both after accounting for the artifact set and any Cryo Resonance that your team can maintain.
- ATK%: Particularly useful until Sandrone reaches 2,000 ATK, and remains valuable afterward as a direct damage stat.
- Elemental Mastery: Improves direct Stellar-Conduct reaction damage. Its value relative to ATK depends on the buffs already present.
- Energy Recharge: Add enough for the Burst frequency your team can actually support. A 60-Energy Burst does not automatically mean it is ready every rotation; teams with additional Cryo teammates or Favonius triggers generally need less ER.
It is reasonable to use Burst whenever available if meeting a strict every-rotation Energy requirement would sacrifice too much offensive value. The stronger baseline is to finish the Charged Attack and Skill cycle reliably, then adjust Energy Recharge based on whether the Burst is consistently ready when your supports' buffs return.
What Are the Best Team Comps for Sandrone?
Sandrone needs Cryo and Electro interaction to maintain Stellar-Conduct. A team should provide dependable off-field application, keep the Polestar Field active, and cover interruption or healing needs while Fagio fires. Several characters also have specific Stellar reaction interactions in their current kits; these effects should not be confused with their older, unrelated passives.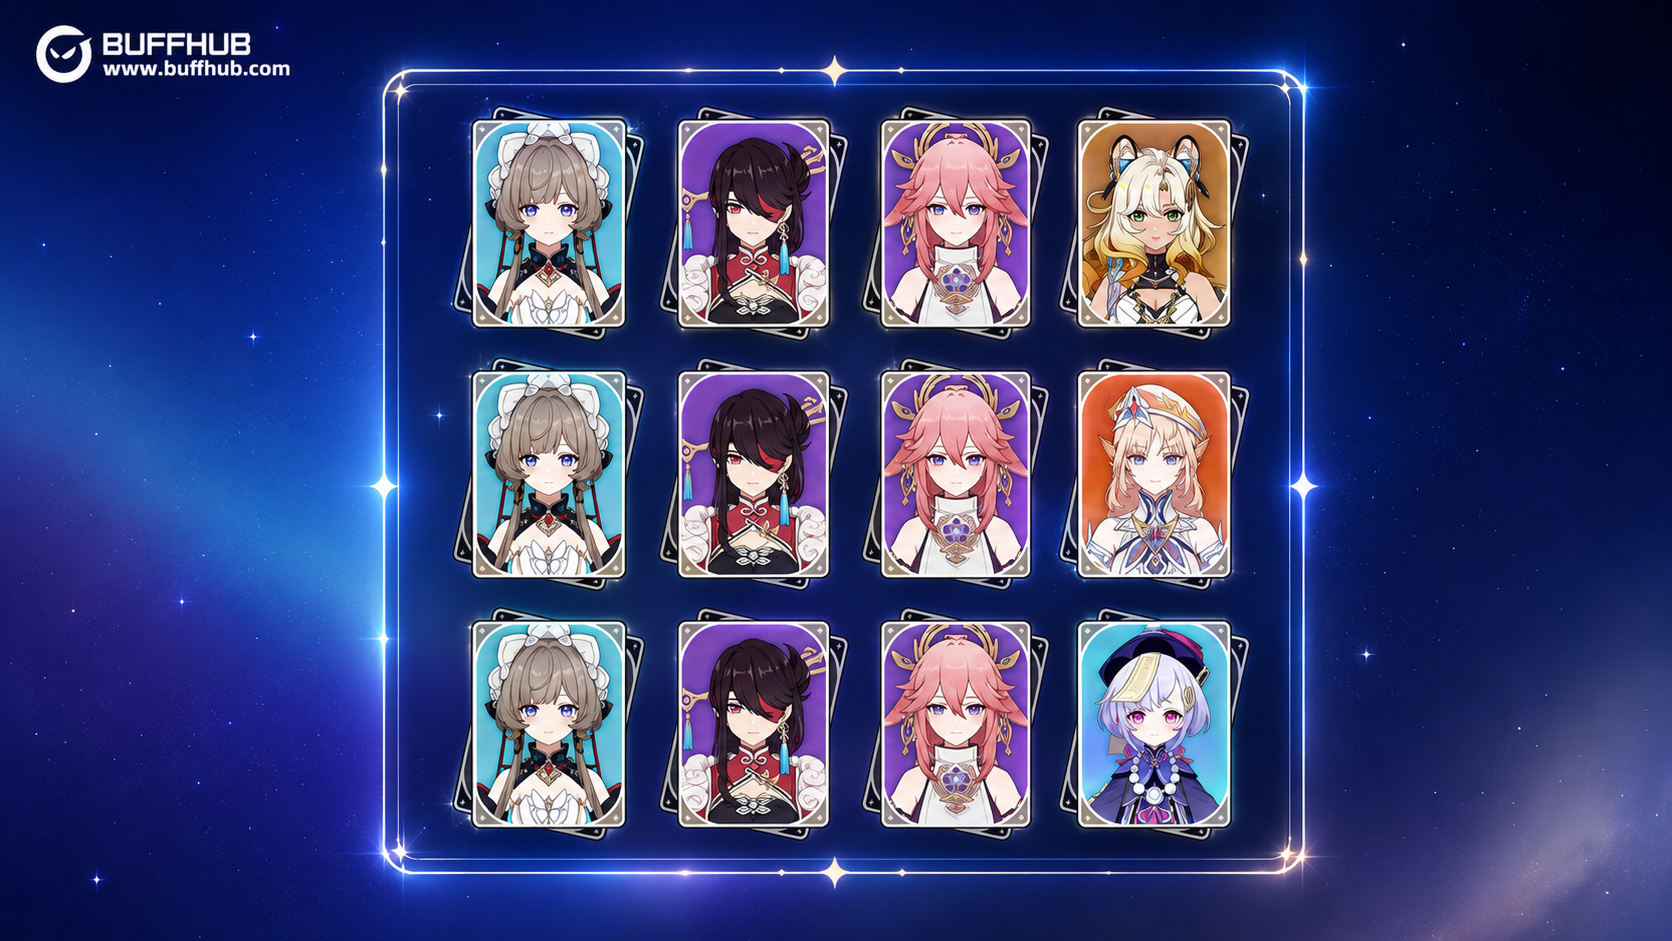
Premium Electro Core
- Yae Miko: Her Sesshou Sakura turrets apply Electro off-field while Sandrone stays active. This helps maintain Stellar-Conduct and contributes independent damage. Her Constellation upgrades can add team utility, but those benefits should not be described as baseline effects of a C0 Yae Miko.
- Beidou: An alternative off-field Electro enabler whose Burst also provides damage reduction and interruption resistance. Her stronger Stellar-Conduct team benefits, including 200 Elemental Mastery and the relevant resistance reduction, depend on her later Constellation investment, especially C6. She is not a universal replacement for Yae Miko at every investment level.
A workable premium framework is Sandrone + Yae Miko + Odette + Escoffier, with Odette supplying additional Stellar reaction support and Escoffier providing off-field Cryo damage and healing. For a more accessible team, Sandrone + Qiqi + Beidou + Sucrose uses Qiqi's healing and Stellar-Conduct bonus, Beidou's Electro application, and Sucrose's Elemental Mastery share and Viridescent Venerer resistance reduction. Their damage and energy requirements differ, so neither lineup is automatically the right choice for every account.
Flexible Support Options (Choose One)
- Xilonen: Can supply elemental resistance reduction and healing. Her C2 grants additional Cryo CRIT DMG, but that effect should not be presented as part of her C0 kit. Standard Elemental DMG buffs do not necessarily improve direct Stellar-Conduct damage, so choose support artifacts accordingly.
- Qiqi: Provides healing and, while her Elemental Skill is active under Radiance: Stellar-Conduct, can increase the party's relevant reaction damage by 50%. This is a specific Stellar-reaction interaction, not proof that all her original healing abilities independently increase damage. She is a useful option when you need comfort without abandoning the reaction setup.
- Nicole: A Pyro support option for teams that already have enough Cryo and Electro application. She can provide shielding and ATK-focused support, but her Pyro application may interfere with some reactions. Treat her as a flexible slot rather than an automatic upgrade over dedicated Stellar-Conduct supports.
Do not fill the remaining slot only by looking for the largest displayed ATK or Cryo DMG buff. Sandrone needs consistent reaction uptime, and a support who preserves that uptime can be more useful than one whose bonus does not apply to direct Stellar-Conduct damage. For shorter fights, prioritize fast setup; for long encounters, consider healing, resistance reduction and Energy generation.
What Materials Are Needed to Upgrade Sandrone?
The following requirements cover her character ascension, talent upgrades, and signature weapon separately. The full figures below assume character Lv.90, all three talents at Lv.10, and A Teaspoon of Transcendence at Lv.90. You do not need to complete all those targets at once.
Character Ascension Materials (Level 1 to 90)
- Mora: 2,092,600 for leveling and ascension combined.
- Character EXP: 3 Wanderer's Advice and 418 Hero's Wit.
- Local Specialty: 168 Subdetection Units, collected around the Fontaine Research Institute and Mont Esus East.
- Cryo Gems: 1 Shivada Jade Sliver, 9 Fragments, 9 Chunks and 6 Gemstones.
- Enemy Drops: 18 Broken Drive Shafts, 30 Reinforced Drive Shafts and 36 Precision Drive Shafts, obtainable from Landcruisers in Nod-Krai.
- World Boss Drop: 46 Plume of the Fallen Watcher, obtained from Watchers: Fallen Vigil in Dornman Port.
The 2,092,600 Mora figure includes both the six ascensions and the character EXP leveling cost; it should not be added to a separate character-leveling Mora estimate. Players stopping at Lv.80/90 can save part of the EXP and Mora cost while still unlocking the final ascension.
Talent Upgrade Materials (All Three Talents at 10/10/10)
- Mora: 4,957,500 for all three talents combined.
- Talent Books: 9 Teachings of Vagrancy, 63 Guide to Vagrancy and 114 Philosophies of Vagrancy, from the Lightless Capital domain in Nod-Krai on Wednesday, Saturday and Sunday.
- Enemy Drops: 18 Broken Drive Shafts, 66 Reinforced Drive Shafts and 93 Precision Drive Shafts.
- Weekly Boss Materials: 18 Madman's Restraint, from the relevant weekly boss encounter with The Doctor.
- Rare Items: 3 Crowns of Insight.
Those are three-talent totals, not the cost of a single talent. Fully leveling Sandrone and all three talents requires 7,050,100 Mora in total: 2,092,600 for character leveling and ascension plus 4,957,500 for talents. If you only max Normal Attack and leave Skill at a lower level, your actual requirement will be lower.
Signature Weapon Ascension Materials (Level 1 to 90) – A Teaspoon of Transcendence
- Mora: 225,000 for weapon ascensions, excluding separate EXP enhancement costs.
- Warrants: 15 Tattered Warrants, 23 Immaculate Warrants and 27 Frost-Etched Warrants.
- Far-North Scions Materials: 5 Sundered Glory of the Far-North Scions, 14 Unyielding Delusion of the Far-North Scions, 14 Oblation of the Far-North Scions and 6 Aureate Radiance of the Far-North Scions.
- Lunar Iron: 23 Fractured Lunar Iron, 27 Depleted Lunar Iron and 41 Unblemished Lunar Iron.
Weapon EXP from Enhancement Ore or equivalent materials is also required, on top of these ascension costs. The former unnamed 23 / 27 / 41 weapon materials are now identified as the three Lunar Iron tiers. Their counts are part of the weapon requirement, not an extra material category to add on top. The Far-North Scions materials come from the Lost Mooncourt weapon domain in Nod-Krai; the Warrant and Lunar Iron materials use their corresponding enemy drops. Only farm these weapon materials if you have, or intend to obtain, A Teaspoon of Transcendence.
Which Constellations (Awakenings) Are Worth Getting?
Sandrone's Constellations change Fagio's field time, boost Stellar Glimmer damage and, at higher levels, add new attacks. They should be judged by those actual effects rather than unsupported claims that every copy creates a fixed percentage increase in team damage. Her C1 and C2 help the existing rotation, while C6 changes the beam itself.
| Level | Constellation Name | Effect Summary | Verdict / Value |
|---|---|---|---|
| C1 | Morrow After the Golden Dusk | During Decoding mode, Fagio gains Decoding Power 50% more slowly. All party members deal 30% increased Stellar Glimmer reaction damage. | More beam uptime and a party-wide reaction bonus. Longer beam windows usually change the C0 three-cycle rotation to two longer cycles. |
| C2 | An Heiress Gazed Into the Looking-Glass | During Radiance: Stellar Glimmer, condensed beams gain 40% CRIT DMG. Each beam fired adds a further 20% CRIT DMG to condensed beams in the same Decoding period, up to three stacks. | A direct improvement to beam CRIT damage. It is not an additional flat ATK multiplier and depends on the beams actually being fired. |
| C3 | Refuse the Wake of Dusk, the Moonlit Yoke | Normal Attack Talent Lv. +3, up to Lv.15. | Raises the talent responsible for her main Charged Attack output. |
| C4 | In Knowledge Lies the World's True Ground | Dealing Stellar-Conduct or Stellar Swirl damage triggers an extra Prismatic Resonance Cannon hit equal to 125% or 187.5% of ATK respectively. The damage is treated as the matching Stellar Glimmer reaction and can trigger once every four seconds. | Additional conditional damage; both multipliers should not be counted in a single Stellar-Conduct trigger. |
| C5 | Of All Beside, She Takes No Part | Elemental Burst Talent Lv. +3, up to Lv.15. | Improves the Burst but does not change Fagio's Charged Attack loop. |
| C6 | Narcissus Wakes, Her Eyes Upon the Dawn | The third condensed beam turns into a Condensed Cluster Beam with up to four additional hits. Under Radiance, those hits use the corresponding Stellar-Conduct or Stellar Swirl multipliers (80% or 120% of ATK), and Sandrone's Stellar Glimmer reaction damage receives 20% Elevation. | A major high-investment beam upgrade, but not a guarantee of a specific clear time or damage total. |
Best Stopping Point
C0 is a complete starting point. Sandrone can access her Charged Attack, Skill reset, Stellar-Conduct and Burst mechanics without Constellations. If you already have good Electro and Cryo teammates, C1 gives longer Charged Attack windows and a team-wide Stellar Glimmer bonus. C2 adds more beam CRIT DMG, but its value depends on your build and the amount of time you can keep Fagio attacking.
For an account missing consistent off-field Electro or reaction support, improving the team may do more than pursuing an extra Sandrone copy. Her signature weapon is also not a universal priority over those missing teammates. There is no single optimal stopping point without knowing what equipment and characters the account already owns.
Is Sandrone Worth Pulling?
Sandrone is a reasonable pull target if you want a Cryo on-field damage dealer centered on Stellar-Conduct and can support her with frequent Electro application. If you are deciding whether to obtain her, consider the support characters and equipment already available on your account before committing resources.
Her limitations are practical: Charged Attacks take field time, interruption can cost beam hits, and direct Stellar-Conduct damage needs the right reaction environment. Without adequate Electro application or a way to maintain the Polestar Field, she loses much of what makes the build work. Existing well-built Cryo damage dealers do not automatically need replacing, especially if the account lacks suitable support options or cannot spare the resources for new artifacts.
Frequently Asked Questions (FAQ)
How Do I Prevent Fagio from Overheating?
At C0, let Fagio complete its main Charged Attack sequence, then use Elemental Skill to reduce Decoding Power before starting another beam. Power Overdrive begins at 100 Decoding Power and ends when the meter drops below 50, but waiting for natural recovery wastes time. At C1, Decoding Power rises more slowly, so longer Charged Attack sequences are possible. Avoid canceling Sandrone's Skill so quickly that the meter is not sufficiently reduced.
Does Sandrone Need a Lot of Energy Recharge?
Her Burst costs 60 Energy, but its availability depends on teammates, particles, Favonius triggers and how often the rotation repeats. Additional Cryo characters generally reduce the required Energy Recharge. If building enough ER to Burst every cycle would cost too much CRIT and ATK, it can be better to Burst every other rotation or whenever it is ready. The Charged Attack and Skill sequence remains her main source of consistent field damage.
Can Sandrone Benefit from Physical Damage Supports?
Her weapon type does not make her a Physical damage dealer. Sandrone's principal damage comes from Cryo and direct Stellar-Conduct reaction hits, so Physical DMG Bonus does not increase those attacks. Stellar-Conduct retains the Superconduct-associated Physical RES reduction, but that is separate from Sandrone's own damage scaling. Build around ATK, balanced CRIT, Elemental Mastery and Stellar reaction support instead of investing in Physical DMG bonuses for her.