Genshin Impact
 Honkai: Star Rail (HSR)
 Zenless Zone Zero(zzz)
 Wuthering Waves
 Arknights: Endfield
 GODDESS OF VICTORY: NIKKE
 Last War: Survival Game
 Mobile Legends: Bang Bang
 King Shot
 PUBG MOBILE
 NTE (Neverness to Everness)
  Delta Force
 Whiteout Survival
 Identity V
 Last Z: Survival Shooter
 SD Gundam G Generation ETERNAL
 Honor of Kings
 Free Fire
 Dark War Survival
 AFK Journey
 Valorant
 Marvel Rivals
 Where Winds Meet
 Pokémon Trading Card Game Pocket
 Arknights
 Tiles Survive
 Poppo Live
 Bigo Live
 Heartopia
 ChatGPT
 Valorant Vouchers
 Roblox
 Lineage 2M
 Miliastra Wonderland
 FC 26 Coins
 Chamet
 Etheria: Restart
 APEX
APEX Fortnite
 MONOPOLY GO!
 Royal Match
 Candy Crush Saga
 Blue Protocol: Star Resonance
 Reverse: 1999
 Arena Breakout
 Infinity Nikki
 Love and Deepspace
 Pokémon Go
 Clash Royale
 Brawl Stars
 Clash of Clans
 Chaos Zero Nightmare
 Blood Strike
 Umamusume: Pretty Derby
 Hot Selling Games


 Like
Like

If you want a character that can literally delete enemies from the battlefield, look no further. Zero is an S-Rank Cosmos element Esper in Neverness to Everness (NTE) who specializes in Instant Cycle Burst DPS. Hailing from the Eibon Antique Shop, she is the only Esper in history without a detectable Wertheimer Index—but what she lacks in standard metrics, she more than makes up for in raw, unadulterated damage.

- Enjoy Up To 22% Off On Game Top-ups.
- 3-minute Delivery For Non-stop Gaming.
- Trusted 4.9/5 On Trustpilot, 10/10 Among Players.
- Official Partnership Route, Protect Your Game Wallet.
This comprehensive guide will break down everything you need to know to build Zero optimally, from her best gear and weapons to top-tier team synergies. Let's dive in!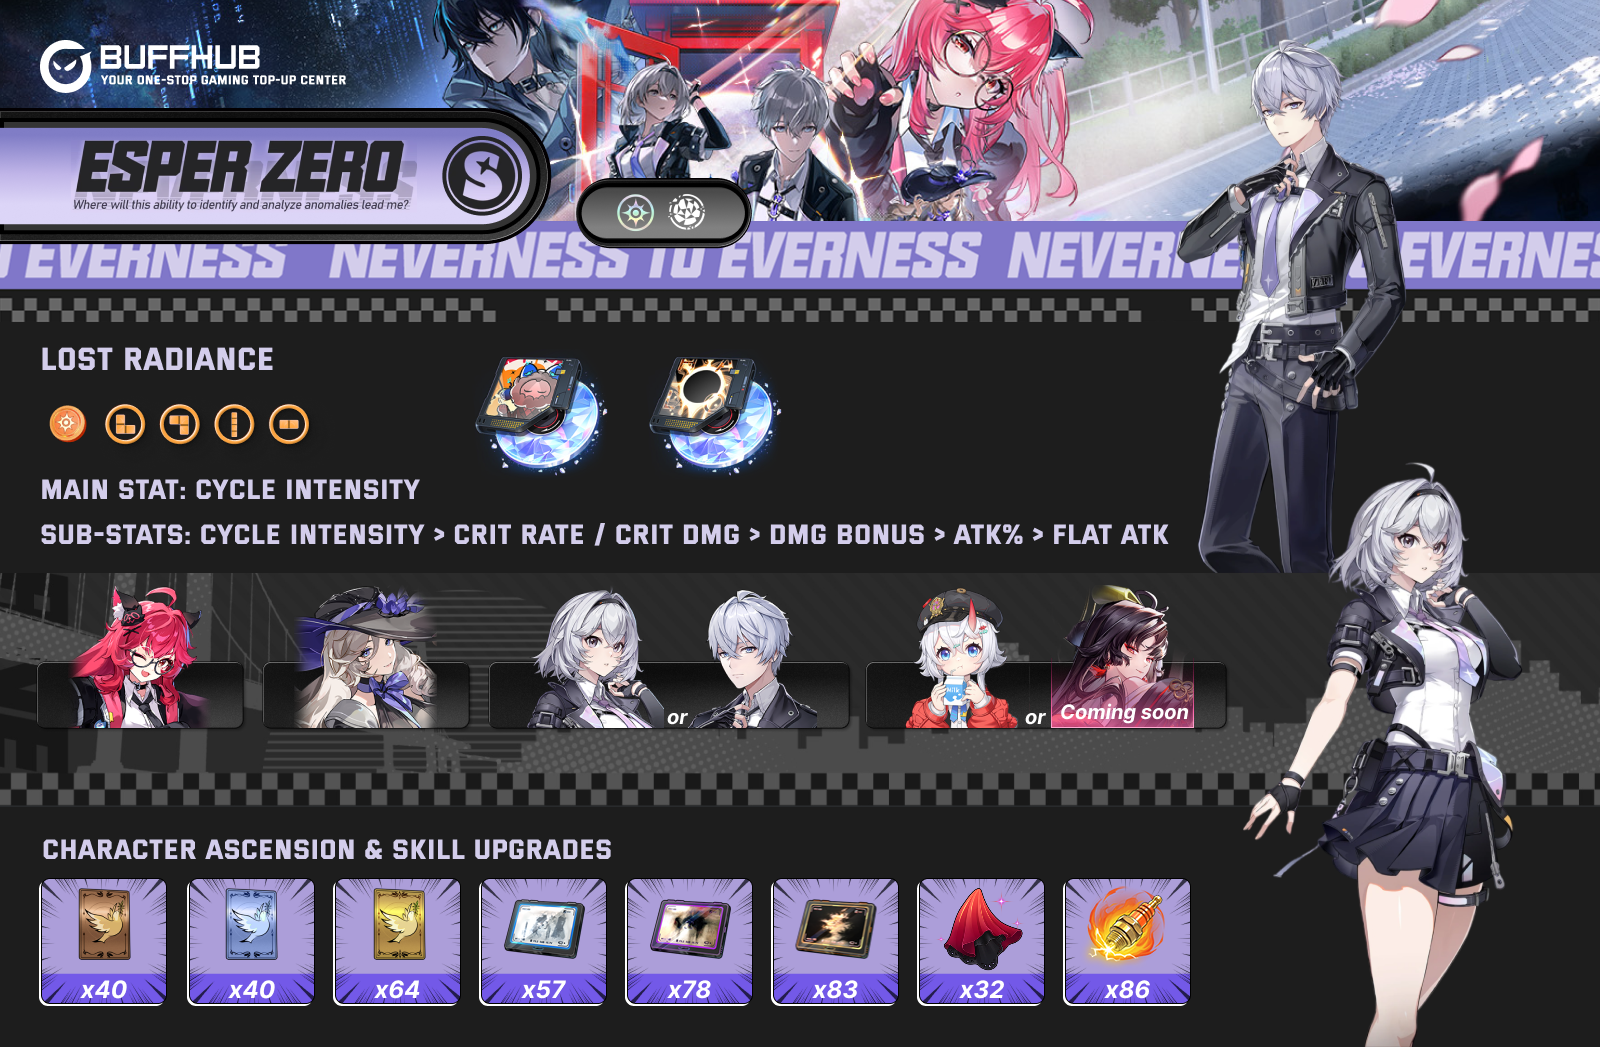


Skills & Mechanics Analysis
Zero’s playstyle revolves around precision strikes and devastating area-of-effect (AoE) bursts. Her kit heavily rewards you for fighting enemies lower than your current level, making her an incredible tool for map clearing and speed-running content.
- Basic Attack (Appraisal - Severance): A standard 5-hit combo dealing Cosmos damage. Her plunge attack (Appraisal - Break) deals AoE damage based on fall height, and perfectly timed dodges allow her to perform a Critical Riposte (Flash of Inspiration) that reduces enemy Break meters.
- Resonance Skill (Appraise and Engrave): Zero performs three consecutive weapon strikes, leaps into the air, and fires an Esper Cannon. The Catch: If the first enemy hit is a lower level than Zero, she deals an additional instance of Cosmos damage.
- Ultimate (Divide by Zero): A massive AoE nuke that deals multiple instances of Cosmos damage to all enemies caught within the area.
- Redirect Skill (Rift Blossom): She detonates a spatial rift, dealing two quick bursts of Cosmos damage.
- Core Passives:
- Anomaly Perception: When your active character gains Ultimate Energy, Zero restores HP equal to 50% of her Base ATK.
- Theopneustos: Flat out increases her Ultimate damage by 25%.
How to Play Zero: Zero is a burst-focused character. Your goal is to keep her level maxed out so her Resonance Skill naturally triggers its bonus damage on weaker enemies. Build up her Ultimate energy, group the enemies together, and unleash Divide by Zero to wipe the field in an instant.
Best Weapon

| Tier | Weapon Name | Key Stats | Why it works |
|---|---|---|---|
| Best in Slot | The Rain That Shook the World (S-Rank) | Base ATK 512, CRIT Rate 22% | This is practically tailor-made for Zero's burst profile. It increases Cosmos DMG by up to 42% for Redirect Skills and Ultimates. Using a Redirect Skill boosts her Cycle Intensity for 15 seconds, supercharging her damage output. The high CRIT Rate sub-stat makes building her gear significantly easier. |
| Strong Alternative | Day Off | Massive ATK% | Great for generating Ultimate Energy on enemy kills (up to 5 times per Eclipse cycle) while providing a massive ATK% stat stick. |
| Strong Alternative | Fluff of Fearlessness | ATK Boost | Grants a massive ATK boost (up to 45%) for 10 seconds after casting an Ultimate, making it great for short, explosive rotations. |
Best Gear (Cartridges / Modules)
To maximize Zero's burst potential, you want to buff her Cosmos damage and ensure her Ultimate hits as hard as possible.
| Set Type | Set Name | Bonus Effect |
|---|---|---|
| 2-Piece Bonus | Lost Radiance | Cosmos DMG +10% |
| 4-Piece Bonus | Lost Radiance | Ignores 25% of enemies' DEF for 20 seconds after the wearer casts an Ultimate. This is non-stackable but incredibly powerful for a burst DPS like Zero. |
| Stat Type | Priority Recommendation |
|---|---|
| Main Stat | Cycle Intensity |
| Sub-stats | Cycle Intensity > CRIT Rate / CRIT DMG > DMG Bonus > ATK% > Flat ATK |
Note: Cycle Intensity directly buffs her elemental reaction and cycle damage ceiling, making it the most valuable stat for her kit.
Best Team Compositions
Zero thrives in teams that can group enemies, provide ATK buffs, and keep the pressure on while her burst is on cooldown.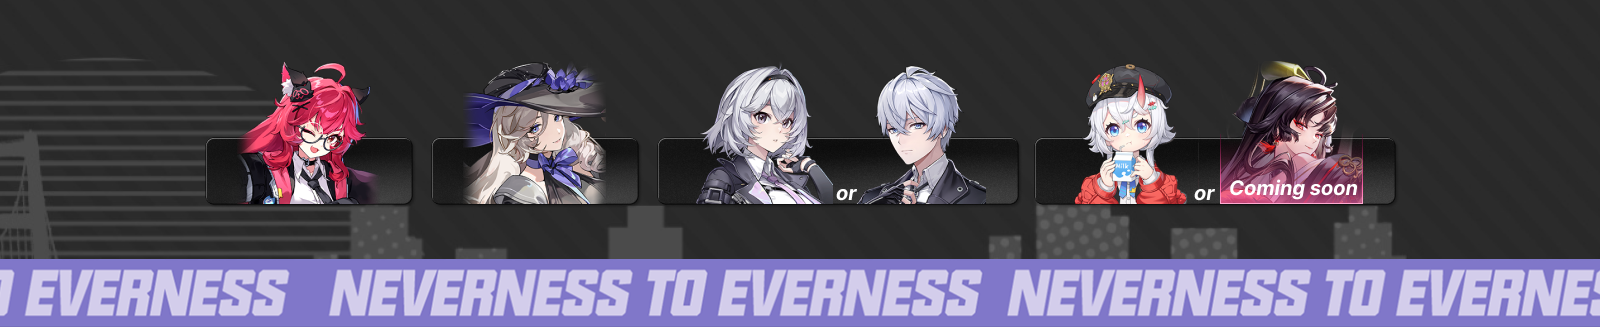
The Ultimate Eibon Burst Team
| Character | Role | Synergy Analysis |
|---|---|---|
| Sakiri | Buffer/Grouper (The Setup) | Sakiri is the ultimate enabler. Using her Eating Mode and Devour Whole, she acts as a powerful crowd-control unit, pulling enemies into a tight cluster. Her Ultimate (Feast of Gluttony) roots enemies in place and triggers her passives to grant the entire team an ATK boost equal to 30% of Sakiri's Base ATK. |
| Jiuyuan | Sub-DPS/Control (The Primer) | While enemies are grouped, Jiuyuan dashes in to apply her Lethal Rose Pact. Her rapid Anima damage and Pact Detonations provide massive burst-control. Furthermore, her Unhindered Passage resonance reduces the Anima RES of marked targets. |
| Nanally | Main/Follow-up DPS (The Sustained DPS) | Nanally provides immense sustained damage through her Anima element and Underboss summons. Her kit is loaded with follow-up attacks that automatically trigger whenever the team deals Esper Cycle DMG, keeping the DPS high while setting the stage for Zero. |
| Zero | Burst DPS (The Executioner) | Zero enters the field to finish the job. Because Sakiri grouped the enemies and buffed the team's ATK, Zero can drop her Divide by Zero Ultimate directly into the cluster. Furthermore, when Zero triggers a Cosmos Esper Cycle, her Zero Display resonance grants the entire team an additional 10% ATK for 20 seconds, buffing Nanally and Jiuyuan for the next rotation. |
Ascension / Leveling Materials
To push Zero to the Level 90 cap and fully max out all 4 of her skills, you will need a substantial amount of resources. Below is the complete, combined total of materials required for both her Breakthroughs and full skill upgrades:
| Material Name | Total Amount Required | Primary Source(s) |
|---|---|---|
| Currency ($) | 2,273,000 | Quest Rewards, Instance Drops, World Exploration |
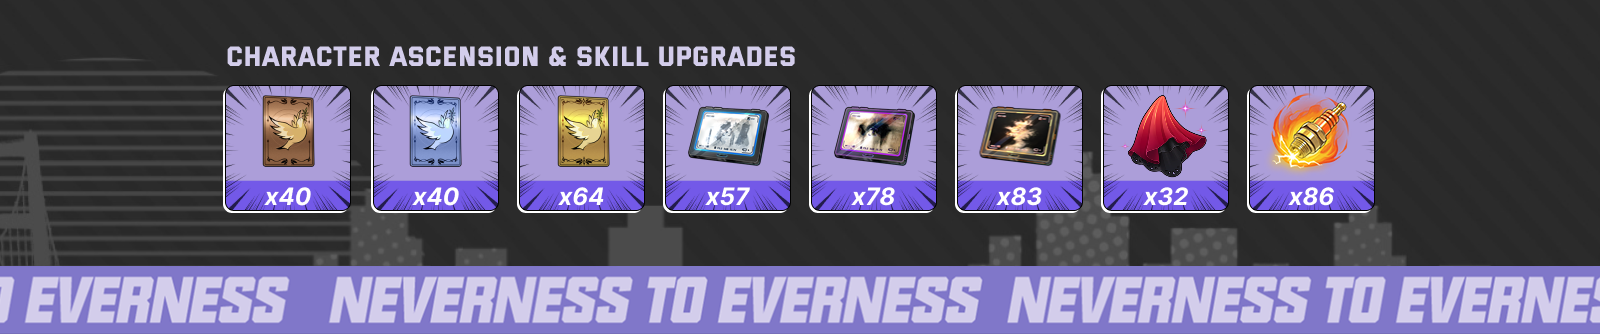
| Charging Knight Spark Plug | 86 | World Boss: Torrential Void |
| Paradoxical Whispers | 83 | Monster Drop (Industrial District), Simulation Center |
| Obscure Whispers | 78 | Monster Drop (Industrial District), Simulation Center |
| The Olive Branch | 64 | Skill Material Instance: Anima, Event Shop |
| Lost Whispers | 57 | Monster Drop (Industrial District), Simulation Center |
| Nestling's Longing | 40 | Skill Material Instance: Anima, Event Shop |
| Dove's Flutter | 40 | Skill Material Instance: Anima, Event Shop |
| Good Boy Stamp | 32 | Store Front, Instance Drops, World Exploration |
Awakening (Constellation) Analysis
If you are pulling for duplicates, Zero has some of the most front-loaded and powerful Awakening nodes in the game.
| Level | Node Name | Effect Details |
|---|---|---|
| A1 | Blooming Gaze (High Priority) | Adds an extra hit of 200% ATK to enemies of a lower level on the first hit, and it ignores 75% of their DEF. This makes her map-clearing potential absolutely top-tier. |
| A2 | Finding the Calling | Grants 8 Ultimate Energy after using her Resonance Skill. Good for rotation smoothness. |
| A3 | Anomalies Record (Game-Changing) | Increases her Ultimate CRIT Chance by a massive 50%. This completely changes how you build her gear, allowing you to invest purely into CRIT DMG and Cycle Intensity. |
| A4 | Undecided Factors | Converts every 1 point of Base ATK into a 0.1% damage boost for her Ultimate (up to 25%). |
| A5 | Theopneustos | Increases her ATK by 10% for 20s when triggering a Support Skill. |
| A6 | Deceptive Liberation | Increases the Extra DMG Ratio of her Resonance skill to 300% of her ATK. |
Is Zero Worth Pulling?
Absolutely. Zero is an exceptionally powerful, self-sustaining S-Rank DPS who trivializes overworld exploration and speed-farming thanks to her "lower level" execution mechanics. If you manage to get her to A3, she becomes one of the easiest characters to build in the game due to the free 50% CRIT Rate on her Ultimate. If you need a Cosmos nuker who can slot seamlessly into fast-swap burst teams, Zero is a must-pull.
FAQ
Q: If I unlock Zero's A3, do I still need to build CRIT Rate on her gear?
A: You need very little! A3 gives her Ultimate a flat 50% CRIT Rate. Combined with her base 5% and potentially her signature weapon (The Rain That Shook the World, which gives 22%), you will effortlessly hit the CRIT cap for her burst. You should focus all your sub-stats on Cycle Intensity and CRIT DMG instead.
Q: How exactly does her "lower level" mechanic work?
A: Zero's Resonance Skill (and her A1 Awakening) checks her current character level against the enemy's level. If the enemy's level is strictly below hers, she deals massive bonus damage (and ignores DEF at A1). This means you should prioritize maxing out Zero's character level (currently Lv. 90) before investing heavily in her other stats, as this level advantage is core to her damage output.
Q: Does Zero provide any team utility, or is she strictly a selfish DPS?
A: While mostly a selfish burst DPS, she does have two great utility points: Her Anomaly Perception passive provides minor healing to the active character based on her ATK, and her Zero Display resonance buffs the entire team's ATK by 10% whenever she triggers a Cosmos Cycle.

 Jul 10, 2026
 NTE (Neverness to Everness)