Genshin Impact
 Honkai: Star Rail (HSR)
 Zenless Zone Zero(zzz)
 Wuthering Waves
 Arknights: Endfield
 GODDESS OF VICTORY: NIKKE
 Last War: Survival Game
 Mobile Legends: Bang Bang
 King Shot
 PUBG MOBILE
 NTE (Neverness to Everness)
  Delta Force
 Whiteout Survival
 Identity V
 Last Z: Survival Shooter
 Honor of Kings
 Free Fire
 Dark War Survival
 AFK Journey
 Valorant
 Marvel Rivals
 Where Winds Meet
 Pokémon Trading Card Game Pocket
 Arknights
 Tiles Survive
 Poppo Live
 Bigo Live
 Heartopia
 ChatGPT
 Valorant Vouchers
 Roblox
 Lineage 2M
 Miliastra Wonderland
 FC 26 Coins
 Chamet
 Etheria: Restart
 APEX
APEX Fortnite
 MONOPOLY GO!
 Royal Match
 Candy Crush Saga
 Blue Protocol: Star Resonance
 Reverse: 1999
 Arena Breakout
 Infinity Nikki
 Love and Deepspace
 Pokémon Go
 Clash Royale
 Brawl Stars
 Chaos Zero Nightmare
 Blood Strike
 Umamusume: Pretty Derby
 Hot Selling Games


 Like
Like

Sandrone is a powerful five-star Cryo Claymore character who completely reshapes the battlefield. This dynamic combatant functions as an elite on-field hyper-carry. Unlike traditional units, she features a unique passive talent that upgrades the standard Superconduct reaction into a brand-new mechanic called Stellar-Conduct.

- Enjoy Up To 22% Off On Game Top-ups.
- 3-minute Delivery For Non-stop Gaming.
- Trusted 4.9/5 On Trustpilot, 10/10 Among Players.
- Official Partnership Route, Protect Your Game Wallet.
When this advanced reaction triggers, it creates a specialized Polestar Field on the ground. While standing inside this zone, your main DPS enters the Radiance: Stellar-Conduct state. This window massively buffs her overall damage output. If you love a fast-paced playstyle that features heavy AoE damage and mechanized combat, this unique carry is the perfect captain for your team.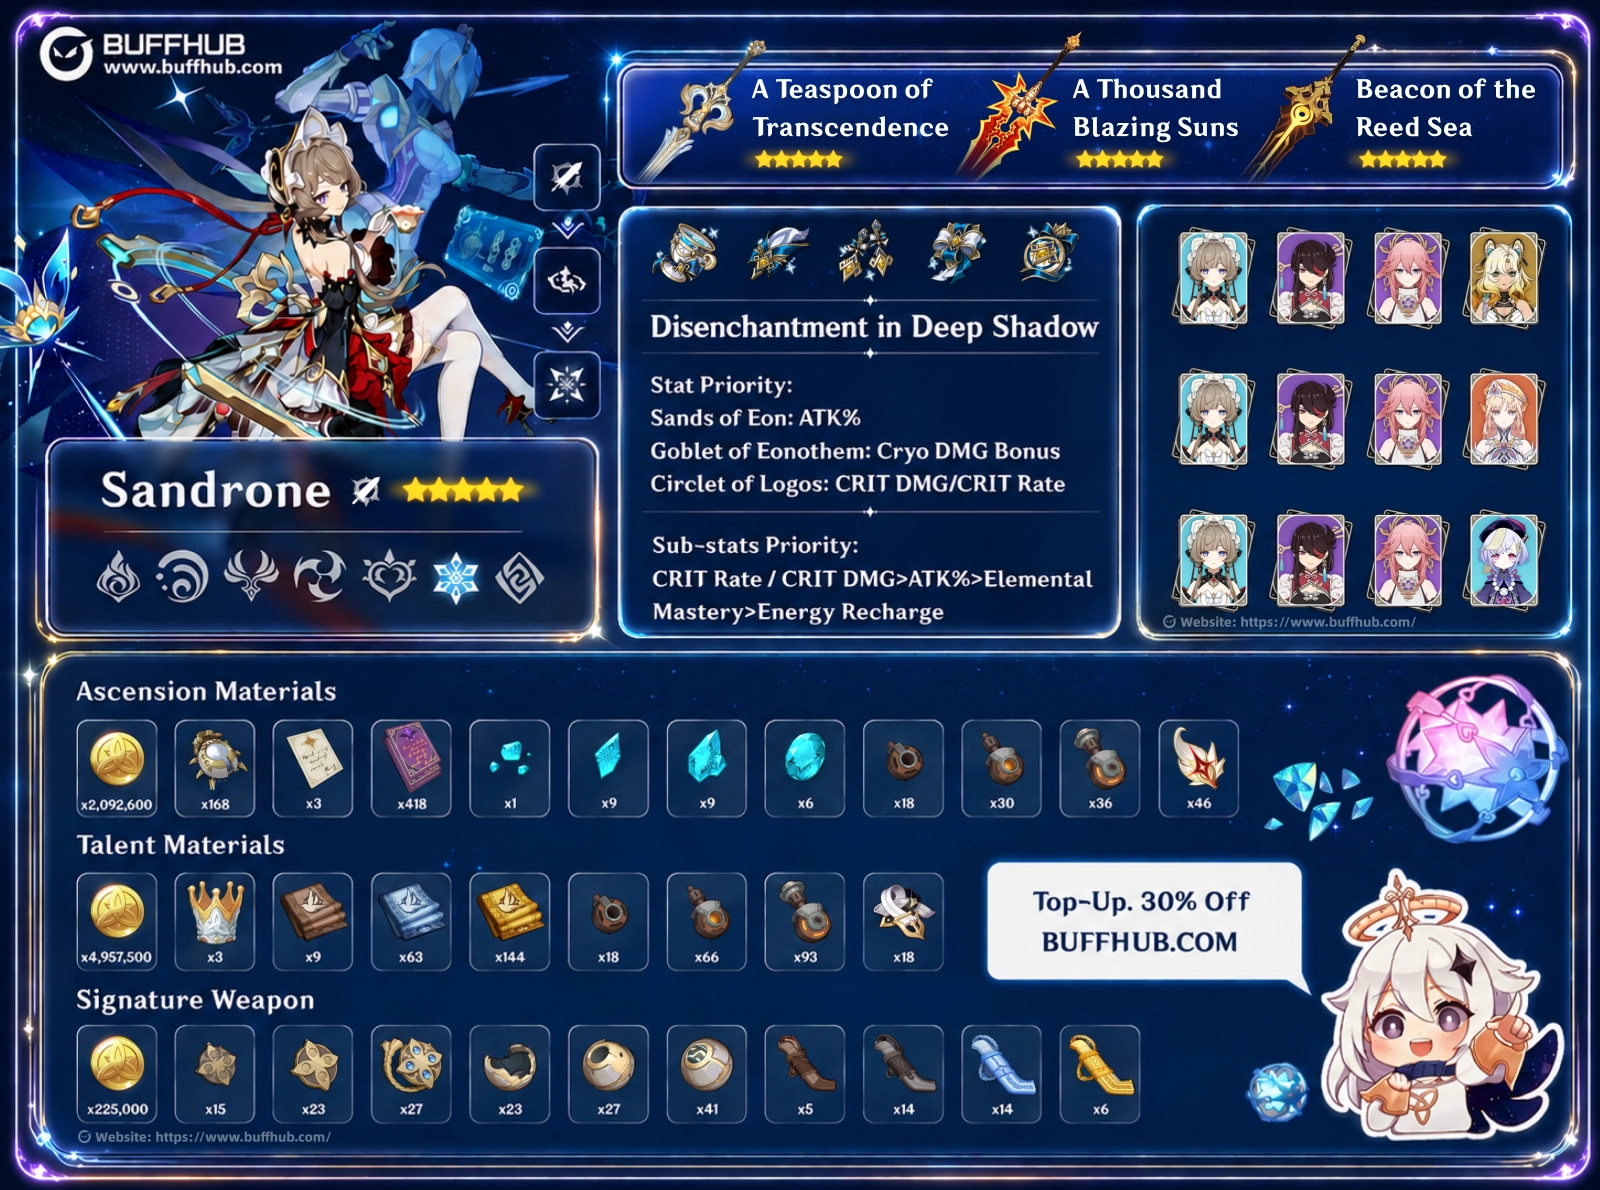


How Do Sandrone's Skills Work?
Understanding the combat flow of this character is the key to maximizing your team's total damage. Her kit revolves around balancing her mechanical companion's power meter and utilizing quick vehicles.
- Normal Attack (Formule Phenomenale: Self-Evident Proposition): She uses invisible threads to control her massive claymore, unleashing a rapid 3-hit combo.
- Charged Attack: This carry summons her mechanical companion, Fagio, and forces him into Decoding mode. He fires a sweeping flame attack and heavy condensed beams that deal massive AoE Cryo DMG. Under her special elemental aura, these beams transform to deal Stellar-Conduct DMG.
- Decoding Power Meter: While firing beams, the puppet's energy meter builds up to 100 points. At maximum capacity, he overheats into Power Overdrive mode. He will attack much slower and cannot re-enter his standard stance. When she is off-field, this meter decays 300% faster. He exits overdrive when the meter drops below 50.
- Elemental Skill (Formule Phenomenale: Differential Analysis): The combatant boards her Tea Party Tactical Assault Hovermech for 6 seconds. She can sprint to move even faster. Activating this skill instantly fires 2 Prism Shots at nearby targets. More importantly, riding this mech rapidly cools down her puppet, dropping his energy meter by 40 points initially and 10 points every 0.1 seconds.
- Elemental Burst (Formule Phenomenale: Q.E.D.): She unleashes a massive frontal bombardment followed by a devastating Convective Inhibition Ray. This ultimate deal massive AoE Cryo DMG. It also consumes tactical stacks built by her mechanical companion to deal massive bonus damage.
Skill Upgrade Priority
To maximize this carry's on-field hyper-carry potential, you want to focus heavily on her sustained charged attacks and her massive ultimate nuke.
Normal Attack (A) ≥ Elemental Burst (Q) > Elemental Skill (E)
Recommended Combat Rotation
- Deploy your off-field support skills to apply constant Electro to enemies.
- Trigger a reaction to drop the Polestar Field and activate her self-buff state.
- Hold her Charged Attack to unleash the puppet's condensed beams, building up your Refined Tactics stacks.
- Before the puppet overheats completely, activate her Elemental Skill to ride the hovermech, reposition, and dump his heat meter.
- Unleash her Elemental Burst window to clear all your tactical stacks and nuke squishy targets out of existence.
What is the Best Weapon for Sandrone?

Best-in-Slot: A Teaspoon of Transcendence
This premium five-star greatsword is tailor-made for her scaling needs. It features a massive 674 Base ATK and a 44.1% CRIT DMG secondary stat. While the wielder is active on the field, it automatically increases her total ATK by 16%.
Furthermore, each time a Charged Attack hits an opponent, she gains the "Surmount" effect: Stellar-Conduct DMG is increased by 20% for 5 seconds, stacking up to three times (can stack once every 0.2s). This directly amplifies the core reaction that makes her hyper-carry playstyle so lethal.
Alternative 5-Star Claymores
If you don't have her signature, these premium options still deliver powerful stat sticks and synergistic effects—none of them are free, but they can serve as strong placeholders until you secure her best-in-slot.
A Thousand Blazing Suns
Base ATK 741, CRIT Rate 11%. Using an Elemental Skill or Burst grants "Scorching Brilliance" for 6s: CRIT DMG +20% and ATK +28% (triggers once every 10s). While active, dealing Elemental DMG with Normal or Charged attacks extends the buff duration by 2s per second (max +6s). When in the Nightsoul's Blessing state, the effects are increased by 75% and the duration does not count down off-field. The huge base ATK and dual crit/ATK buffs make this a very comfortable bridge weapon.
Beacon of the Reed Sea
Base ATK 608, CRIT Rate 33.1%. After the Elemental Skill hits an opponent, ATK is increased by 20% for 8s; after taking DMG, ATK is increased by another 20% for 8s. Both effects work off-field, and when not protected by a shield, Max HP is increased by 32%. The colossal CRIT Rate sub-stat and unconditional ATK boosts significantly ease artifact requirements, letting you stack more CRIT DMG.
Which Gear and Stats Maximize Sandrone's Damage?
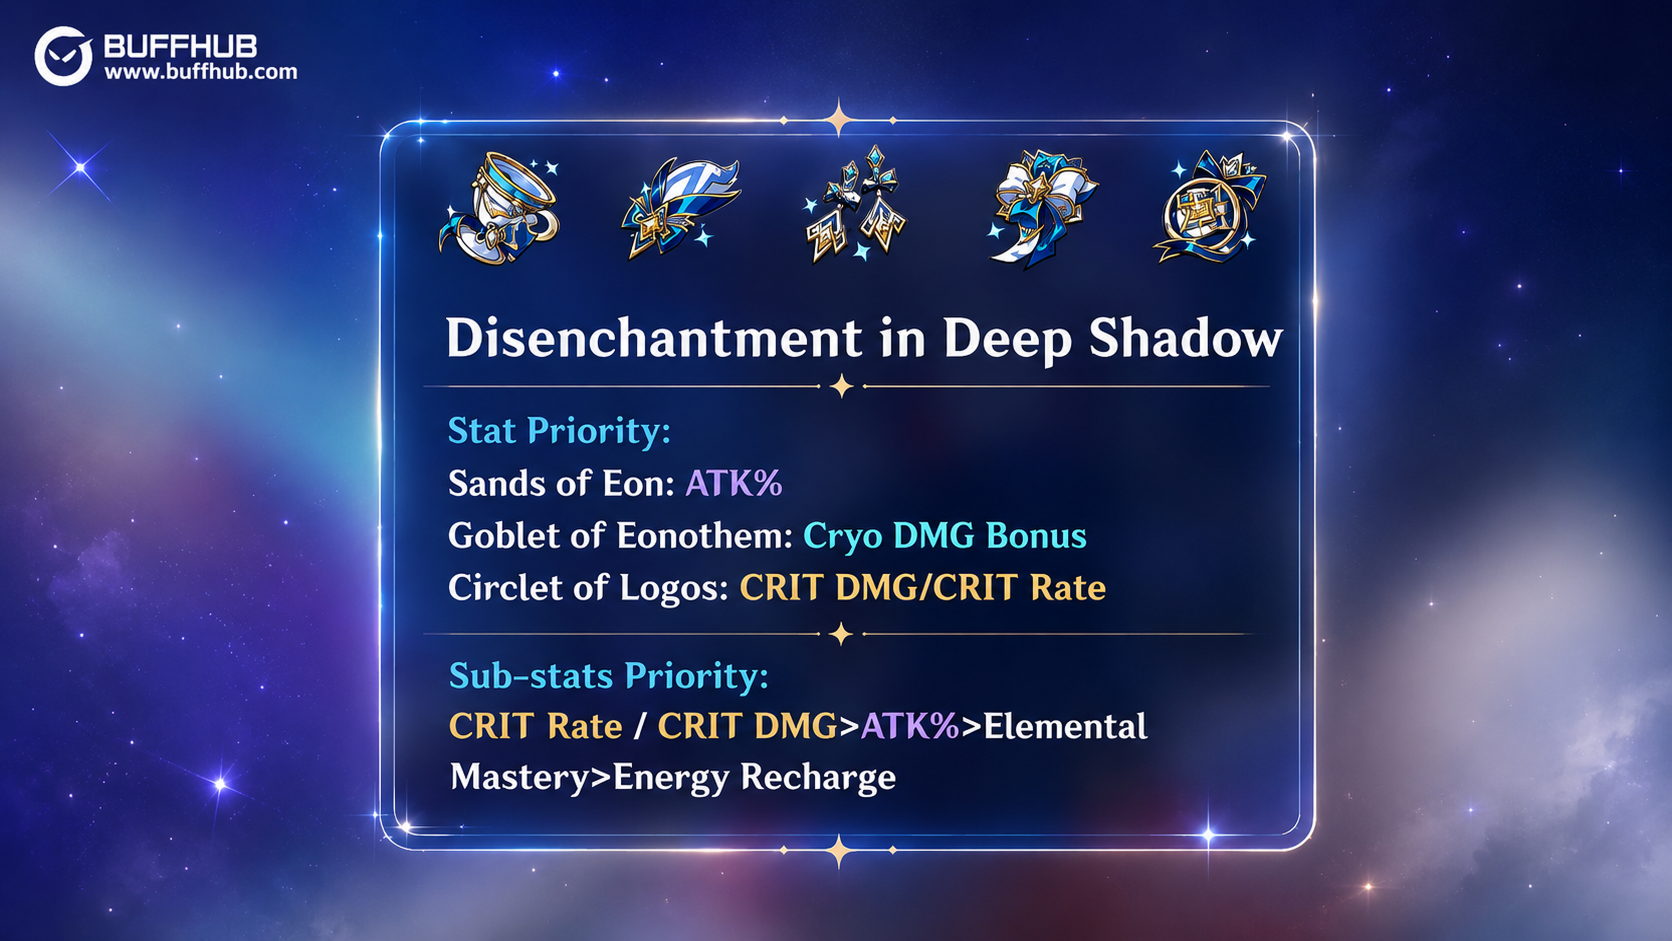
Best Artifact Set: Disenchantment in Deep Shadow
This set provides unparalleled shred resistance and raw damage scaling for her specific element archetype.
- 2-Piece Bonus: ATK +18%.
- 4-Piece Bonus: Increases Superconduct Reaction DMG by 80% and Stellar-Conduct Reaction DMG by 40%. Additionally, when the wearer attacks an enemy affected by either of these reactions, her CRIT Rate is increased by 16%.
Artifact Stat Priority
Based on her current kit mechanics, her passive talents heavily reward stacking raw attack power to convert into Elemental Mastery and base reaction scaling. While these recommendations are based on current theorycrafting and details might shift upon her official live server release, here are the predicted optimal main stats for your gear:
- Sands of Eon: ATK% (Crucial for hitting her passive conversion thresholds).
- Goblet of Eonothem: Cryo DMG Bonus (The best choice to maximize her heavy elemental multipliers).
- Circlet of Logos: CRIT DMG or CRIT Rate (Choose CRIT DMG if you are running her signature weapon or her dedicated 4-piece artifact set, which already provides a free 16% CRIT Rate).
Sub-stats Priority
- CRIT Rate / CRIT DMG (Maintain a healthy 1:2 ratio)
- ATK% (To further fuel her passive attack-to-buff conversions)
- Elemental Mastery (Adds extra punch to her elemental spikes)
- Energy Recharge (Helps her unleash her ultimate on cooldown)
What Are the Best Team Comps for Sandrone?
To fully unlock her unique reaction potential, you must pair her with high-tier off-field Electro appliers and flexible defensive supports.
Premium Electro Core
- Yae Miko: The ultimate off-field sub-DPS companion. Her lightning towers apply consistent Electro to trigger reactions. She has explicit synergy with this team; her passive talents extend her tower durations and grant extra lightning damage whenever a party member triggers a reaction. At high investment, her constellations increase the active character's EM and allow her towers to ignore 60% of enemy DEF.
- Beidou: Excellent for survival and multi-target scenarios. Her ultimate provides an Electro shield, massive damage reduction, and bouncing lightning discharges. Most importantly, if the active fighter is buffed by the star field, the captain's ultimate shreds enemy Cryo RES by 15% and injects a massive 200 Elemental Mastery buff into your active carry.
Flexible Support Options (Choose One)
- Xilonen: A premier Geo sword support. Her elemental skill features an incredible 36% Elemental RES decrease against elements present in your party. Her ultimate provides strong continuous healing, and her second constellation can grant this Cryo carry an astronomical 60% CRIT DMG buff.
- Qiqi: An aggressive defensive pick. While inside the specialized reaction field, her talent cooldowns drop significantly, and her skills grant all party members a flat 50% reaction damage boost. At C6, her ultimate revives fallen teammates and adds a massive damage injection equal to 600% of her ATK to your active carry's reactions.
- Nicole: A Pyro catalyst option who provides an attack-scaling shield and team-wide offensive buffs. Her high constellations let your team ignore 40% of enemy DEF and increase overall active character damage by 70% of her own ATK.
What Materials Are Needed to Upgrade Sandrone?
Plan out your farming schedule ahead of time to fully maximize this mechanized carry on day one.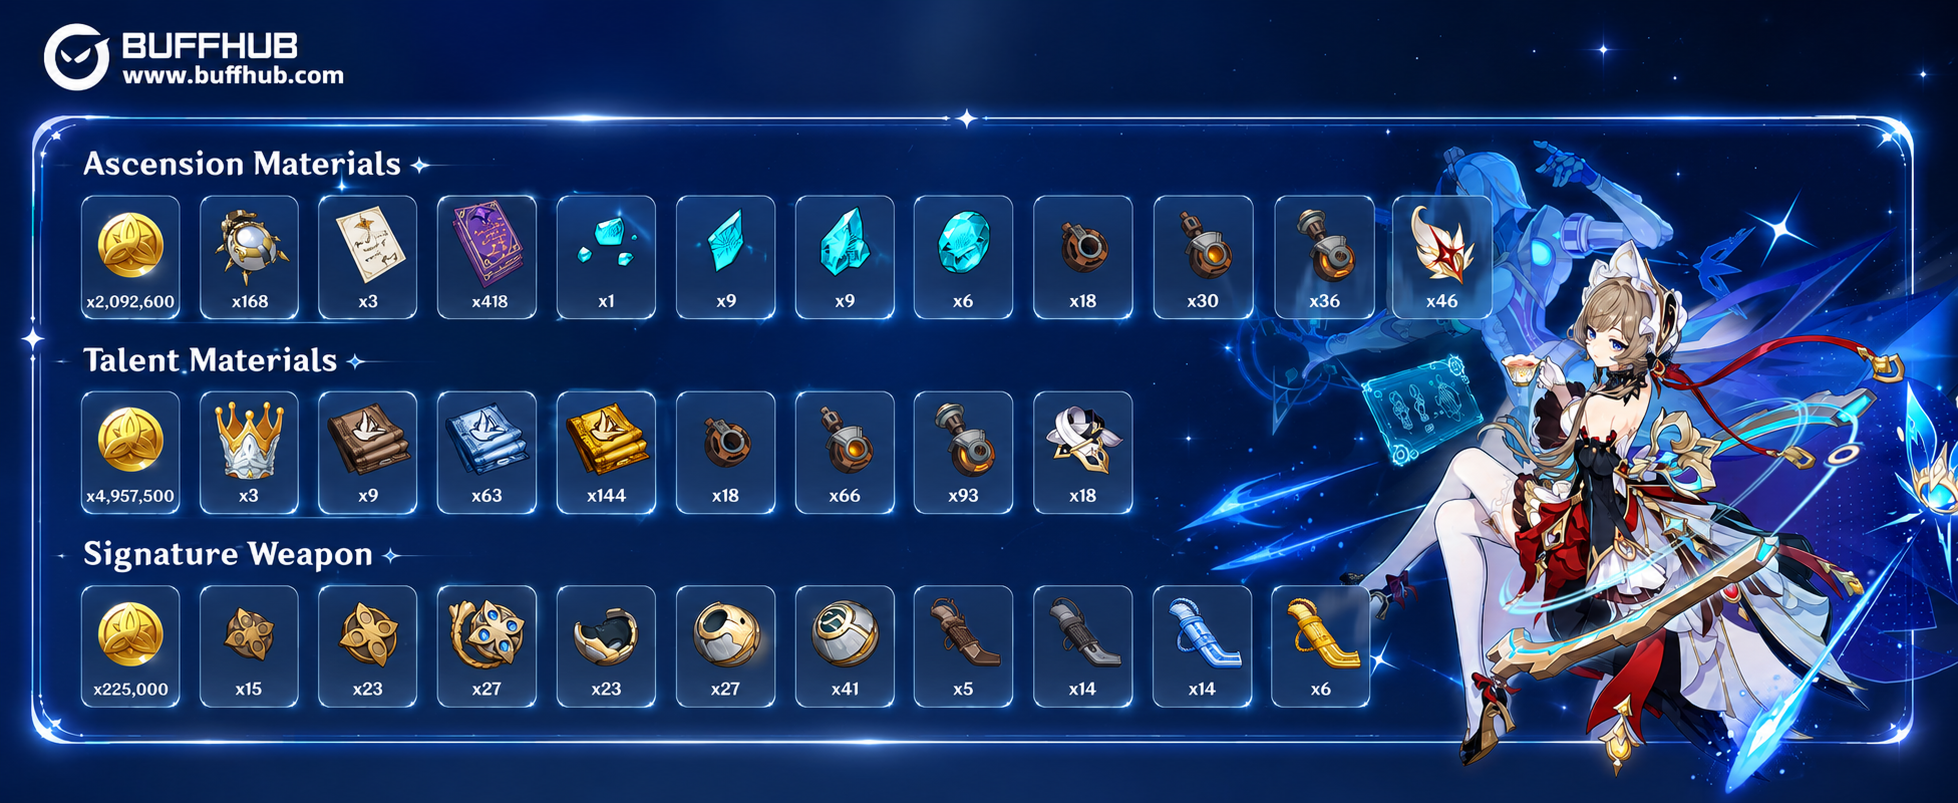
Character Ascension Materials (Level 1 to 90)
- Mora: x2,092,600
- Subdetection Unit: x168
- Character EXP: x3 Wanderer's Advice, x418 Hero's Wit
- Shivada Jade: x1 Sliver, x9 Fragment, x9 Chunk, x6 Gemstone
- Mechanical Parts: x18 Broken Drive Shaft, x30 Reinforced Drive Shaft, x36 Precision Drive Shaft
- Boss Drops: x46 Plume of the Fallen Watcher
Talent Upgrade Materials (Per Maxed 10/10/10 Talent)
- Mora: x4,957,500
- Talent Books: x9 Teachings of Vagrancy, x63 Guide to Vagrancy, x114 Philosophies of Vagrancy
- Mechanical Parts: x18 Broken Drive Shaft, x66 Reinforced Drive Shaft, x93 Precision Drive Shaft
- Weekly Boss Drops: x18 Madman's Restraint
- Rare Items: x3 Crown of Insight
Signature Weapon Ascension Materials (Level 1 to 90) – A Teaspoon of Transcendence
- Mora: x225,000
- Warrants: x15 Tattered Warrant, x23 Immaculate Warrant, x27 Frost-Etched Warrant
- Faction Materials: x5 Sundered Glory, x14 Unyielding Delusion, x14 Oblation, x6 Aureate Radiance of the Far-North Scions
- Missing Upgrade Components: x23 / x27 / x41 (Specific names are currently unknown and to be updated)
Which Constellations (Awakenings) Are Worth Getting?
| Level | Constellation Name | Effect Summary | Verdict / Value |
|---|---|---|---|
| C1 | Morrow After the Golden Dusk | The puppet's heat meter builds up 50% slower. All party members gain a flat 30% increased Stellar-Conduct DMG. | High Value. Greatly improves your combat rotation comfort. |
| C2 | An Heiress Gazed Into the Looking-Glass | Under her self-buff state, Charged Attack beam damage increases by 100% of her ATK. Consecutive shots increase future beam damage by 40% of her ATK (Max 3 stacks). | Amazing. This is a massive DPS spike for your main hyper-carry. |
| C3 | Refuse the Wake of Dusk, the Moonlit Yoke | Increases Normal Attack talent level by 3. | Medium. A steady, reliable damage increase. |
| C4 | In Knowledge Lies the World's True Ground | Triggering her unique reaction fires a coordinated cannon strike dealing 125% ATK as Cryo DMG (4s cooldown). | High Value. Provides great extra passive scaling over prolonged fights. |
| C5 | Of All Beside, She Takes No Part | Increases Elemental Burst talent level by 3. | Medium. Boosts the scale of your ultimate nuke window. |
| C6 | Narcissus Wakes, Her Eyes Upon the Dawn | The third beam becomes a continuous Cluster Beam, adding 4 extra instances of AoE Cryo hits scaling on her ATK. Elevates all her reaction damage by a separate 20% independent multiplier. | Whale Tier. Completely broken. Obliterates everything instantly. |
Best Stopping Point
For budget players or light spenders, C1 offers amazing utility by keeping your puppet active longer. If you want maximum competitive power, stopping at C2 gives you the biggest offensive bang for your buck.
Is Sandrone Worth Pulling?
Yes, Sandrone is absolutely worth pulling because she introduces a revolutionary combat archetype that transforms weaker reactions into high-tier elemental multipliers, while boasting an incredibly short 4-second elemental skill cooldown for unmatched battlefield mobility and massive self-buffs within her localized zone.
However, your team will need to master the strict active management of her mechanical companion's power meter to avoid overheating, and this carry remains somewhat restricted in team building since she heavily relies on high-frequency off-field Electro teammates to truly shine.
Frequently Asked Questions (FAQ)
How do I prevent Sandrone's mechanical companion from overheating?
Managing the puppet's power meter is the most important part of her gameplay loop. If you find your companion trapped in his sluggish overdrive state, immediately swap to this character and activate her Elemental Skill. Boarding her signature tactical hovermech cools his systems down incredibly fast, letting you get right back to your main damage stance.
Does this character suffer from extreme energy recharge issues?
Fortunately, her ultimate ability only costs a moderate 60 Energy and sits on a short 15-second cooldown. When you run her alongside optimal Electro batteries like Yae Miko or Beidou, their constant particle generation easily covers her ultimate requirements without forcing you to sacrifice offensive attributes on your gear.
Can I run this main DPS alongside traditional physical damage supports?
Even though she wields a claymore, she is not a physical damage dealer. Her entire kit is built around transforming standard baseline elemental reactions into high-scaling Cryo and localized elemental damage. Focus heavily on stacking her attack stats and pairing her with elemental shred or reaction-boosting supports rather than physical damage modifiers.


 Jul 07, 2026
 Genshin Impact