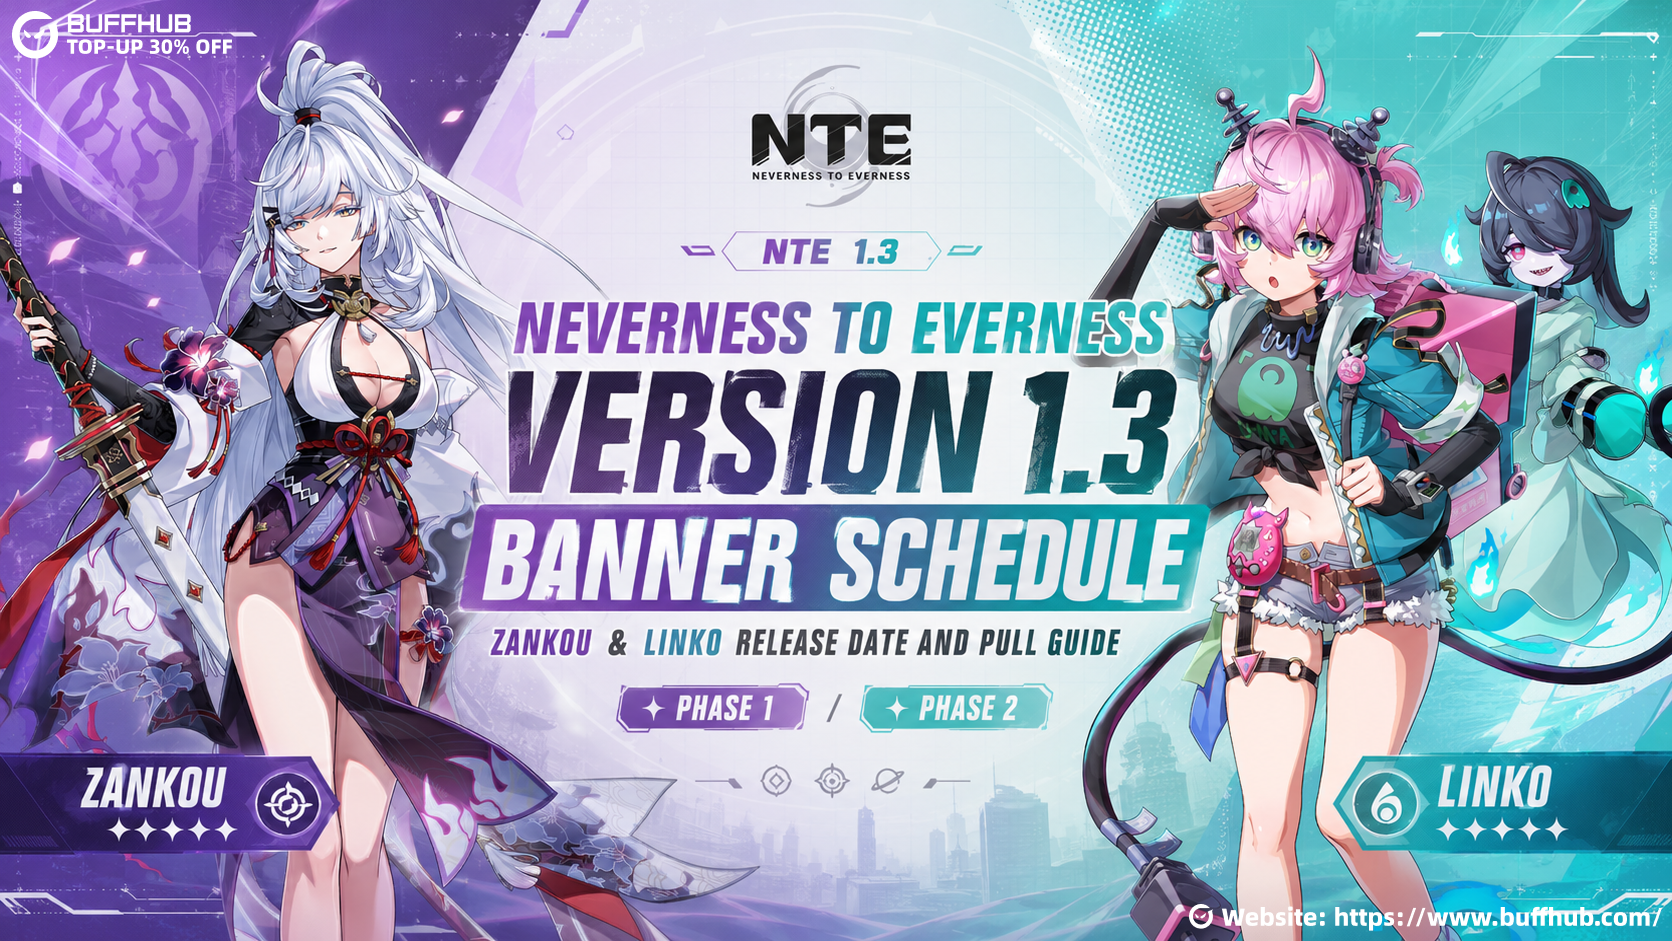


Zankou is an S-Class Incantation Damage character in Neverness to Everness built around DoT effects, Additional Attacks, and form switching. Her combat loop moves between a normal form and an Illusion form, letting her apply long-lasting DoTs, spread existing DoT effects across groups, reduce enemy Break, and set up a two-part Ultimate burst. She can take a major share of a team's damage output, while the supplied Lacrimosa composition also supports using her as a sub-DPS when another character handles the main on-field damage.



At Level 80, Zankou has 15,514 Base HP, 660 Base ATK, and 909 Base DEF, with 5% CRIT Rate and 50% CRIT DMG. Her Type III specialization adds another strong reason to build around CRIT, as each equipped Type III Module increases her CRIT DMG by 16%. Her signature Arc also provides a large amount of CRIT Rate, so her ideal main stats change quite a bit depending on whether you own it.








Terminology note: Zankou's official English character name and established NTE system terms are used throughout this guide. Several Zankou-specific skill, status, Awakening, and signature Arc names do not yet have a verifiable official English localization. Those names are marked as tentative translations rather than being presented as official terminology.
Who is Zankou and What is Her Playstyle?
Zankou is an Incantation DPS focused on sustained damage. Her normal form grants a damage buff, while her Illusion form converts key attacks into Additional Attacks and allows her to spread up to four existing DoT types from the target to nearby enemies. That makes her especially attractive in teams where other characters are already placing persistent damage effects instead of relying only on single-hit burst damage.
Her normal-form buff will be referred to here as Hunt (tentative translation). It increases Zankou's own damage by 25%. Her Illusion-form buff, referred to as Bewitchment (tentative translation), increases the team's DoT CRIT DMG by 25%. Switching forms correctly lets these effects overlap for a limited time, which is one of the main reasons her Redirect Skill timing matters.
She also brings direct interaction with Scorch. Her passive allows Scorch to stack up to three times, and when the team applies DoT stacks to a target already affected by Scorch, Zankou can apply additional Scorch stacks. This gives her a clear reason to play alongside characters such as Sakiri, whose own kit increases the DoT damage taken by enemies in the Scorch state.
There is also a useful start-of-combat advantage. Zankou begins battle with 100 Cycle Energy through one of her passives, although this can only activate once per battle and has a 30-second cooldown condition. While she is in the team, she additionally gains 100 Cycle Strength, giving her combat kit a strong connection to the Esper Cycle system rather than functioning as a pure standalone attacker.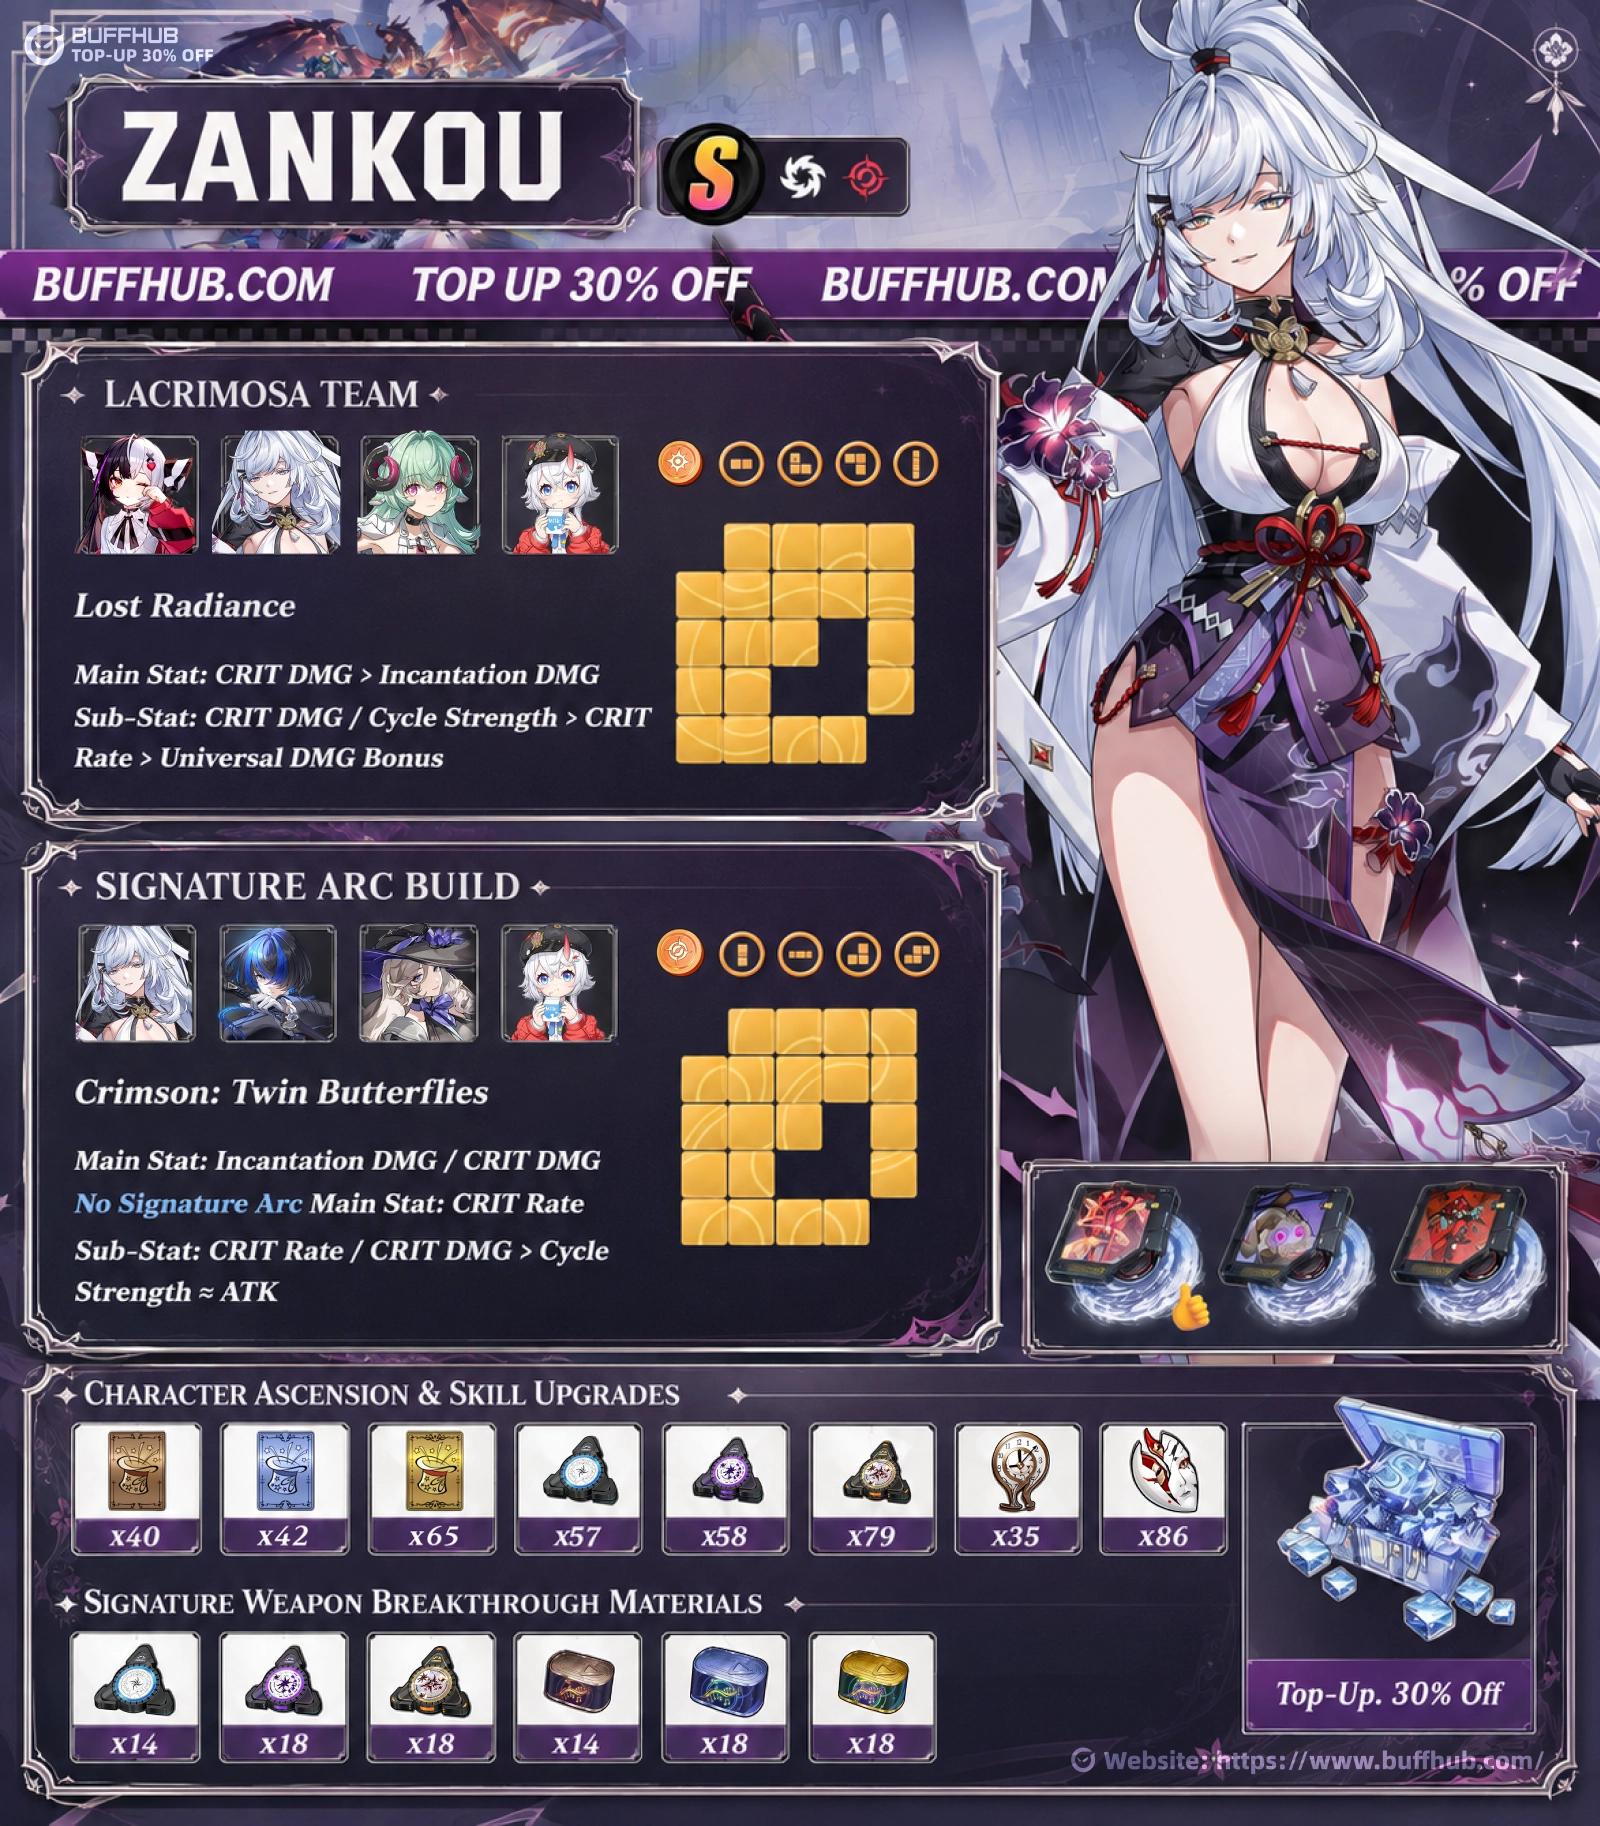
How Do Zankou's Skills Work?
Basic Attack: Wildfire and Nightmare Dance
Zankou's normal-form Basic Attack will be called Wildfire (tentative translation). It performs up to five consecutive attacks that deal Incantation DMG, with the fifth attack pulling enemies within range. While using this form, she benefits from Hunt, giving her a straightforward 25% damage increase.
During the first or second Wildfire attack, holding Basic Attack triggers a branch attack called Fleeting Shadow (tentative translation). At Skill Level 10, its listed multiplier is 31% × 3 + 342.4%. Her Critical Riposte, referred to here as Phantom Return (tentative translation), deals Incantation DMG with a 349.8% Level 10 multiplier and removes additional Break.
Once she switches into Illusion form, the Basic Attack becomes Nightmare Dance (tentative translation). It performs up to four consecutive attacks, and successful hits apply stacks of a DoT status referred to here as Heart Erosion (tentative translation). The third attack can also pull enemies together, which is useful because this form is where Zankou gains access to her strongest DoT-spreading mechanic.
Each Nightmare Dance sequence can spread up to four different DoT effects from the original target to enemies within range, including the original enemy. Its damage is also classified as Additional Attack DMG. This distinction matters because Zankou is not simply a character who places a DoT and waits; much of her actual combat output comes from repeatedly attacking while manipulating the DoT effects already present on the field.
Holding Basic Attack during the first or second Nightmare Dance attack triggers Falling Moon (tentative translation). It applies another Heart Erosion stack and also counts as an Additional Attack. This gives her another way to keep pressure on the target while maintaining the Illusion-form part of her rotation.
How Does Heart Erosion Work?
Heart Erosion (tentative translation) is one of Zankou's personal DoT effects. At the supplied Skill Level 10 values, each tick has a 3% damage ratio, triggers once every 1 second, lasts 30 seconds, and can stack up to 10 times. That long duration gives her time to establish the effect during one Illusion window and continue benefiting from it after switching forms.
The enhanced version of her form-entry Redirect Skill applies 5 Heart Erosion stacks at once. Her enhanced form-exit Redirect Skill applies another 5 stacks. A clean sequence can therefore reach the listed 10-stack cap without depending only on repeated Basic Attack applications.
Redirect Skill: Scarlet Shadow Flash
Zankou's normal-form Redirect Skill will be referred to as Scarlet Shadow Flash (tentative translation). Successfully casting it switches her into Illusion form. If she uses it shortly after the fourth or fifth Wildfire hit, Fleeting Shadow, or Phantom Return, she can trigger its enhanced version instead.
The enhanced Scarlet Shadow Flash applies 5 Heart Erosion stacks and heavily reduces Break across a wide area. Its supplied Level 10 damage ratio is 52.6% × 4 + 139.9%, compared with 45% × 4 + 119.9% for the standard version. Hunt is not removed immediately after the form change; instead, it remains for another 8 seconds.
Redirect Skill: Soul Displacement
While in Illusion form, her Redirect Skill changes into Soul Displacement (tentative translation). Casting it returns Zankou to her normal form. The Illusion state lasts 8 seconds, and during its final 3 seconds, Soul Displacement gains an enhanced version that should be treated as one of the main checkpoints in her rotation.
The enhanced cast deals substantially more damage, applies 5 Heart Erosion stacks, and triggers a special effect referred to here as Annihilation (tentative translation). That effect activates Zankou's second Ultimate. Both the normal and enhanced versions of Soul Displacement count as Additional Attacks, and Bewitchment remains active for another eight seconds after she returns to normal form.
At Level 10, standard Soul Displacement has a multiplier of 26.4% × 2 + 53.6% × 4 + 332.8%. The enhanced version rises to 39.6% × 2 + 80.2% × 4 + 499.4%. Missing the final-three-second window therefore costs more than just utility; it also gives up a large amount of direct damage and breaks the connection into her alternate Ultimate.
Ultimate: Heaven-Scorching Ash Dance
Zankou's standard Ultimate will be called Heaven-Scorching Ash Dance (tentative translation). It costs 120 Ultimate Energy and has a Level 10 damage ratio of 250.1% + 589.5%. Under normal conditions, this is the Ultimate she casts when her alternate Ultimate has not been activated.
Once Annihilation is triggered through the enhanced Soul Displacement, her alternate Ultimate becomes available. This second Ultimate will be called Blood Feast in a Dream (tentative translation). When active, it receives priority over Heaven-Scorching Ash Dance and deals 120.5% × 3 + 1037.5% at Level 10.
Blood Feast in a Dream applies 5 stacks of another DoT effect, referred to here as Venomflame (tentative translation). Venomflame has a 3% single-tick ratio, activates once per second, lasts 30 seconds, and can reach 10 stacks. It gives Zankou a second long-duration stacking DoT alongside Heart Erosion.
The Ultimate sequence does not end there. After successfully casting Blood Feast in a Dream, you have 5 seconds to cast one strengthened Heaven-Scorching Ash Dance without consuming Ultimate Energy. Its Level 10 ratio increases to 327.4% + 772%, making this follow-up a core part of her full burst rather than an optional extra hit.
Support Skill: Feed the Flame
Zankou's Support Skill will be referred to as Feed the Flame (tentative translation). She swings her blade to deal one instance of Incantation DMG. At Level 10, the supplied multiplier is 399.8%.
The Support Skill itself is simple compared with the rest of her kit, which is useful because her active rotation already contains a large number of timing requirements. The harder decisions revolve around her Redirect Skills and form timer rather than the Support Skill.
Best Zankou Rotation
The goal of the rotation is to enter Illusion form through the enhanced Redirect Skill, use that short window to build and spread DoTs, then leave through the enhanced exit before chaining both Ultimates. You should avoid switching forms randomly, because the enhanced versions contain a large amount of the kit's Break, DoT application, and burst value.
- Use Wildfire and reach the fourth or fifth hit, or trigger Fleeting Shadow or Phantom Return.
- Cast enhanced Scarlet Shadow Flash to apply 5 Heart Erosion stacks and enter Illusion form.
- Use Nightmare Dance to spread existing DoTs and continue dealing Additional Attack DMG.
- Keep track of the 8-second Illusion timer.
- During the final 3 seconds, cast enhanced Soul Displacement to apply another 5 Heart Erosion stacks and activate Blood Feast in a Dream.
- Cast Blood Feast in a Dream and apply 5 Venomflame stacks.
- Within 5 seconds, cast the strengthened Heaven-Scorching Ash Dance for the free enhanced follow-up.
This is a more timing-sensitive loop than a simple Skill-and-Ultimate DPS rotation. The most important mistake to avoid is leaving Illusion form too early or allowing the enhanced Soul Displacement window to expire, since that can interrupt the entire route into Blood Feast in a Dream.
What is the Best Weapon for Zankou?
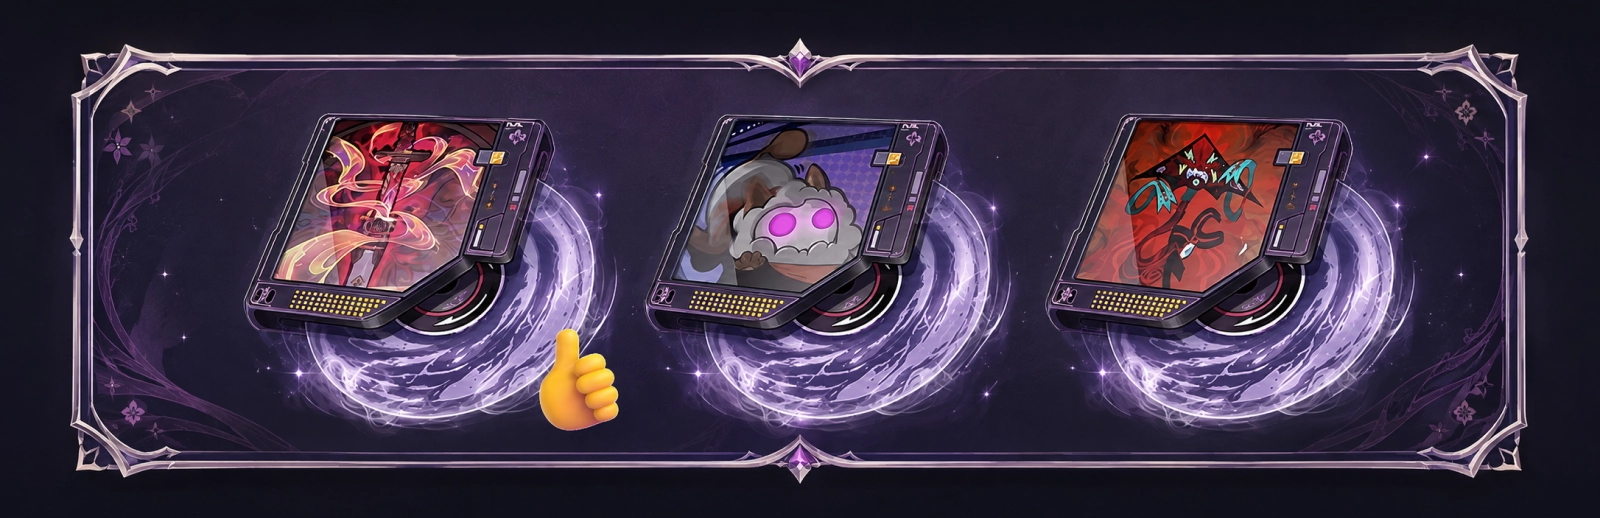 Zankou uses a Gas-type Arc, and her signature option is the Arc referred to in this guide as Heart-Devouring Wraithblade (tentative translation; official English Arc name not yet verified). At Level 80, it provides 570 ATK and 24% CRIT Rate. Those stats already line up well with a character whose Type III Modules naturally push CRIT DMG.
Its R1 effect, referred to here as Demon Blade: Life Bind (tentative translation), increases CRIT Rate by another 16%. Whenever the wearer deals Incantation DMG, they gain 9% CRIT DMG for 15 seconds, stacking up to seven times. A stack can be gained once every 0.3 seconds, and repeated triggers refresh the duration.
Zankou attacks frequently and deals Incantation DMG throughout her normal rotation, so she does not need to add an awkward setup action just to activate the Arc. The signature's high CRIT Rate is also the reason her recommended main stats can shift toward Incantation DMG and CRIT DMG instead of forcing more CRIT Rate onto her Console.
| Arc | Rarity | Level 80 Stats | Why Use It? |
|---|---|---|---|
| Heart-Devouring Wraithblade (tentative translation) | S-Class | 570 ATK, 24% CRIT Rate | Signature Arc. Adds another 16% CRIT Rate at R1 and stacks CRIT DMG whenever Zankou deals Incantation DMG. |
| Fluff of Finesse | S-Class | 512 ATK, 27.5% ATK Bonus | After a Critical Dodge, increases damage by 8% for 10 seconds, up to three stacks. |
| Watch Your Heads! | A-Class | 475 ATK, 40% CRIT DMG | At R5, grants 18% ATK for 15 seconds after a Redirect Skill. Its separate Lakshana DMG effect does not directly match Zankou's Incantation damage. |
Fluff of Finesse is the cleaner S-Class alternative. Its 27.5% ATK Bonus is always useful, and Critical Dodges can build up to three stacks of its 8% damage buff. It asks for more active dodge execution than the signature, but it does not contain an obvious stat or damage-type mismatch.
Watch Your Heads! can still function as a lower-rarity option because it gives 40% CRIT DMG and an 18% ATK buff after using a Redirect Skill at R5. However, the passive also increases Lakshana DMG against targets affected by Remora and Stain, and Zankou deals Incantation DMG instead. In other words, part of the Arc's effect is wasted on her, so it should be treated as a fallback rather than a true replacement for her signature.
Neither alternative should be described as a free weapon. The supplied information specifically identifies them only as lower substitutes, not F2P rewards.
Which Gear and Stats Maximize Zankou's Damage?
Zankou has two supplied Console setups, each tied to a different team. Both builds use a large number of Type III Modules, which is especially valuable because her Type III specialization grants 16% CRIT DMG per Type III Module. That makes balancing CRIT Rate against CRIT DMG one of the main decisions when choosing her stats.
Lost Radiance Build
For the Lacrimosa + Zankou + Iroi + Sakiri composition, the supplied recommendation is Lost Radiance. Its Epic 2-piece effect gives 10% Cosmos DMG, while its Legendary 4-piece effect causes the wearer to ignore 25% of enemy DEF for 20 seconds after casting an Ultimate. The DEF Ignore does not stack.
There is an important tradeoff here: Zankou is an Incantation character, so the Cosmos DMG from the 2-piece effect does not directly improve her Incantation attacks. This makes Lost Radiance look more like a team-specific setup built around its powerful post-Ultimate DEF Ignore window than a perfectly matched general-purpose Zankou set. If you use this build, the supplied main-stat priority is CRIT DMG > Incantation DMG, while the preferred substats are CRIT DMG and Cycle Strength > CRIT Rate > Universal DMG Bonus.
Crimson: Twin Butterflies Build
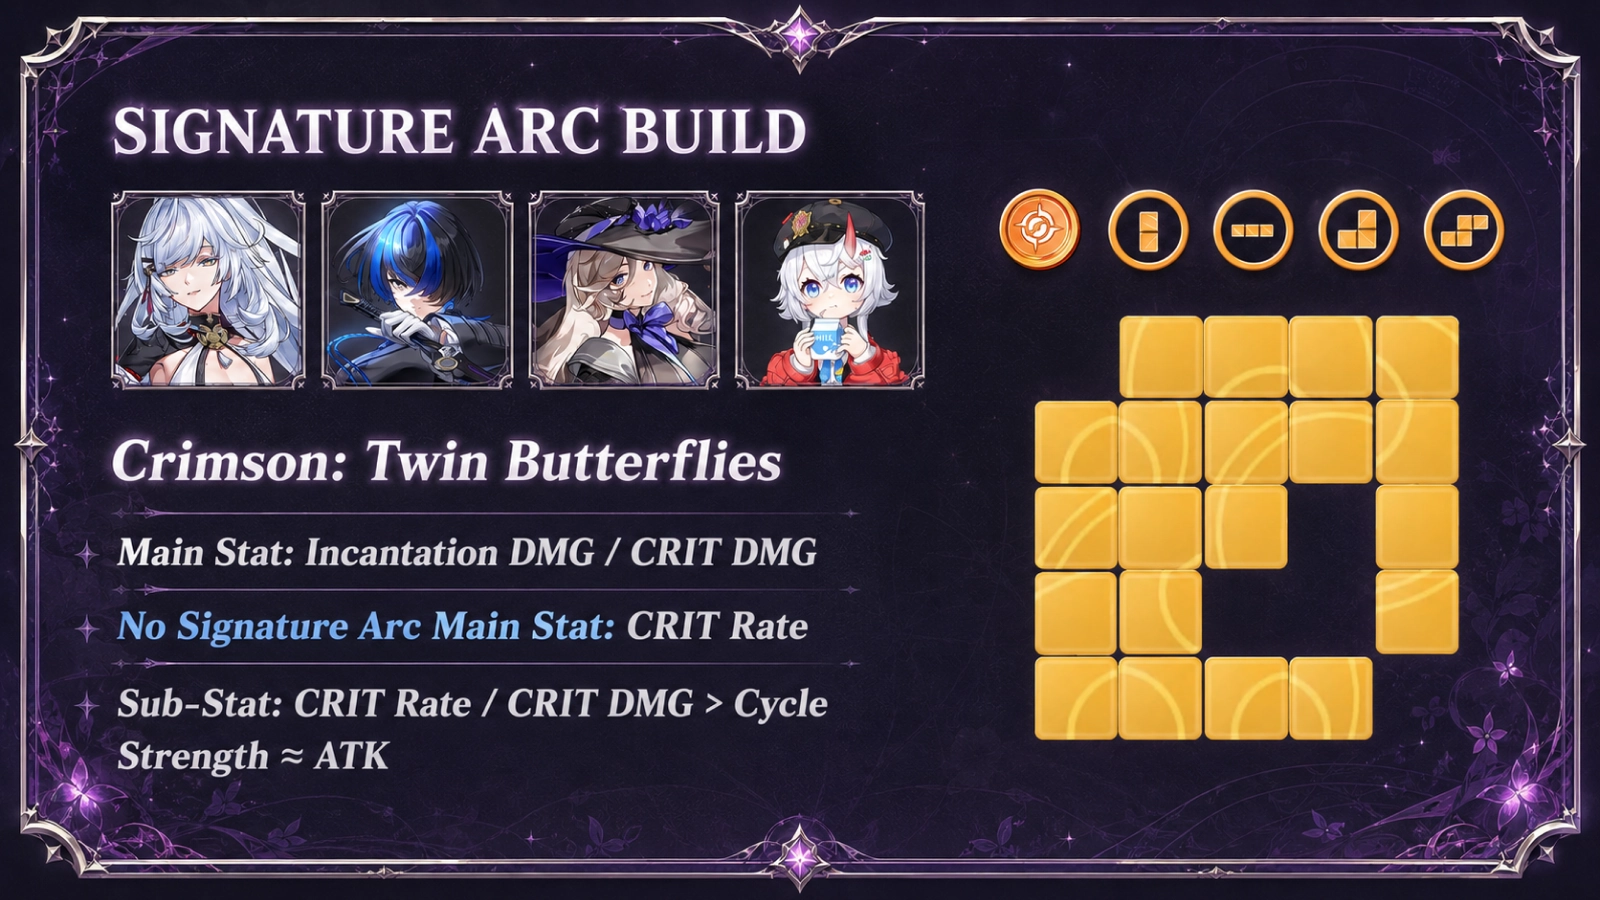
For the Zankou + Daffodill + Jiuyuan + Sakiri team, the supplied recommendation is Crimson: Twin Butterflies. Its Epic 2-piece effect gives 10% Incantation DMG, which directly matches Zankou's Esper type. Its Legendary 4-piece effect grants 6% ATK whenever a nearby enemy takes Incantation DMG from the team, stacking up to six times, with each stack lasting 10 seconds.
This is the more obvious direct damage match on paper because both parts of the set can benefit the build. Sakiri also deals Incantation DMG, giving the team another source that can contribute to the 4-piece trigger condition. The set therefore fits a composition where Incantation damage is being applied frequently rather than relying only on Zankou's own hits.
| Setup | Cartridge | Main Stats | Substats |
|---|---|---|---|
| Lacrimosa Team | Lost Radiance | CRIT DMG > Incantation DMG | CRIT DMG / Cycle Strength > CRIT Rate > Universal DMG Bonus |
| Signature Arc Build | Crimson: Twin Butterflies | Incantation DMG / CRIT DMG | CRIT Rate / CRIT DMG > Cycle Strength ≈ ATK |
| No Signature Arc | Crimson: Twin Butterflies | CRIT Rate | CRIT Rate / CRIT DMG > Cycle Strength ≈ ATK |
The signature Arc changes the build because it already supplies a large amount of CRIT Rate. With it equipped, you have more room to take Incantation DMG or CRIT DMG as your main offensive stats. Without it, CRIT Rate becomes much more important so that her large CRIT DMG investment does not go to waste.
Recommended Module Layout
The supplied Console layouts use the following distribution:
- Type II Module ×2
- Type III Module ×4
- Type IV Module ×2
With four Type III Modules, Zankou receives a large amount of CRIT DMG from her specialization alone. This is another reason a no-signature build needs to pay closer attention to CRIT Rate, while the signature Arc build can lean harder into offensive multipliers.
What Are the Best Team Comps for Zankou?
Team 1: Lacrimosa + Zankou + Iroi + Sakiri
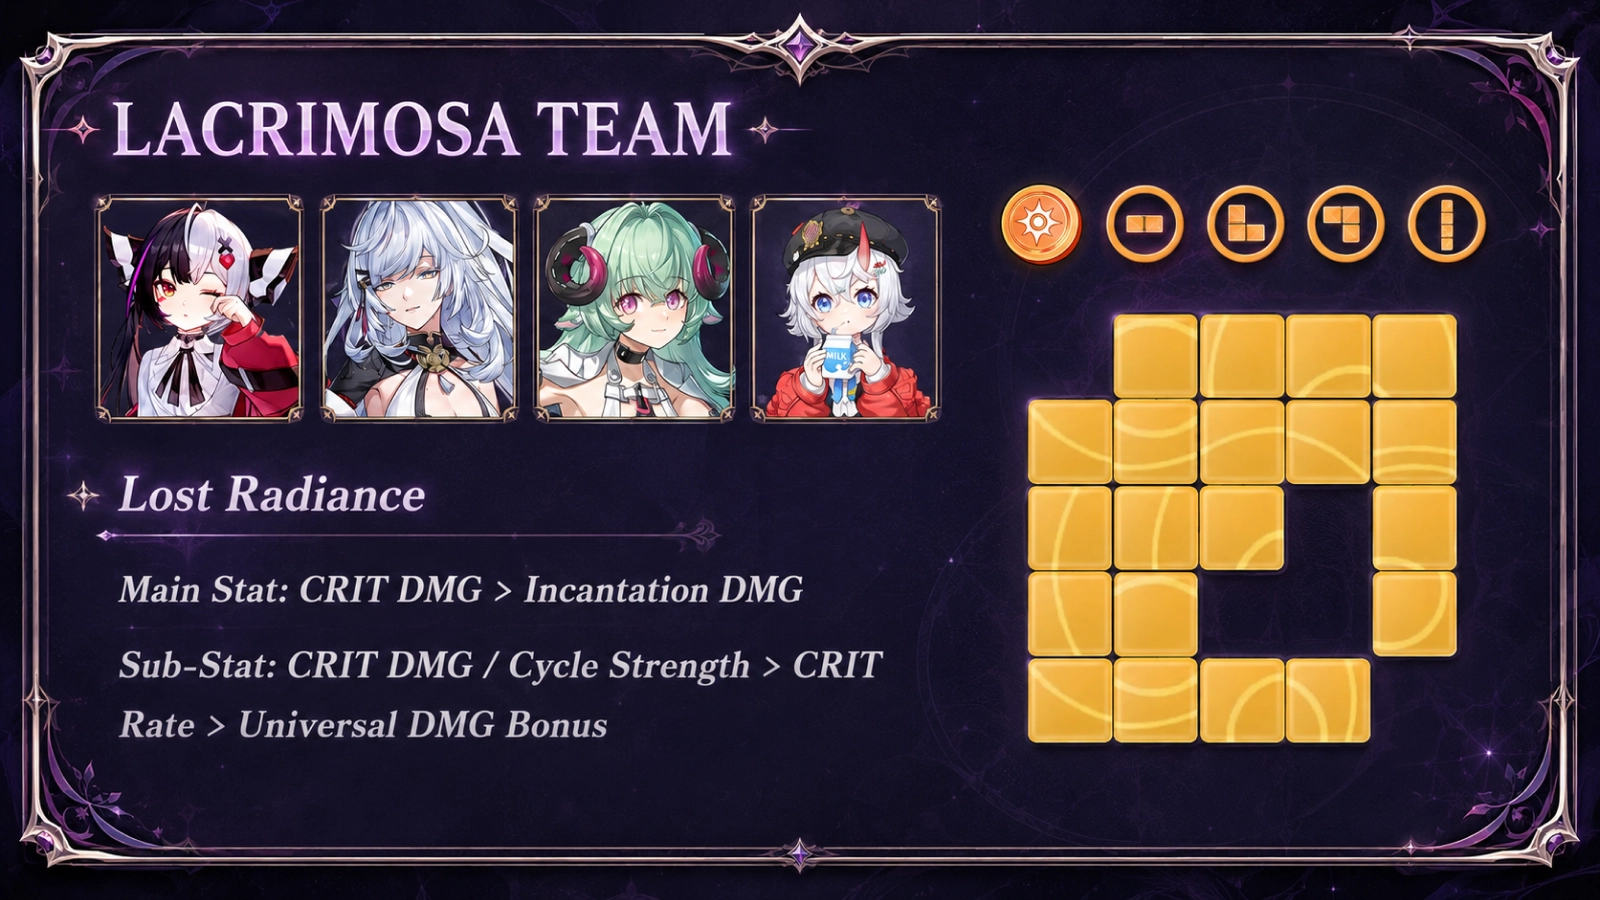 This lineup uses Lacrimosa as the main DPS and Zankou as a sub-DPS and DoT enabler. Lacrimosa's kit is built around Nightmare, giving the team another persistent damage effect that fits naturally with Zankou's ability to spread multiple DoT types during Nightmare Dance. Instead of asking Zankou to carry every second of field time, the team can establish DoTs first and then bring her in when there are useful effects ready to spread.
Sakiri is one of the most direct synergy pieces. Her passive Can I Eat This? is a Scorch Enhancement that increases the DoT damage taken by a target in the Scorch state by 25% for each type of DoT effect, up to 100%. Zankou can spread as many as four DoT types during her Illusion-form Basic Attack, so the two kits are clearly aiming at the same sustained-damage game plan.
Sakiri also brings additional team utility. Her Ultimate increases the ATK of all teammates other than herself based on 30% of her Base ATK for 20 seconds. Her passive Impish Trick reduces enemy DEF by 10% for 20 seconds after inflicting Airborne or Suppress, giving the team another way to increase its damage during important windows.
Iroi supplies the sustain that the other three characters lack. Her Skill heals the full team and grants an ATK bonus equal to 20% of her Base ATK for 20 seconds. Her Sympathetic Nerves passive also grants the team an additional 5% DEF Ignore for 20 seconds whenever she performs healing, giving the lineup both survivability and offensive support.
Team 2: Zankou + Daffodill + Jiuyuan + Sakiri
The second supplied team gives Zankou a more central damage role and pairs her with the Crimson: Twin Butterflies Cartridge. Sakiri remains valuable because she supplies Incantation damage, team ATK, crowd control, and Scorch-related DoT amplification. Having another Incantation character also helps maintain the Cartridge's condition for gaining ATK when enemies take Incantation DMG from the team.
Daffodill focuses much more heavily on Break. Her Redirect Skill builds Resonance stacks when the team uses Support Skills, increasing both its damage and Break contribution before upgrading into Echoes at maximum stacks. Her Blade Draw passive can further reduce the target's Break cap while Discord is active, and several of her Awakenings increase the team's ability to punish Broken enemies.
Jiuyuan adds burst damage and battlefield control through her Lethal Rose Pact system. She can mark enemies, build Rose Pact Bullets, and trigger Pact Settlement through her Ultimate. This gives the composition another source of damage that does not require Zankou to stay on field for the entire fight.
The two teams therefore ask Zankou to do slightly different jobs. The Lacrimosa lineup leans harder into DoT spreading and sub-DPS play, while the Daffodill and Jiuyuan lineup gives her more room to act as a central Incantation attacker with Break and burst support around her.
What Materials Are Needed to Upgrade Zankou?
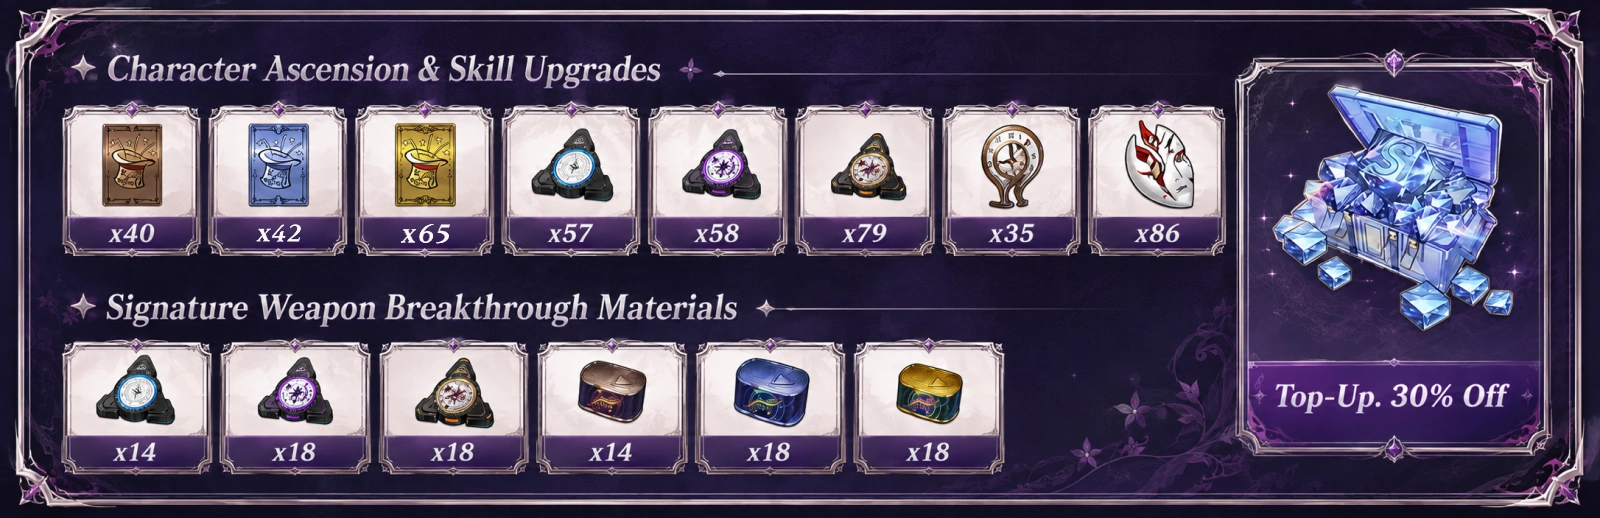 Taking Zankou from Level 1 to Level 80 requires Beetle Coins, three tiers of Numeral materials, and Nest Guard Fragments. Fully raising the listed combat skills requires a much larger pool of Beetle Coins plus Dreamless Seed, Fons, and several additional skill materials.
| Upgrade | Material | Amount |
|---|---|---|
| Character Level | Beetle Coin | 525,000 |
| Character Level | Blurred Numeral | 17 |
| Character Level | Unsolved Numeral | 18 |
| Character Level | Distorted Numeral | 15 |
| Character Level | Nest Guard Fragment | 86 |
| Skills | Dreamless Seed | 96 |
| Skills | Fons | 38,400 |
| Skills | Beetle Coin | 1,818,000 |
| Skills | Blurred Numeral | 40 |
| Skills | Unsolved Numeral | 40 |
| Skills | Distorted Numeral | 64 |
| Skills | First Expectations | 40 |
| Skills | Known Weariness | 42 |
| Skills | Black Hat | 65 |
| Skills | Eternal Memory | 35 |
These skill totals correspond to the supplied target levels of 10 / 10 / 10 / 10 / 5 / 2. No separate skill-leveling priority was provided, so there is not enough evidence to claim that one of her major combat skills should always be maxed before the others. Her Basic Attack, Redirect Skill, and Ultimate are all directly involved in the same main damage loop.
Which Constellations (Awakenings) Are Worth Getting?
Zankou's Awakening effects can dramatically change how smoothly her kit works. Some are simple damage or survival upgrades, while others remove restrictions from her form system or add new scaling to her DoT and Ultimate mechanics. The following English Awakening names are tentative translations because verifiable official English names are not yet available.
| Awakening | Effect | Value / Verdict |
|---|---|---|
| A1 – Abyss in Her Eyes (tentative translation) | Wildfire, Fleeting Shadow, Phantom Return, enhanced Scarlet Shadow Flash, and enhanced Soul Displacement can spread DoTs. Hunt and Bewitchment become permanent until Zankou is defeated. Hunt increases her damage by 40%, while Bewitchment increases team DoT CRIT DMG by 50%. | Excellent. One of the biggest quality-of-life and damage upgrades because it removes much of the form-dependent buff management. |
| A2 – Kiss from the Abyss (tentative translation) | When Zankou participates in triggering Scorch or Hexed, she gains 1 Flame Reserve stack. The next Heaven-Scorching Ash Dance deals 150% increased final damage. Maximum 1 stack. | Excellent burst upgrade. A major increase to one of her strongest Ultimate hits. |
| A3 – Kissmark Dreamglimpse (tentative translation) | Hunt also grants 50% interruption resistance. Bewitchment restores 4% of Zankou's maximum HP every second. | Strong comfort upgrade. Helps her complete time-sensitive rotations without being interrupted and adds substantial self-sustain. |
| A4 – Nightmare in Bloom (tentative translation) | Blood Feast in a Dream activates immediately whenever Heaven-Scorching Ash Dance becomes available. Flame Reserve also affects Blood Feast in a Dream, and both Ultimates share the same damage-boost stack. | Strong. Improves access to her two-Ultimate sequence and increases the value of Flame Reserve. |
| A5 – Blood at Full Bloom (tentative translation) | The first hit of enhanced Scarlet Shadow Flash guarantees Break against a valid target once per battle. The effect does not work on Bosses in character-balance modes. Zankou also increases team Break DMG by 300% while in the team. | Very strong in Break-focused teams. More specialized than her early damage Awakenings. |
| A6 – Bloodstained Eyes (tentative translation) | The final hit of Annihilation gains 12% damage for every DoT stack on the target, up to 240%. Against multiple enemies, the bonus is calculated separately using each target's own DoT stack count. | High damage ceiling. Best suited to teams capable of building very high combined DoT stacks. |
| Resonance Lv.3 – Scarlet Feast (tentative translation) | Raises the skill levels of Wildfire, Nightmare Dance, Scarlet Shadow Flash, Soul Displacement, Heaven-Scorching Ash Dance, and Blood Feast in a Dream by 1. Both Ultimate multipliers also increase by 20%. | Major direct damage increase. |
| Resonance Lv.6 – Venomflame Scorches the Heart (tentative translation) | After dealing damage, Zankou gains 40% ATK for 20 seconds. After defeating a target affected by Scorch, she gains a 60-second effect that immediately pushes Scorch to its maximum stacks whenever she applies a DoT. | Very powerful at maximum investment, especially in fights where Scorched targets can be defeated repeatedly. |
If you want the strongest early-value upgrade from the supplied effects, A1 is the standout. Making Hunt and Bewitchment permanent greatly simplifies the form-switching restrictions while increasing both personal damage and team DoT CRIT DMG. A2 is the next major offensive target for players who want to push her Ultimate burst, thanks to the 150% final-damage increase tied to Flame Reserve.
Later Awakenings are powerful, but their value becomes more specialized. A5 heavily favors Break-oriented teams, while A6 becomes better as the team can maintain more total DoT stacks on the target. Players with limited resources should therefore look at what their existing team actually supports instead of judging every Awakening only by its maximum possible number.
Is Zankou Worth Pulling?
Pre-release verdict: Yes for DoT-focused or Scorch-focused accounts, but she is not an automatic pull for every roster. Her supplied kit has a clear identity: she can apply two stacking DoTs of her own, spread several existing DoT types, deal repeated Additional Attacks, contribute Break, and chain two Ultimates when the rotation is executed correctly. Teams already built around Lacrimosa or Sakiri have obvious ways to use those tools.
She is also more flexible than a pure hyper-carry. The Lacrimosa setup can use Zankou as a sub-DPS and DoT spreader, while the Daffodill, Jiuyuan, and Sakiri lineup gives her more responsibility for direct damage. That flexibility is valuable if you already own multiple pieces from either team instead of needing to build an entirely new roster around her.
The biggest concern is execution. Zankou has an 8-second Illusion state, a specific final-three-second enhanced Redirect window, and a 5-second follow-up Ultimate window. Players looking for a very simple attacker may find her more demanding than characters whose damage comes from pressing Skill and Ultimate whenever they are ready.
Her signature Arc also improves the build substantially by solving much of her CRIT Rate requirement. She still has usable alternatives, but one of the lower-rarity options wastes part of its passive because it boosts Lakshana DMG rather than Incantation DMG. For that reason, players planning to skip the signature should pay closer attention to their existing Gas Arcs and CRIT Rate options before committing resources.
Frequently Asked Questions (FAQ)
Does Zankou need her signature Arc?
No, but the signature Arc is clearly the cleanest option in the supplied build. It gives 570 ATK and 24% CRIT Rate, then adds another 16% CRIT Rate at R1 and stacking CRIT DMG whenever the wearer deals Incantation DMG. Fluff of Finesse is the stronger general alternative from the supplied options, while Watch Your Heads! works as a fallback but contains a Lakshana-specific damage effect that Zankou cannot fully use.
Should Zankou use CRIT Rate or CRIT DMG?
It depends heavily on her Arc. With her signature Arc, the supplied recommendation favors Incantation DMG and CRIT DMG because the weapon already contributes a large amount of CRIT Rate. Without the signature, CRIT Rate becomes the more important main-stat choice, while CRIT Rate, CRIT DMG, Cycle Strength, and ATK remain the main substats to look for.
How do you activate Zankou's second Ultimate?
Use the enhanced version of Scarlet Shadow Flash to enter Illusion form, then continue attacking until the final three seconds of the eight-second Illusion timer. Cast enhanced Soul Displacement during that window to trigger Annihilation, which activates Blood Feast in a Dream. After using it, cast the strengthened Heaven-Scorching Ash Dance within five seconds to complete the full Ultimate sequence.
Is Zankou a main DPS or sub-DPS?
She can fill either role in the supplied teams. The Lacrimosa + Zankou + Iroi + Sakiri lineup specifically places her in a sub-DPS role, using her to spread DoTs and add Additional Attack damage around Lacrimosa's main DPS window. The Zankou + Daffodill + Jiuyuan + Sakiri composition gives her more room to act as a central Incantation damage dealer.
What is the best Zankou team for DoT damage?
From the supplied options, Lacrimosa + Zankou + Iroi + Sakiri has the clearest DoT-focused synergy. Lacrimosa supplies Nightmare, Zankou spreads multiple DoT types, and Sakiri increases DoT damage taken by Scorched enemies by 25% for each DoT type, up to 100%. Iroi completes the lineup with healing, ATK support, and team DEF Ignore.