

Arlecchino is a 5-Star Pyro Polearm main DPS in Genshin Impact whose combat loop is built around Bond of Life. This resource powers her Pyro-infused Normal Attacks and gives her a naturally front-loaded damage profile: she hits hardest when her Bond of Life is high, then gradually spends it as she stays on the field. The Knave also follows a special survival rule. While in combat, other characters cannot heal her, so her own Elemental Burst, shielding, damage reduction, clean rotations, and positioning matter more than they do for many standard carries.



This Arlecchino build guide covers her Bond of Life mechanics, best weapons, Fragment of Harmonic Whimsy build, team comps, upgrade materials, constellations, and the best investment stopping points. If you are comparing her pull value with other characters, check the current and upcoming Genshin Impact banner schedule before committing your Primogems.










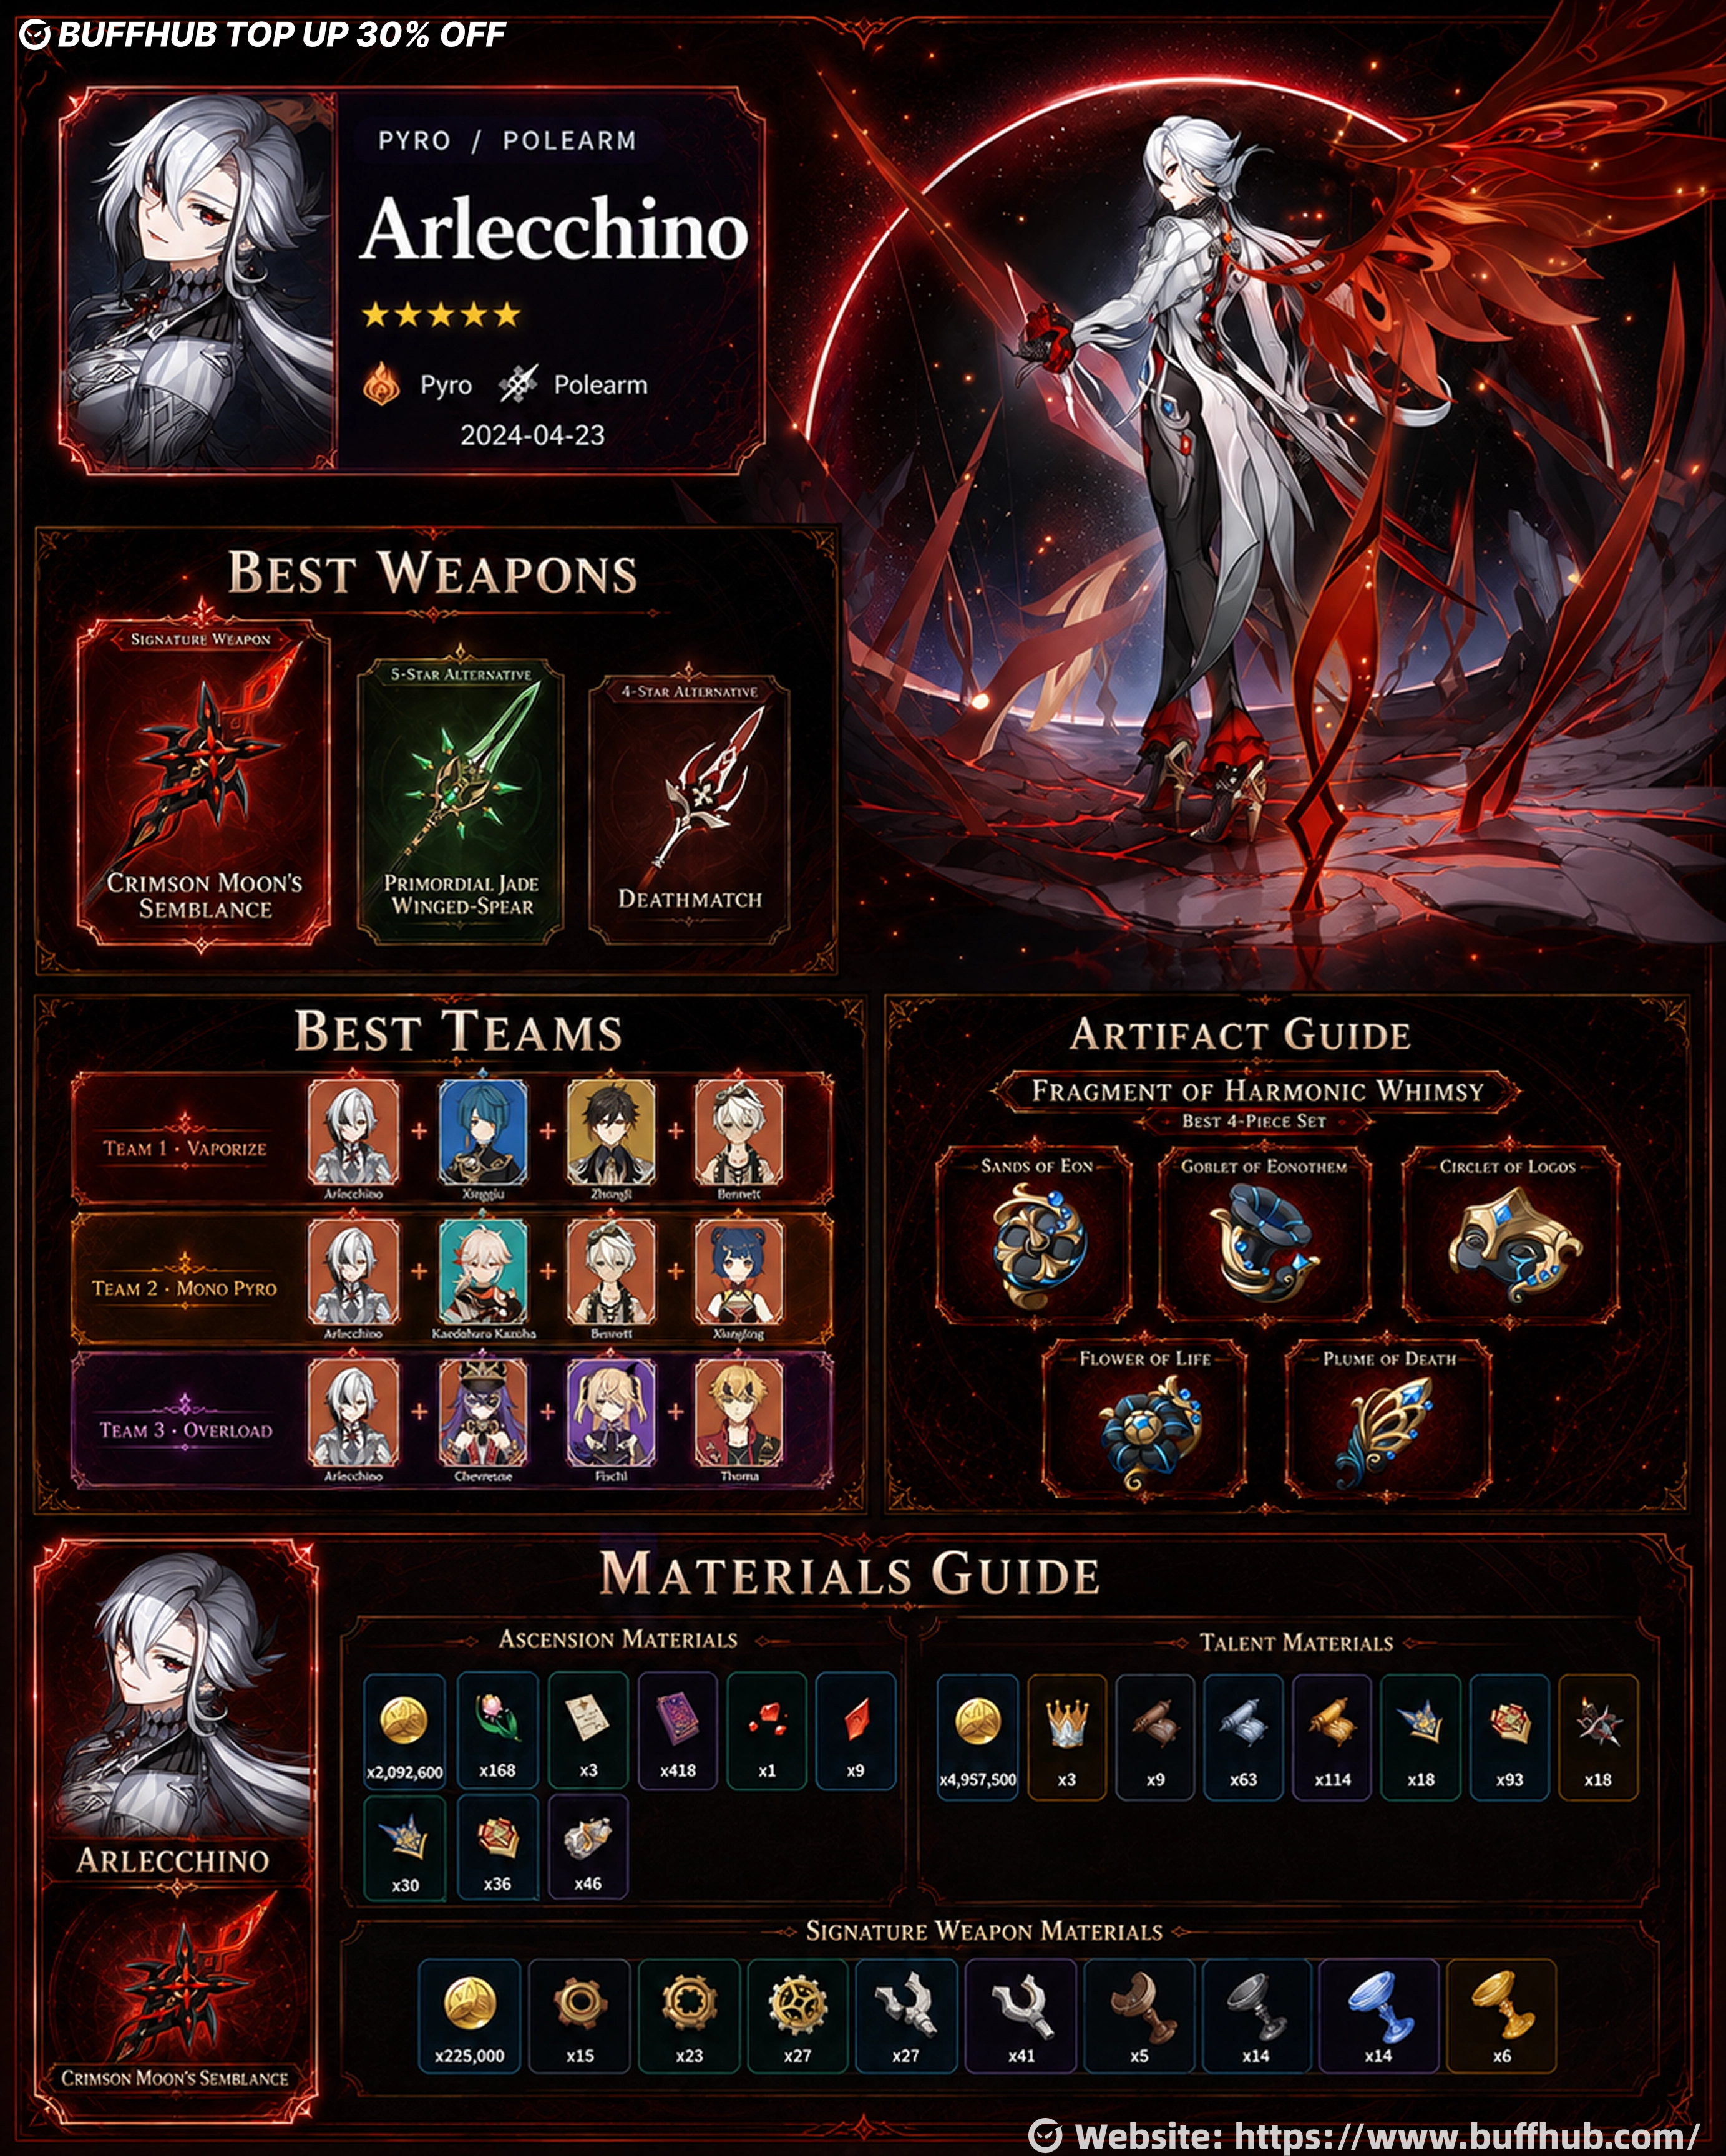
Who is Arlecchino and What is Their Playstyle?
Arlecchino is an on-field Pyro carry whose damage is heavily tied to Bond of Life. When that resource reaches at least 30% of Max HP, she enters Masque of the Red Death. Her Normal, Charged, and Plunging Attacks then become Pyro DMG, the infusion cannot be overridden, and her Normal Attacks gain extra damage based on the current Bond of Life percentage. Each empowered Normal Attack also consumes part of the resource, so the basic rhythm is easy to understand: build Bond of Life, enter the damage window, then spend it through Normal Attacks.
Why does Bond of Life matter so much?
While Masque of the Red Death is active, the extra Normal Attack damage is based on ATK × current Bond of Life percentage × skill ratio. At Talent Level 10, the listed Masque of the Red Death increase is 238%, and each empowered Normal Attack consumes 7.5% of her current Bond of Life. Because the consumption is calculated from the current amount instead of subtracting a fixed amount from the original total, the resource falls faster near the start of the sequence and more slowly later.
That same current Bond percentage also affects her extra damage, which is why the rotation is naturally front-loaded. The first attacks benefit from the highest Bond value, while later attacks lose part of that bonus as the resource is spent. In practical play, this gives her a clear burst window rather than completely flat damage from the beginning to the end of a combo.
Can Arlecchino be healed by teammates?
Not during combat. Her passive The Balemoon Alone May Know gives her a 40% Pyro DMG Bonus while also restricting combat healing to her own Elemental Burst, Balemoon Rising. This makes shields and damage reduction much more valuable than they are for many other Pyro carries. Players who are not confident with dodging should give extra consideration to defensive teammates such as Zhongli, Xingqiu, Dehya, Thoma, or Beidou, all of whom appear in the supplied team recommendations.
How Do Arlecchino's Skills Work?
Normal Attack: Invitation to a Beheading
Her Normal Attack string performs up to six consecutive spear strikes. The Charged Attack deals 179.5% damage at Talent Level 10 and costs 25 Stamina. Holding the input also lets her move at high speed for up to five seconds at a cost of 40 Stamina per second.
| Attack | Talent Level 10 Multiplier |
|---|---|
| 1st Hit | 93.9% |
| 2nd Hit | 103% |
| 3rd Hit | 129.3% |
| 4th Hit | 73.4% + 73.4% |
| 5th Hit | 138.3% |
| 6th Hit | 168.8% |
| Charged Attack | 179.5% |
Masque of the Red Death
This is the core of the build. Once Bond of Life reaches at least 30% of Max HP, her Normal, Charged, and Plunging Attacks become Pyro and cannot be overridden. Normal Attacks gain additional Bond of Life scaling, and every empowered hit consumes 7.5% of the current Bond. This consumption can occur once every 0.03 seconds, and each successful trigger reduces All Is Ash cooldown by 0.8 seconds. Because the main damage window depends so heavily on these attacks, Normal Attack is her highest-priority talent.
Elemental Skill: All Is Ash
All Is Ash summons Balemoon Bloodfire, damages nearby opponents, then performs a dash-cleave that deals AoE Pyro DMG. At Talent Level 10, its initial Spike DMG is 26.7%, the Cleave deals 240.4%, Blood-Debt Directive deals 57.2%, and the Skill has a 30-second cooldown. Enemies hit by the attack receive Blood-Debt Directive, which is the key setup for rebuilding Bond of Life.
How does Blood-Debt Directive work?
A Blood-Debt Directive lasts for 30 seconds and deals Pyro DMG every five seconds, up to two instances, with that damage counting as Elemental Skill DMG. Arlecchino can absorb nearby Directives with a Charged Attack or with Balemoon Rising. Each standard Directive absorbed grants Bond of Life equal to 65% of Max HP, while the total Bond gained through Directives within 35 seconds after using the Skill is capped at 145% of Max HP. Using All Is Ash again during that period restarts both the duration and the limit.
Should you wait before absorbing Blood-Debt Directive?
Against a durable single target, yes. Her passive Agony Alone May Be Repaid upgrades Blood-Debt Directive into Blood-Debt Due five seconds after application. Absorbing the upgraded mark grants Bond of Life equal to 130% of Max HP, twice the value of a normal Directive. The passive also grants the same 130% Bond if an enemy carrying one of her Directives is defeated, so against a boss that will survive the setup, waiting five seconds creates a much stronger opening damage window.
Elemental Burst: Balemoon Rising
Her Burst absorbs and clears nearby Blood-Debt Directives, deals large AoE Pyro DMG, resets the cooldown of All Is Ash, and heals Arlecchino based on her Bond of Life and ATK. At Talent Level 10, it deals 666.7% damage, restores HP equal to 150% of Bond of Life + 150% ATK, has a 15-second cooldown, and costs 60 Energy. Because other characters cannot normally heal her in combat, the Burst should be treated as both an offensive tool and an emergency survival button rather than something you cast automatically whenever it is available.
Passive: Strength Alone Can Defend
For every 100 ATK above 1,000, she gains 1% All Elemental RES and Physical RES, up to a maximum increase of 20%. ATK therefore improves more than raw damage in this build; it also contributes to personal durability.
Talent priority
Normal Attack > Elemental Skill = Elemental Burst. Normal Attack has the highest priority because leveling it improves both the standard attack multipliers and the Masque of the Red Death bonus. Skill and Burst mainly gain direct multiplier increases from talent levels, so they come after the core Normal Attack talent.
Best Arlecchino rotation
A safe general rotation is to apply Blood-Debt Directive first, use the rest of the team to set up buffs or defensive effects, then return to your main DPS once the mark is ready. Against a durable single target, waiting roughly five seconds for Blood-Debt Due before collecting it can significantly improve the opening Bond of Life value.
- Use All Is Ash to apply Blood-Debt Directive.
- Set up your supports while the mark develops.
- Use a Charged Attack to absorb the mark and gain Bond of Life.
- Stay on field and use Pyro-infused Normal Attacks during the main burst window.
- Use Balemoon Rising when you need healing, Directive absorption, or a Skill cooldown reset, then begin the next setup.
Do not rush Directive collection in every boss fight. Moving from 65% to 130% Bond of Life can materially change the strength of the first Normal Attack sequence, so the five-second setup has real value when the enemy will survive long enough for it to matter.
What is the Best Weapon for Arlecchino?
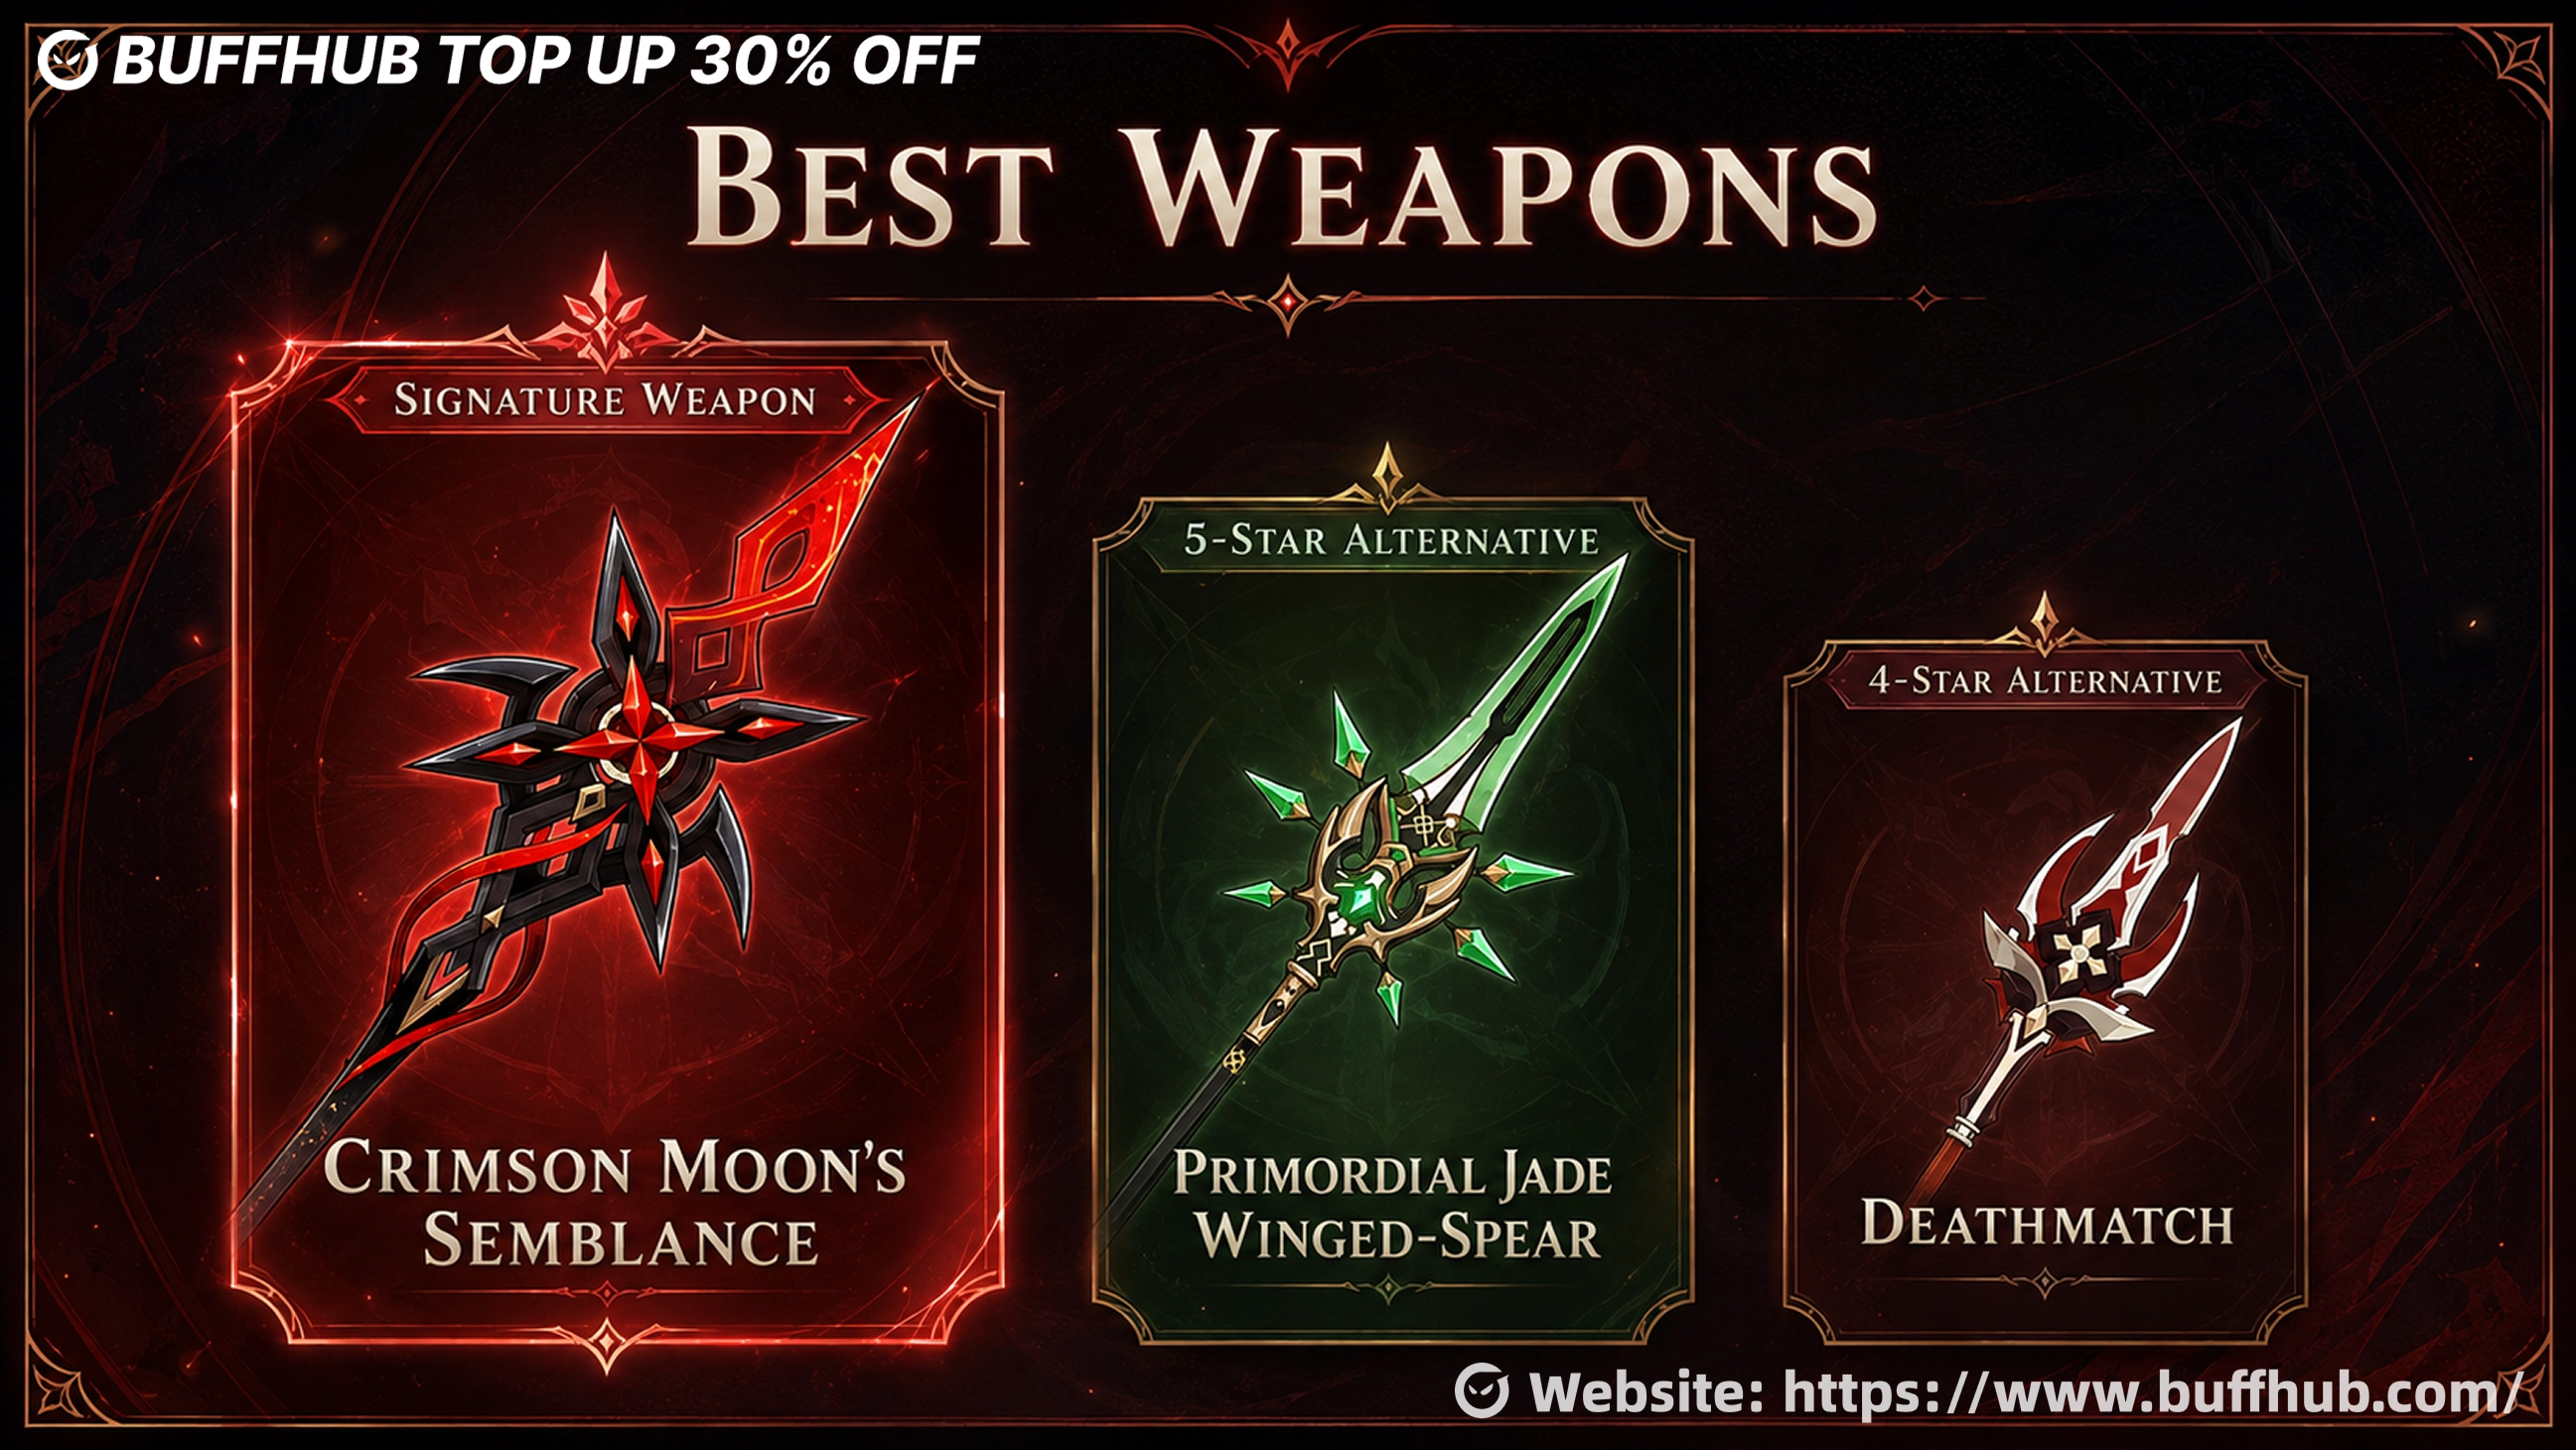
Best-in-Slot: Crimson Moon's Semblance
Crimson Moon's Semblance is her signature 5-Star Polearm and the cleanest match for the Bond of Life kit. At Level 90 it provides 674 Base ATK and 22.1% CRIT Rate. At Refinement 1, Ashen Sun's Shadow grants Bond of Life equal to 25% of Max HP when a Charged Attack hits an opponent, with a 14-second trigger interval.
The passive also gives a 12% DMG Bonus while the wearer has Bond of Life and another 24% DMG Bonus when that Bond is at least 30% of Max HP, for a total of 36% under the full condition. The synergy is straightforward: her normal rotation already uses Charged Attacks to absorb Blood-Debt Directives, so the signature weapon turns an action she already wants to perform into another source of Bond of Life while helping her maintain the threshold required for Masque of the Red Death.
How strong are other 5-Star weapons?
The supplied weapon calculations use a standard Vaporize setup with double Pyro resonance and treat R1 Crimson Moon's Semblance as 100%. These percentages should therefore be read as build estimates for that specific comparison rather than universal damage values.
| Estimated Damage Tier | Weapons |
|---|---|
| 90%–100% | Crimson Moon's Semblance; R5 Primordial Jade Winged-Spear; Staff of the Scarlet Sands at 2 stacks with EM Sands |
| 80%–90% | Staff of Homa below 50% HP; Primordial Jade Winged-Spear; Blackcliff Pole at 3 stacks; Ballad of the Fjords; Staff of Homa above 50% HP; Deathmatch in single-target; shielded Vortex Vanquisher at 5 stacks; Calamity Queller; Lithic Spear with two Liyue teammates |
| 75%–80% | Deathmatch in AoE; Dragon's Bane; Missive Windspear; White Tassel |
Reaction-focused weapons that rely on Elemental Mastery are less relevant in Mono Pyro or Overload setups. This is why weapon rankings should always be read together with the intended team rather than treated as one fixed order for every build.
Best F2P / budget option: White Tassel
White Tassel is the lowest weapon included in the supplied damage comparison, but it remains a practical early option. Under the stated Vaporize testing conditions, the source estimates it at roughly 76% of R1 Crimson Moon's Semblance. Its main weakness is low base ATK, while its advantage is accessibility, making it a reasonable transition weapon for newer players who do not yet have a premium Polearm.
Other useful alternatives
Dragon's Bane is listed in the 75%–80% tier and fits reaction-focused Vaporize builds better than Mono Pyro or Overload. Deathmatch performs better against a single target than in AoE, while Staff of the Scarlet Sands is one of the strongest alternatives in the supplied calculations when used at two stacks with an Elemental Mastery Sands.
Which Gear and Stats Maximize Arlecchino's Damage?
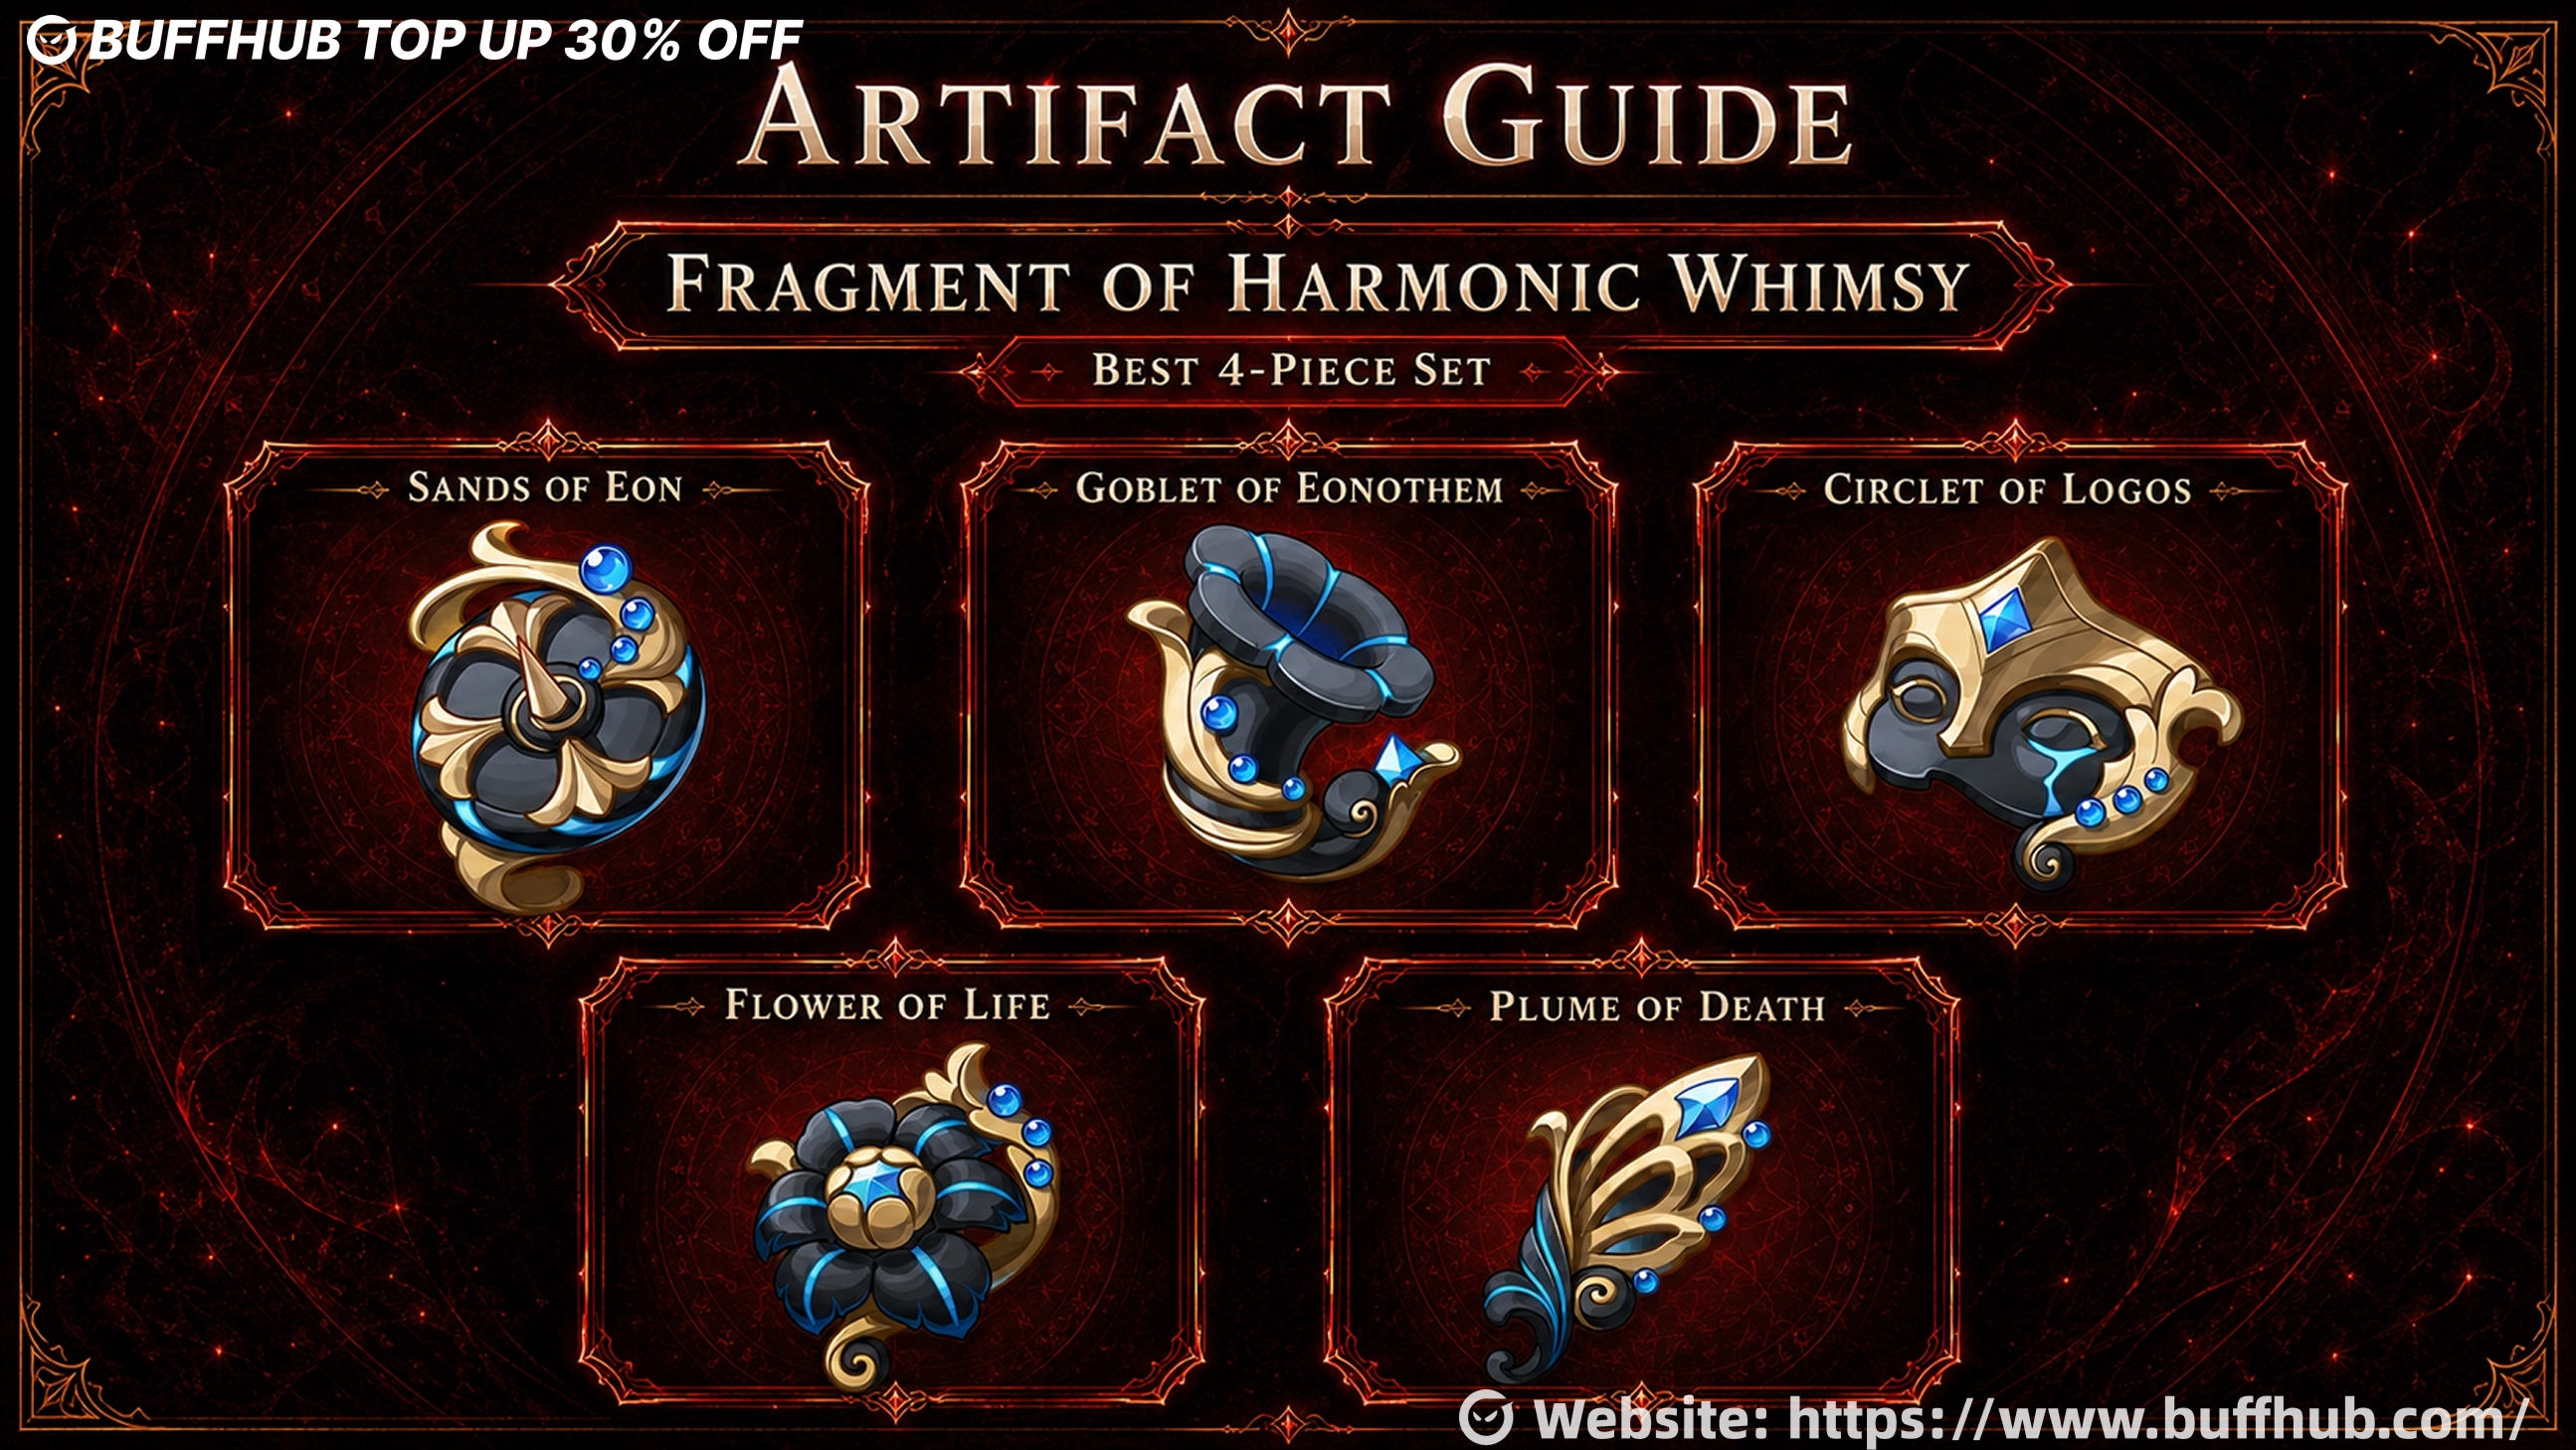
Best Artifact Set: Fragment of Harmonic Whimsy
4-Piece Fragment of Harmonic Whimsy is the strongest listed artifact option. The 2-piece bonus gives ATK +18%, while the 4-piece increases damage by 18% for 6 seconds whenever Bond of Life increases or decreases. The effect stacks up to three times for a maximum of 54% increased damage.
The set fits her normal loop without requiring any awkward setup. She gains Bond of Life by absorbing Blood-Debt Directives, then spends it through empowered Normal Attacks, so the resource naturally changes throughout the rotation and keeps activating the set.
Best alternative sets
| Artifact Set | Why Use It? |
|---|---|
| Gladiator's Finale | Provides 18% ATK and 35% Normal Attack DMG, making it a strong general alternative if your Whimsy pieces are weaker. |
| Retracing Bolide | Provides 40% Normal and Charged Attack DMG while shielded and is best considered in teams with stable shield uptime. |
| Lavawalker | Listed as a Mono Pyro option with a 35% damage increase under its relevant condition. |
| Echoes of an Offering | Improves Normal Attack damage and fits a playstyle centered on repeated basic attacks. |
| Crimson Witch of Flames | Better suited to Vaporize and other reaction-focused setups. |
| 2-Piece + 2-Piece | A flexible mix of useful ATK, Pyro DMG, or Normal Attack bonuses. Strong substats can make this better than forcing a weak 4-piece set. |
Best main stats and substats
| Slot / Priority | Recommended Stat |
|---|---|
| Sands | ATK% |
| Sands with Staff of the Scarlet Sands | Elemental Mastery |
| Goblet | Pyro DMG Bonus / ATK% |
| Circlet | CRIT Rate / CRIT DMG |
| Substat Priority | CRIT DMG ≈ CRIT Rate > ATK% > Energy Recharge; Elemental Mastery can matter in reaction teams. |
For a standard build, the most direct setup is 4pc Fragment of Harmonic Whimsy with an ATK Sands, Pyro DMG or ATK Goblet, and a CRIT Circlet. If your new-set pieces are poor, a strong Gladiator's Finale set or a high-quality 2-piece combination is a perfectly reasonable farming bridge. Do not stack Elemental Mastery blindly in Mono Pyro or Overload just because it performs well in a Vaporize weapon calculation.
What Are the Best Team Comps for Arlecchino?
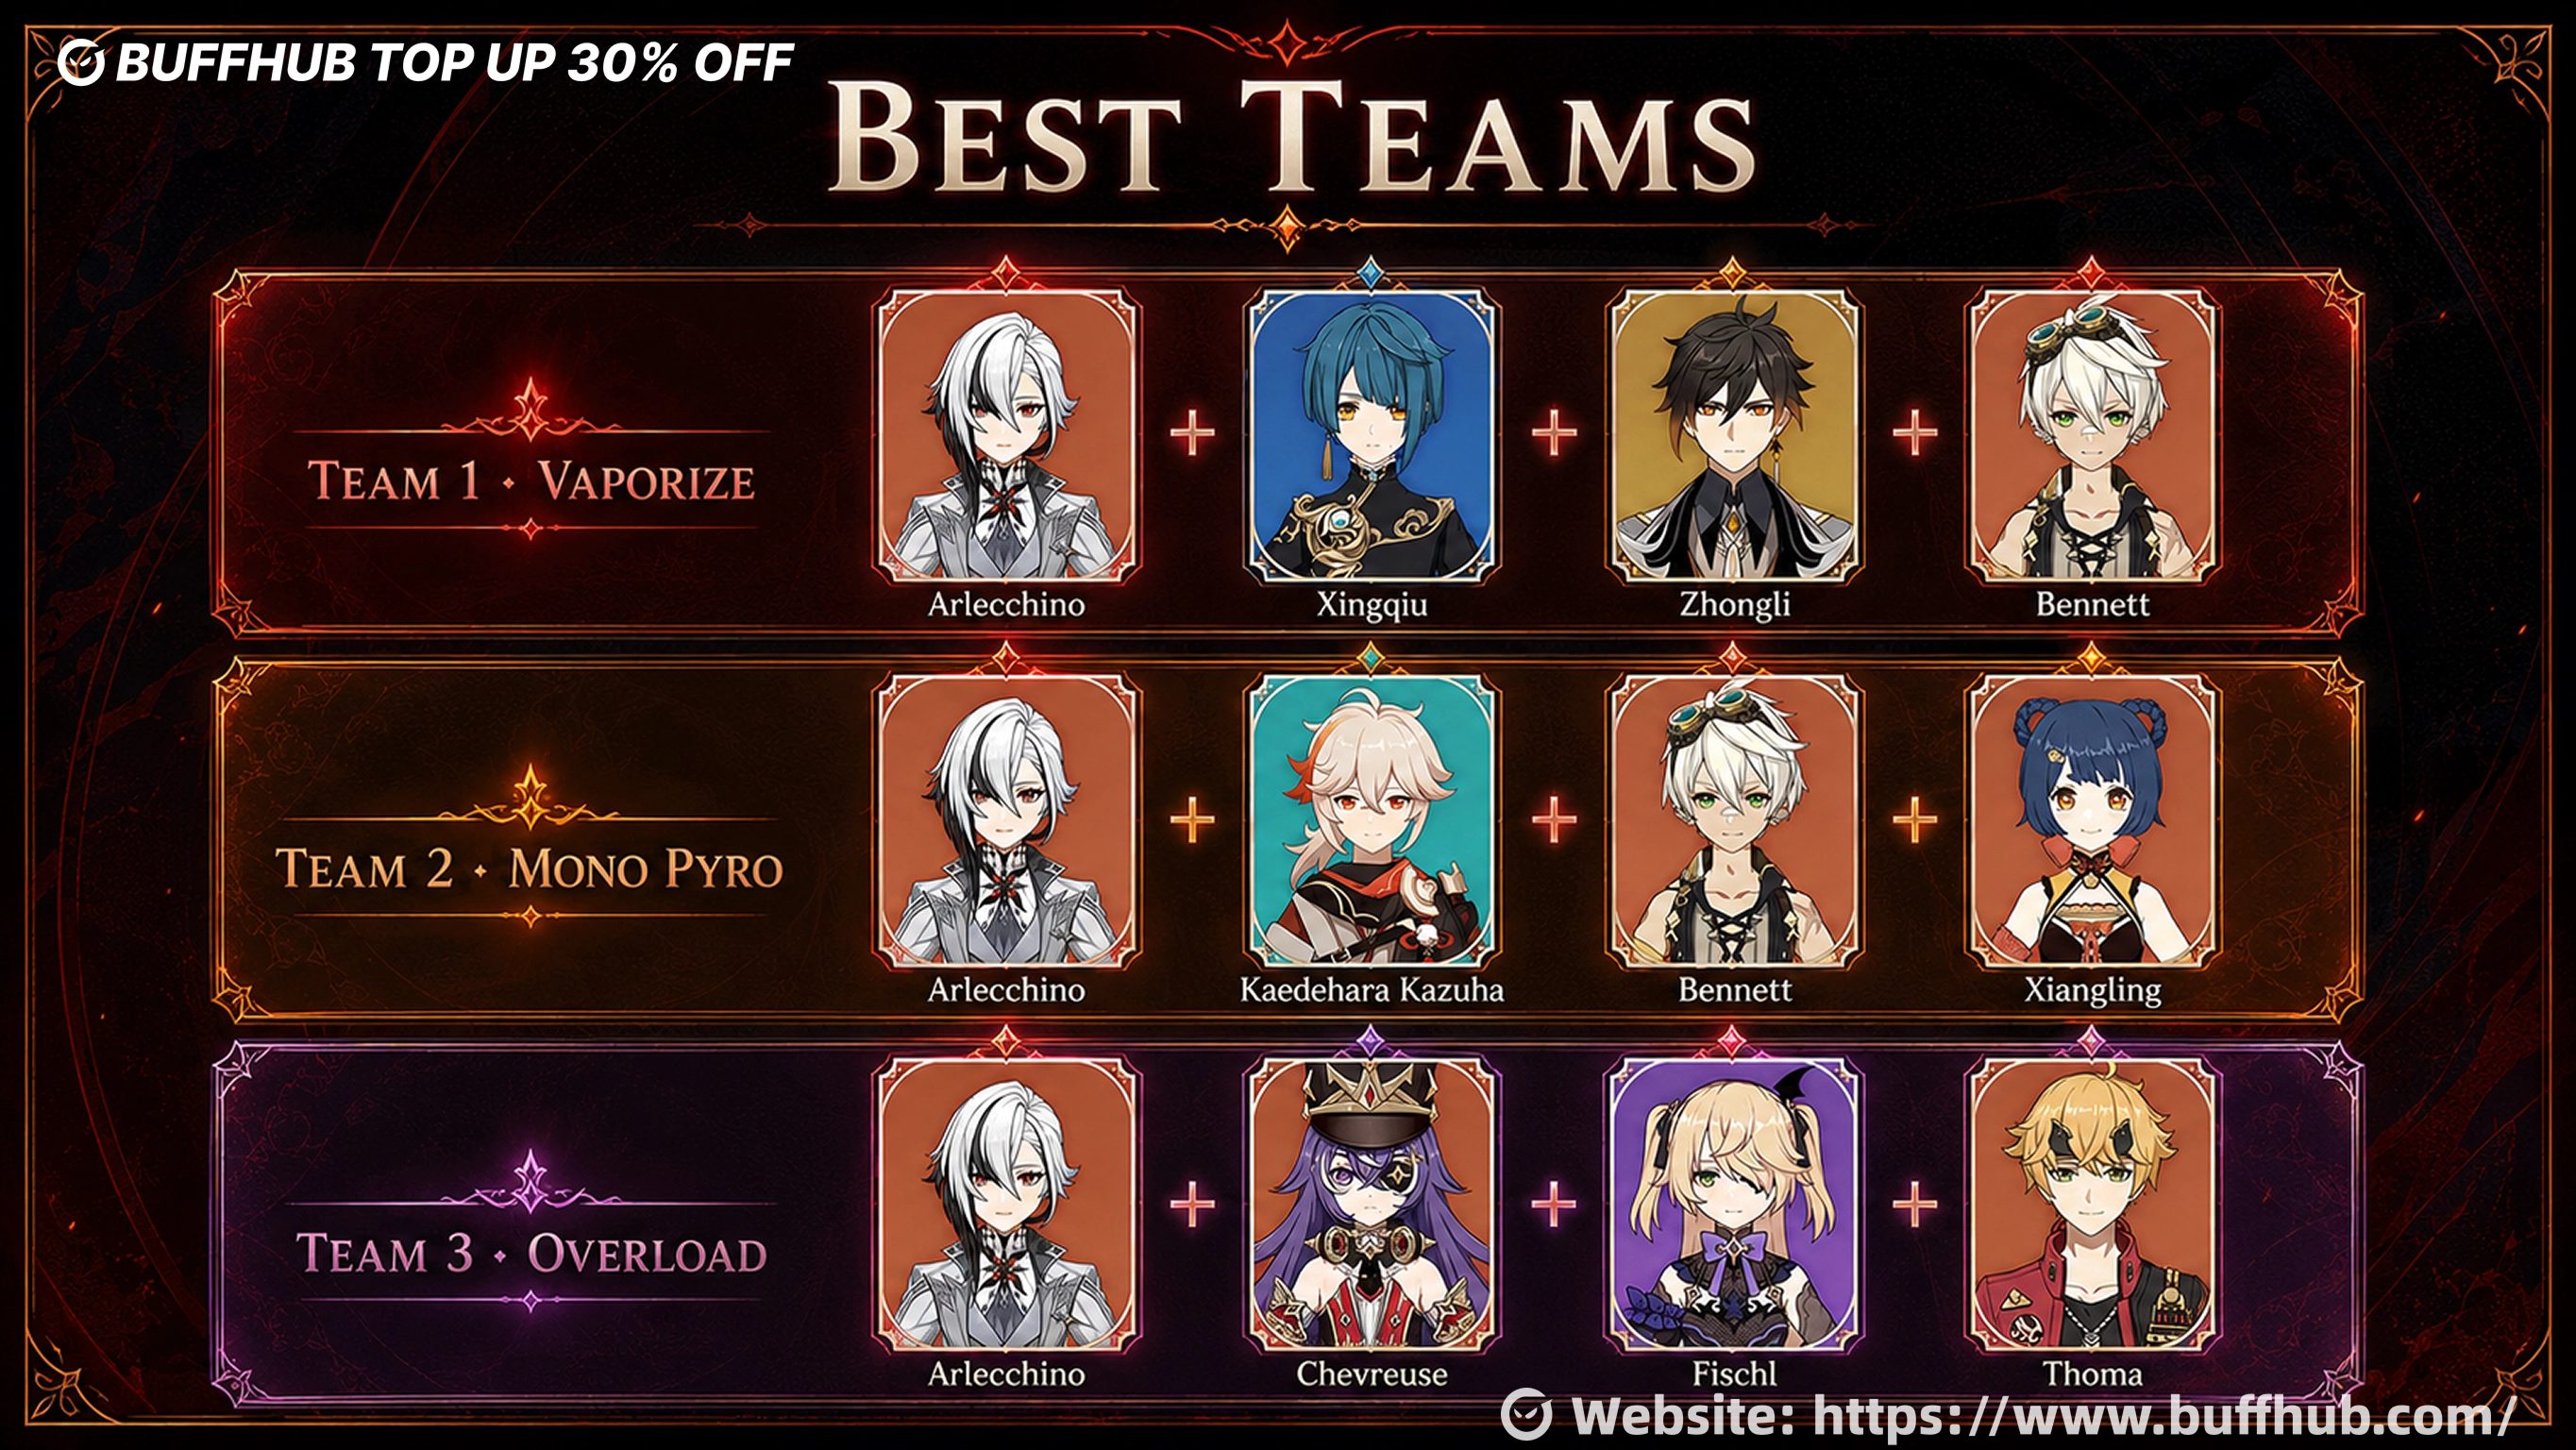
The supplied data recommends three main archetypes: Vaporize, Mono Pyro, and Overload. None is presented as universally superior. The best choice depends on your weapon, artifacts, available teammates, and how much defensive support you need. Because she cannot receive normal teammate healing during combat, protection and damage reduction matter more here than they do for a typical Pyro carry.
| Team | Lineup | How It Fits the Build |
|---|---|---|
| Vaporize | Arlecchino + Xingqiu + Zhongli + Bennett | Arlecchino remains the on-field Pyro DPS. Xingqiu fills the Vaporize and defensive-utility slot, Zhongli provides shield-focused protection, and Bennett occupies the listed Pyro support position. Exact numerical teammate buffs were not supplied. |
| Mono Pyro | Arlecchino + Kaedehara Kazuha + Bennett + Xiangling | A pure Pyro setup that avoids building around Vaporize-specific weapon assumptions and pairs naturally with the source's Lavawalker recommendation. Exact teammate buff values and full rotation details are To be updated. |
| Overload | Arlecchino + Chevreuse + Fischl + Thoma | Combines the main Pyro carry with an Overload-focused structure, off-field Electro, and a shield-oriented defensive slot through Thoma. |
Other team options from the source
The broader recommendations allow more flexibility inside each archetype. Overload can use Chevreuse with Bennett, Dehya, or Thoma plus Beidou or Fischl. Mono Pyro can pair Bennett with Kazuha, Lynette, Sucrose, or Jean and add Zhongli. Vaporize can use Xingqiu or Yelan, then choose Zhongli, Kazuha, Sucrose, or Lynette alongside Bennett or Yun Jin.
There is no reason to chase the theoretical highest team damage if the rotation constantly breaks. For a carry who cannot rely on teammate healing, a slightly safer lineup can produce better real-world results if it lets you finish the full damage window consistently.
What Materials Are Needed to Upgrade Arlecchino?
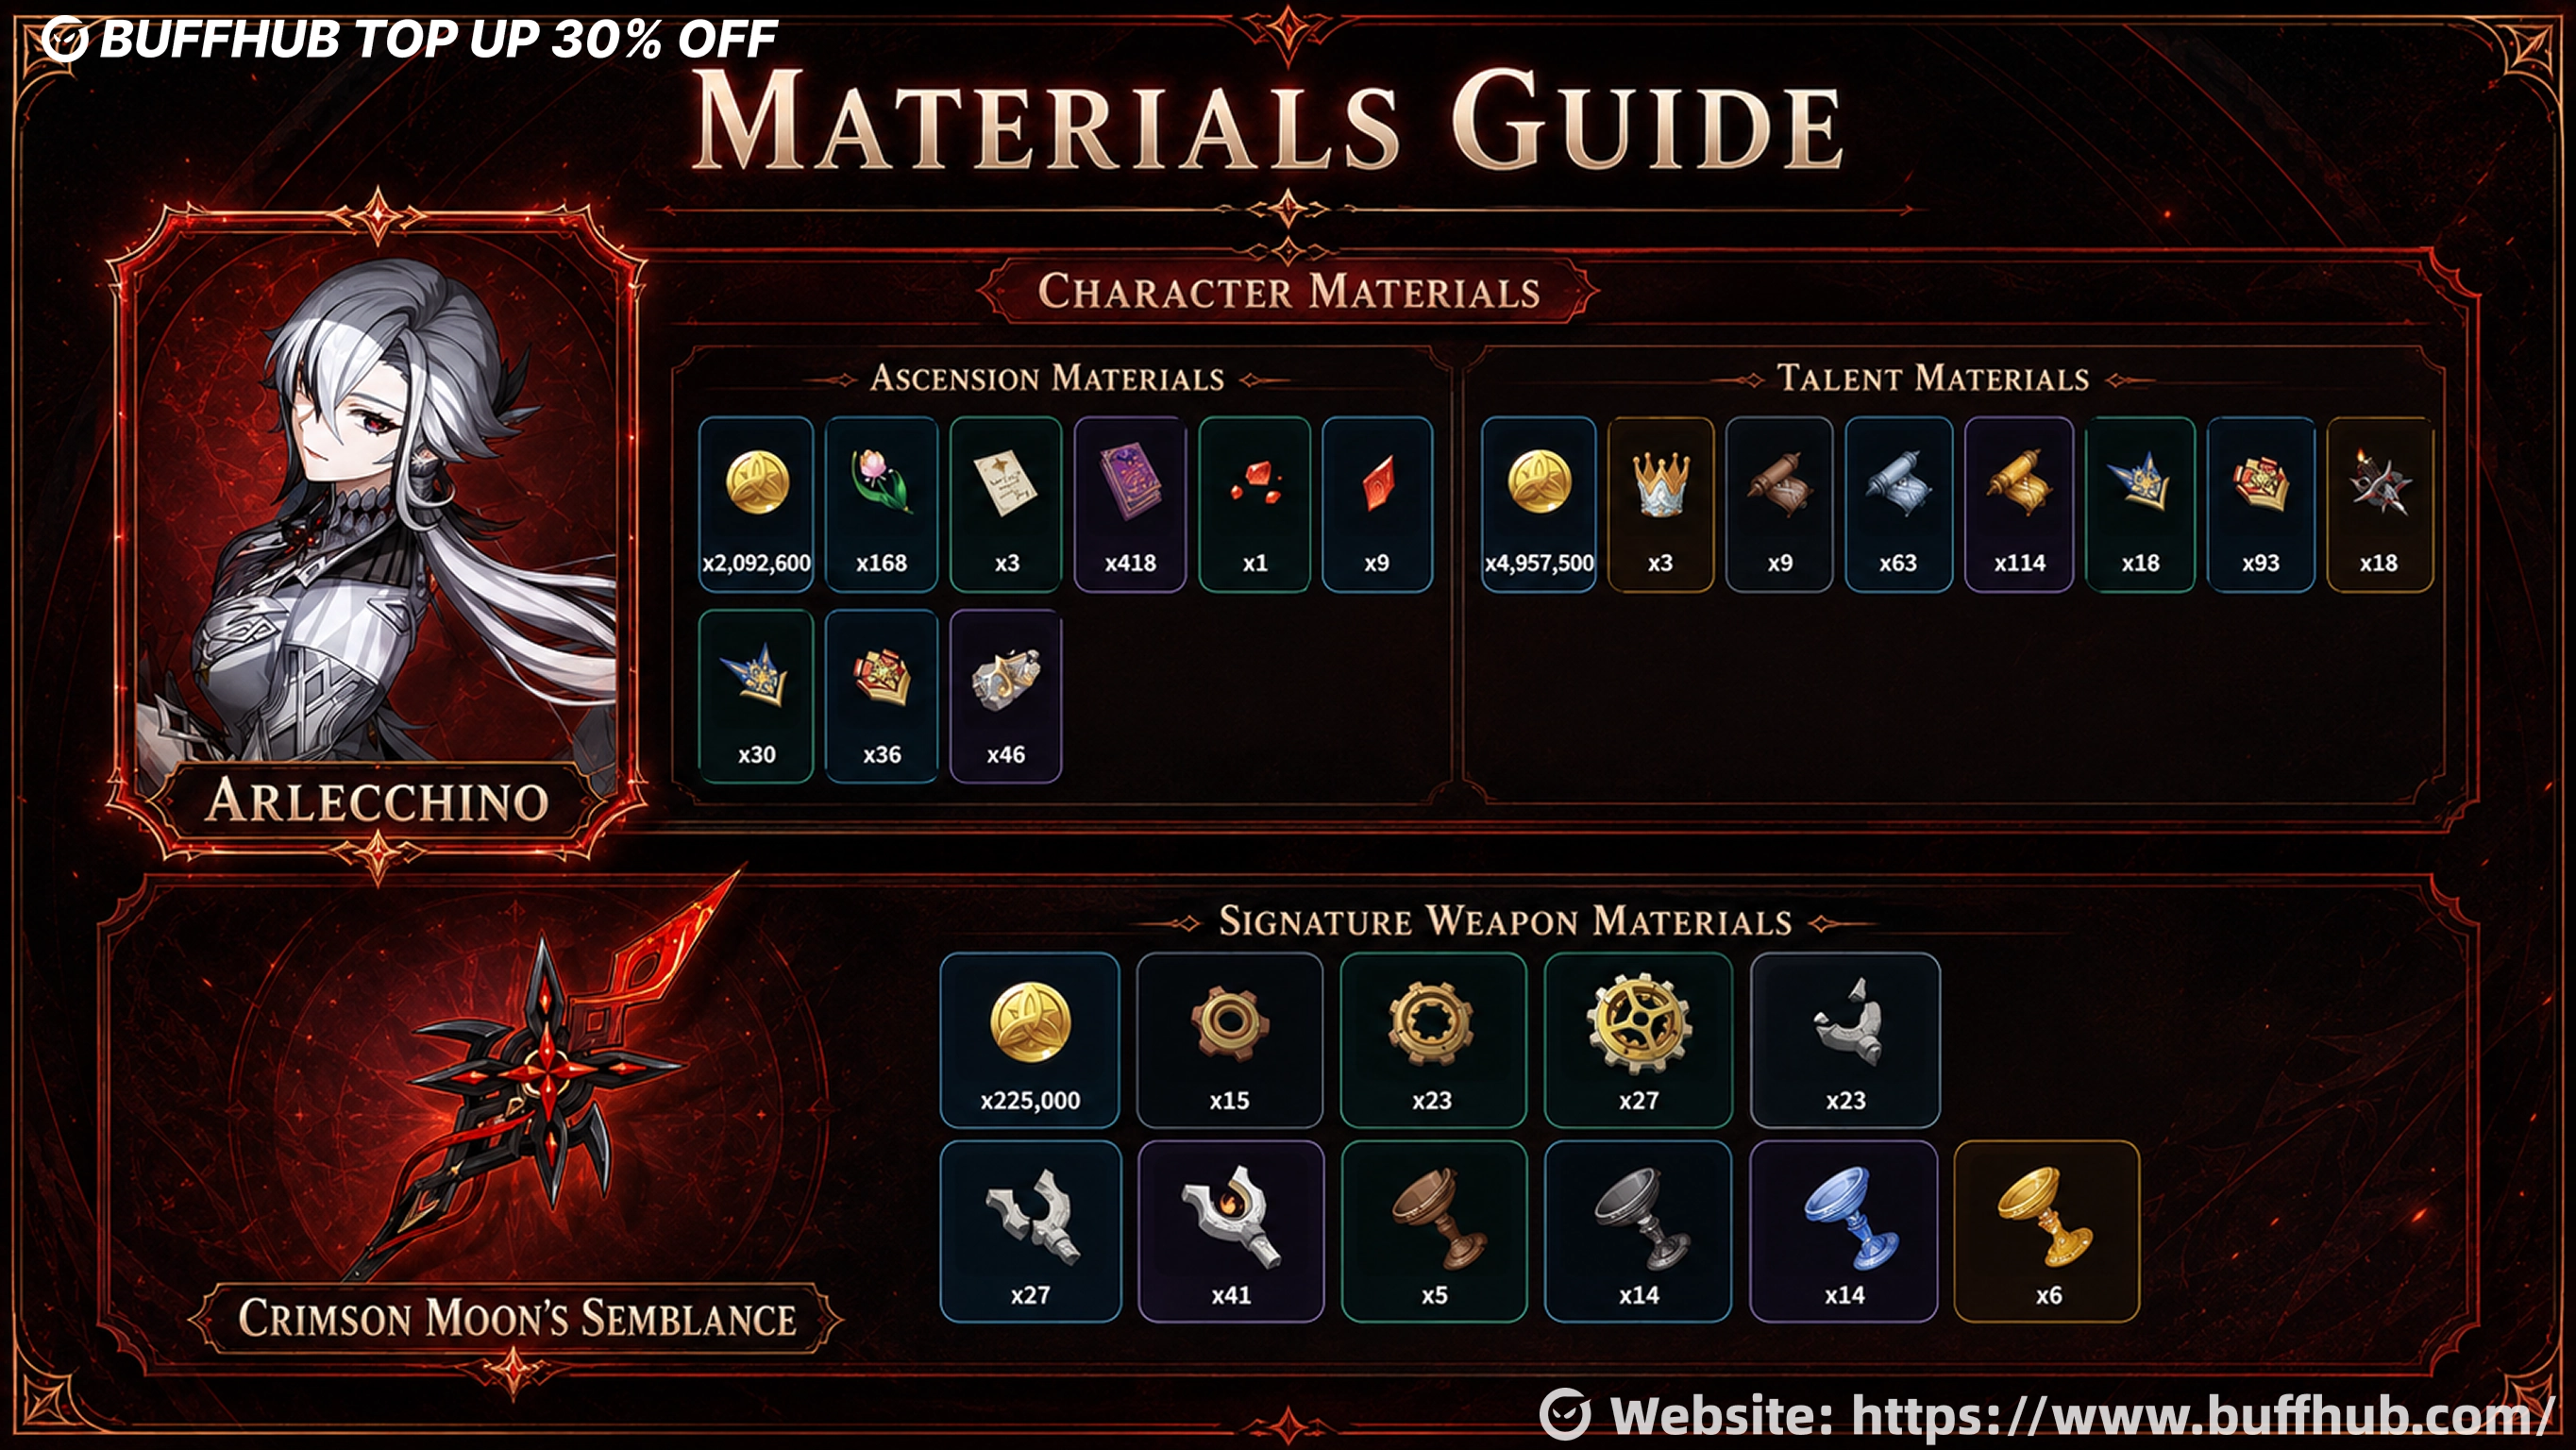
Character leveling and Ascension materials
To raise her from Level 1 to Level 90, the supplied data lists the following materials. While preparing them, you can also check the latest Genshin Impact codes for available free rewards and Primogems.
| Material | Amount |
|---|---|
| Mora | 2,092,600 |
| Rainbow Rose | 168 |
| Wanderer's Advice | 3 |
| Hero's Wit | 418 |
| Agnidus Agate Sliver | 1 |
| Agnidus Agate Fragment | 9 |
| Agnidus Agate Chunk | 9 |
| Agnidus Agate Gemstone | 6 |
| Recruit's Insignia | 18 |
| Sergeant's Insignia | 30 |
| Lieutenant's Insignia | 36 |
| Fragment of a Golden Melody | 46 |
Talent materials
Raising all three listed talents from Level 1 to Level 10 requires 4,957,500 Mora, 3 Crowns of Insight, the full Order talent-book line, additional Insignias, and 18 Fading Candles.
| Material | Amount |
|---|---|
| Mora | 4,957,500 |
| Crown of Insight | 3 |
| Teachings of Order | 9 |
| Guide to Order | 63 |
| Philosophies of Order | 114 |
| Recruit's Insignia | 18 |
| Sergeant's Insignia | 66 |
| Lieutenant's Insignia | 93 |
| Fading Candle | 18 |
Crimson Moon's Semblance upgrade materials
Taking the signature weapon to Level 90 requires 225,000 Mora plus Meshing Gear, Mechanical Spur Gear, Artificed Dynamic Gear, Ruined Hilt, Splintered Hilt, Still-Smoldering Hilt, and the four Pristine Sea Goblet tiers shown below.
| Material | Amount |
|---|---|
| Meshing Gear | 15 |
| Mechanical Spur Gear | 23 |
| Artificed Dynamic Gear | 27 |
| Ruined Hilt | 23 |
| Splintered Hilt | 27 |
| Still-Smoldering Hilt | 41 |
| Broken Goblet of the Pristine Sea | 5 |
| Wine Goblet of the Pristine Sea | 14 |
| Silver Goblet of the Pristine Sea | 14 |
| Golden Goblet of the Pristine Sea | 6 |
Which Constellations (Awakenings) Are Worth Getting?
| Level | Effect | Value / Verdict |
|---|---|---|
| C1 — "All Reprisals and Arrears, Mine to Bear..." | Further enhances Masque of the Red Death with an additional value of 100% and increases interruption resistance during Normal and Charged Attacks while the state is active. | Excellent early stopping point. Raises the damage ceiling and makes the on-field string harder to interrupt. |
| C2 — "All Rewards and Retribution, Mine to Bestow..." | Blood-Debt Directives start as Blood-Debt Due. Absorbing one deals 900% ATK AoE Pyro DMG and grants 20% All Elemental and Physical RES for 15 seconds, with a 10-second trigger interval. | Best value constellation. Removes the five-second wait, adds a large burst hit, and improves survival. |
| C3 — "You Shall Become a New Member of Our Family..." | Normal Attack level +3. | Strong. Directly improves the highest-priority talent and core damage loop. |
| C4 — "You Shall Love and Protect Each Other Henceforth..." | Absorbing a Blood-Debt Directive reduces Burst cooldown by 2 seconds and restores 15 Energy, once every 10 seconds. | Good utility. Makes Balemoon Rising easier to access for healing and rotation resets. |
| C5 — "For Alone, We Are as Good as Dead..." | Elemental Burst level +3. | Moderate. Improves Burst numbers but does not change the main playstyle. |
| C6 — "From This Day On, We Shall Delight in New Life Together." | Burst gains additional scaling equal to ATK × 700% of current Bond of Life percentage. For 20 seconds after using Skill, Normal Attacks and Burst gain 10% CRIT Rate and 70% CRIT DMG. | Massive premium upgrade. Dramatically raises both Burst and Normal Attack ceiling. |
What is the best constellation stopping point?
For strength-focused investment, the supplied recommendation is C0 → C1 → C2 → R1 Crimson Moon's Semblance → later constellations. C1 makes the main attack string safer and stronger, while C2 is the most important early breakpoint because Blood-Debt Directive immediately counts as Blood-Debt Due. That removes the five-second wait, adds 900% ATK AoE Pyro DMG, and provides 20% extra All Elemental and Physical RES. For players focused on account power, C2 is the best stopping point. For the surrounding Version 6.7 pull context, see the Genshin Impact 6.7 banner schedule.
What if you care more about weapon appearance?
If visuals matter as much as raw damage, the recommendation changes to C0 → R1 Crimson Moon's Semblance → constellations. The supplied source notes that her normal translucent scythe becomes a much more striking crimson scythe with the signature weapon equipped. If you decide to spend for constellations or Crimson Moon's Semblance, review the available Genshin Impact top-up options before purchasing Genesis Crystals.
Is Arlecchino Worth Pulling?
Yes—if you want a high-damage on-field Pyro carry and are comfortable managing Bond of Life instead of normal healing. Her main strengths are front-loaded Normal Attack damage, flexible Pyro uptime while Bond of Life is maintained, multiple viable team archetypes, a strong signature artifact set, a usable low-cost weapon floor, full C0 functionality, valuable C1 and C2 upgrades, and self-healing through her own Burst.
She is a better fit for players who enjoy aggressive on-field carries, Normal Attack-focused combat, and resource management. Having shield or damage-reduction teammates also makes the experience more forgiving, especially if you plan to use Vaporize, Mono Pyro, or Overload teams. On the other hand, players who rely heavily on conventional healer-based teams, dislike health-management mechanics, or want an extremely forgiving main DPS may find her restrictions less comfortable.
If your defensive roster is limited and interruption or incoming damage regularly breaks your rotations, skipping can also be reasonable. In that case, the Genshin Impact 7.0 banner schedule can help you compare the next set of pull options instead of forcing an investment that does not suit your account.
Final verdict
Arlecchino is worth pulling for players who want a high-ceiling Pyro main DPS with a distinct combat loop. C0 already contains the full Bond of Life engine, while C1 and C2 offer the strongest early constellation value. Crimson Moon's Semblance is the obvious signature upgrade for players who want both damage and the full weapon visual experience. For longer-term Primogem planning, you can also review the Genshin Impact 7.1 banner schedule.
Frequently Asked Questions (FAQ)
Q: Why can't teammates heal Arlecchino during combat?
A: Her passive The Balemoon Alone May Know prevents normal teammate healing while she is in combat. Instead, she heals herself through Balemoon Rising. At Talent Level 10, the listed healing is 150% of current Bond of Life + 150% of ATK, which is why shields and damage-reduction teammates can be more useful than building the team around conventional healing.
Q: How long should I wait before absorbing Arlecchino's Blood-Debt Directive?
A: Against a durable single target, wait about five seconds if your rotation allows it. After five seconds, Blood-Debt Directive becomes Blood-Debt Due. A normal Directive grants Bond of Life equal to 65% of Max HP, while a Due grants 130% of Max HP, creating a much stronger opening damage window. At C2, this waiting period disappears because Blood-Debt Directives are already Blood-Debt Due when applied.
Q: Why does Arlecchino's damage drop during a long Normal Attack combo?
A: Her empowered Normal Attacks scale with the current Bond of Life percentage, and each hit consumes 7.5% of the current Bond. As the resource falls, the bonus from Masque of the Red Death also becomes smaller. This is why the rotation is naturally front-loaded: early attacks benefit from the highest Bond value, while later hits gradually lose part of that extra scaling.