


Aemeath is a returning Fusion Sword Main DPS in Wuthering Waves Version 3.1, featuring a unique dual-form combat system that lets her switch between Aemeath form and Mech form. She can concentrate burst damage through Tune Rupture or clear groups of enemies with Fusion Burst, making her a versatile on-field DPS for both single-target and AoE combat. For the broader patch context, see the Wuthering Waves Version 3.1 banner overview.










What Is Aemeath's Combat Role?
Aemeath is a Fusion Sword Resonator and Wuthering Waves' first dual-mode Main Damage Dealer. She specializes in burst damage through Resonance Liberation DMG and supports both Tune Rupture and Fusion Burst team archetypes. Her core role is an on-field burst damage dealer. Her unique dual-form mechanic lets her switch between different damage modes to suit the encounter, combining strong single-target burst with effective area damage for clearing groups of enemies.
Most of Aemeath's damage is concentrated in her Resonance Liberation and the enhanced damage phase that follows. She must build resources through her combat rotation, enter an enhanced state, and then use high-multiplier skills to deliver her burst. This makes her a Main Damage Dealer whose rotation is built around her own field time rather than a quickswap sub-DPS.
How Does Aemeath's Kit Work?
Core Mechanic: Dual-Mode Combat System
Aemeath's defining feature is her dual-mode design. She can switch between two forms according to the needs of the fight.
Aemeath Form
In Aemeath form, she primarily starts the rotation and builds resources. Basic Attacks, Resonance Skills, and special follow-up attacks quickly restore her core resources, preparing her to enter the enhanced phase and unleash high-multiplier burst damage.
Mech Form
Mech form is Aemeath's primary burst-damage form, with stronger offensive performance and higher skill multipliers. In this form, she can use enhanced attacks to cycle resources efficiently and set up her final Resonance Liberation burst. By casting Resonance Skill: Form Switch, Aemeath can alternate between her own form and Mech form. This is not merely a visual or animation change: it changes her moveset, resource generation, and overall damage rhythm.
Core Resources: Synchronization Rate and Resonance Rate
Aemeath's rotation revolves around two resource gauges.
1. Synchronization Rate
Synchronization Rate is the first resource required to enter Aemeath's enhanced rotation. How to restore Synchronization Rate:
- Follow Basic Attack Stages 2, 3, or 4 with Resonance Skill.
- Cast Sync Strike follow-up skills.
- Continue dealing damage with Basic Attacks.
Once the requirements are met, she can cast the following special follow-up skills:
- Sync Strike: Armament Merge
- Sync Strike: Call of Dawn
These skills further restore Synchronization Rate.
2. Resonance Rate
After building enough Synchronization Rate, Aemeath can move into the second stage of her rotation. After Basic Attack Stage 4, cast Resonance Skill during the follow-up window. She can then use the following actions to continue restoring Resonance Rate:
- Resonance Skill: Seraphic Duet
- Intro Skill
- Resonance Liberation
Core Burst: Enhanced Resonance Liberation
Aemeath's core damage comes from the enhanced Resonance Liberation, Heavenfall Edict: Finale. During combat, she must first build Synchronization Rate and Resonance Rate through attacks in both forms. Only when both resources meet the required conditions can she cast this finishing skill.
Compared with characters who rely on sustained Basic Attack damage, Aemeath is a burst-focused Main Damage Dealer: she builds resources in the opening phase, enters an enhanced state in the middle of the rotation, and finishes with a high-multiplier Resonance Liberation. Her build therefore places high value on Crit. Rate, Crit. DMG, and Resonance Liberation DMG Bonus to maximize the final burst.
How Do Tune Rupture and Fusion Burst Modes Affect Aemeath's Kit?
Resonance Mode: Tune Rupture
In Resonance Mode: Tune Rupture, selected Basic Attacks, Sync Strikes, and Intro Skills inflict Tune Rupture: Shifting. When the team responds to Tune Rupture: Interfered, the target also gains Rupturous Trail stacks. Casting Seraphic Duet removes these stacks and deals five additional instances of Tune Rupture DMG. Each Rupturous Trail stack removed increases the DMG Multiplier of the additional hits by 4%. After Resonance Liberation grants Stardust Resonance, the additional Tune Rupture DMG increases from five to ten instances, making this mode especially effective at concentrating damage on a priority target.
Resonance Mode: Fusion Burst
In Resonance Mode: Fusion Burst, the same attacks instead inflict Fusion Burst, while teammates who inflict Fusion Burst build Fusion Trail stacks. Casting Seraphic Duet removes Fusion Trail and triggers Fusion Burst based on the target's maximum stack limit without removing the target's existing Fusion Burst stacks. Each Fusion Trail stack removed increases the DMG Multiplier of the Fusion Burst on the main target by 10%. During Stardust Resonance, the Fusion Burst DMG Multiplier against the main target is increased by an additional 200%, making this mode better suited to clearing multiple enemies through area damage.
Mode-Specific Passive Bonuses
The two modes also change Aemeath's passive bonuses. In Resonance Mode: Tune Rupture, each eligible Resonator can grant her 20% Crit. DMG, up to three stacks, by inflicting Tune Rupture: Shifting or dealing Tune Rupture DMG. In Resonance Mode: Fusion Burst, each eligible Resonator can grant 30% Crit. DMG, up to two stacks, by inflicting Fusion Burst. At maximum stacks, both modes also grant Heavenfall Edict: Finale 25% DMG Amplification, so team members should be chosen to trigger the corresponding combat system consistently.
What Is Aemeath's Best Weapon?
Everbright Polestar: Aemeath's Best-in-Slot Weapon
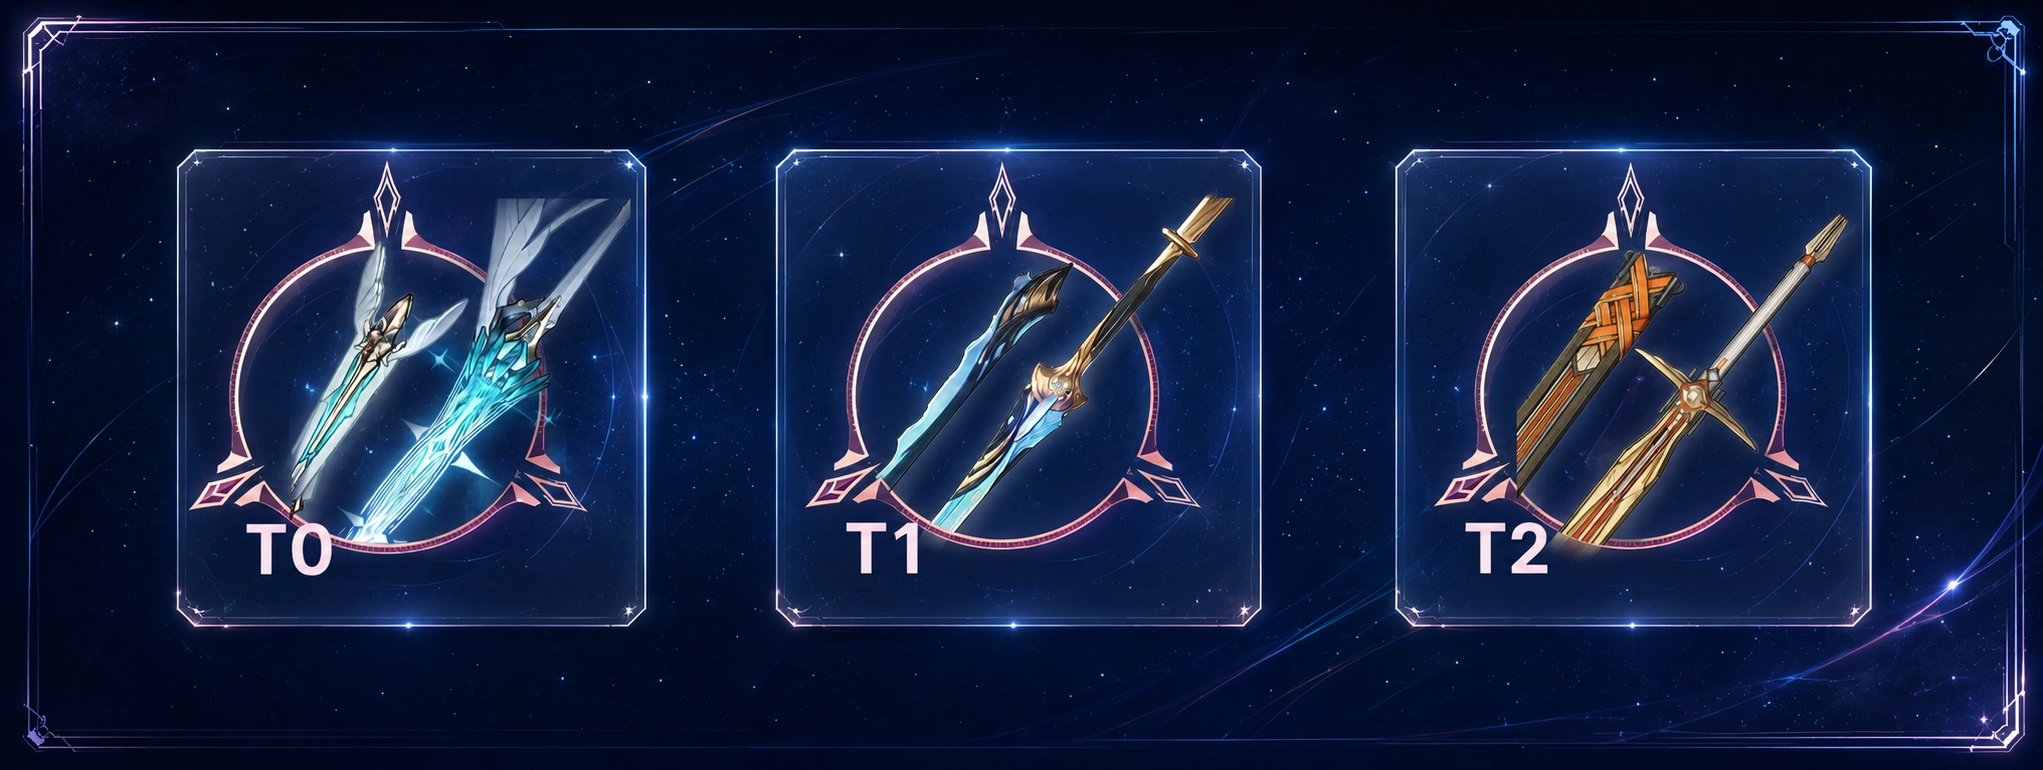
Everbright Polestar is Aemeath's best Sword and her signature weapon, designed around her Tune Rupture and Fusion Burst modes. At Level 90, it provides 588 Base ATK and 24.3% Crit. Rate, increasing her raw damage while easing Crit. Rate requirements on Echoes.
Resonance Liberation DMG is relevant throughout almost all of Aemeath's core rotation. Her two enhanced Resonance Skills, Charged II Heavy Attacks, and final Heavenfall Edict: Finale either count as or scale with Resonance Liberation DMG. As a result, the weapon's Resonance Liberation bonuses strengthen most of her key damage rather than only her final cast. At Rank 1, Everbright Polestar permanently grants 12% All-Attribute DMG Bonus. When Aemeath inflicts Tune Rupture: Shifting or Fusion Burst on a target, her Resonance Liberation DMG ignores 32% of the target's DEF and 10% Fusion RES for eight seconds.
This effect closely matches Aemeath's dual-mode mechanics. In Resonance Mode: Tune Rupture, she can inflict the required effect through later Basic Attack stages, Sync Strikes, or Intro Skills. In Resonance Mode: Fusion Burst, the same skills inflict Fusion Burst instead. In either team archetype, Aemeath can activate the full weapon effect through her own kit without relying on a teammate to enable it.
Once the weapon effect is active, Aemeath can fit her enhanced Resonance Skills, Charged Heavy Attack, and finishing Resonance Liberation into the eight-second window. Ignoring 32% DEF and 10% Fusion RES provides value outside the standard DMG Bonus bracket, making it especially effective against high-level, high-DEF enemies or targets with Fusion RES. Everbright Polestar combines high Base ATK and Crit. Rate with an activation condition, duration, and bonus type tailored to Aemeath's full rotation. Both Tune Rupture and Fusion Burst teams trigger it naturally, so it is not merely a strong Crit. stat stick; it directly strengthens Aemeath's entire Resonance Liberation burst sequence.
Budget and Free-to-Play Weapon Options
Aemeath has several viable alternatives. Because her enhanced skills, Charged Heavy Attacks, and finishing skill largely count as Resonance Liberation DMG, substitute weapons should prioritize Crit. stats, Base ATK, Resonance Liberation DMG, and Energy Regen.
Emerald of Genesis: Best Standard 5-Star Alternative
At Level 90, Emerald of Genesis provides 587 Base ATK and 24.3% Crit. Rate. At Rank 1, it grants 12.8% Energy Regen and increases ATK by 6% after casting a Resonance Skill, stacking up to two times for a maximum of 12% ATK for ten seconds. Aemeath frequently uses Resonance Skills while switching forms, so she can maintain both stacks reliably. The Energy Regen also helps ensure Heavenfall Edict: Overdrive is available on schedule, making this the most well-rounded option without her signature weapon.
Feather Edge: Best 4-Star Budget Option
At Level 90, Feather Edge provides 412 Base ATK and 20.3% Crit. Rate. After casting Resonance Liberation, Rank 1 grants 7.2% ATK and 10.8% Resonance Liberation DMG Bonus. At maximum rank, these values increase to 23% ATK and 34.5% Resonance Liberation DMG Bonus for 15 seconds. Aemeath opens with Heavenfall Edict: Overdrive before casting two Seraphic Duets and Heavenfall Edict: Finale, so the 15-second buff covers most of her burst phase and makes Feather Edge one of her better 4-star options.
Somnoire Anchor: Free Option for Existing Owners
At Level 90, Somnoire Anchor provides 462 Base ATK and 18.2% ATK. At maximum rank, Aemeath gains one stack for each second she deals damage while on the field, with each stack granting 4% ATK, up to ten stacks. At full stacks, the weapon provides up to 40% ATK and 12% Crit. Rate. Aemeath's complete on-field rotation is long enough to build the effect gradually, but reaching maximum stacks usually takes about ten seconds and all stacks are lost when she leaves the field. It is therefore better for stable on-field rotations than frequent quickswapping.
Which Echoes and Stats Maximize Aemeath's Damage?
Best Echo Set: 5-Piece Trailblazing Star
Aemeath's recommended endgame Sonata Effect is the five-piece Trailblazing Star set.
- 2-piece effect: Fusion DMG +10%
- 5-piece effect: After inflicting Fusion Burst or Tune Rupture: Shifting, Crit. Rate increases by 20% and Fusion DMG increases by 20% for eight seconds.
Aemeath can trigger the five-piece effect consistently through her own skills and keep the buff active during her enhanced Resonance Skills and finishing skill. As a result, Trailblazing Star currently offers the best combination of damage ceiling and consistency in both Tune Rupture and Fusion Burst teams.
Best Main Echo: Sigillum
Prioritize Sigillum as Aemeath's main Echo. When equipped by Aemeath, it directly grants 25% Resonance Liberation DMG Bonus. It does not require the Echo Skill to hit an enemy or any additional stacking condition. Aemeath's enhanced skills and finishing Resonance Liberation rely heavily on Resonance Liberation DMG, so Sigillum directly strengthens her core damage window and is difficult for other COST 4 Echoes to replace as an endgame option.
Echo Setup and Main Stats
Use the standard 4-3-3-1-1 setup:
| Echo Cost | Recommended Main Stat |
|---|---|
| COST 4 | Crit. DMG or Crit. Rate |
| COST 3 | Fusion DMG Bonus |
| COST 3 | ATK% or Fusion DMG Bonus |
| COST 1 | ATK% |
| COST 1 | ATK% |
Aemeath Substat Priority
Meet Energy Regen requirements > Crit. Rate approximately equal to Crit. DMG > ATK% > Resonance Liberation DMG Bonus > Flat ATK.
Aemeath Resonance Chain Pull Recommendations
| Resonance Chain | Core Upgrade | Practical Value | Pull Advice |
|---|---|---|---|
| Base: Complete Kit | Full dual-form cycle, two Seraphic Duets, and Heavenfall Edict: Finale. | Both Tune Rupture and Fusion Burst rotations work without Resonance Chains. | Best for limited resources. |
| RC1: Quality of Life | Improves Charged Heavy Attacks, Synchronization Rate generation, Trail inheritance, and multi-wave target switching. | Faster setup and smoother multi-target play, but a limited overall damage increase. | Comfort pick. |
| RC2: Core Damage | Significantly strengthens both Seraphic Duets and improves Tune Rupture and Fusion Burst multipliers. | A noticeable full-rotation increase and the best balance of cost and performance. | Best-value stopping point. |
| RC3: Finisher | Greatly increases Heavenfall Edict: Finale and reduces reliance on fixed-archetype teammates. | Higher burst damage and greater team-building flexibility. | Strong long-term pick. |
| RC4: Team Buff | Grants the team a long-duration All-Attribute DMG Bonus. | Improves total team damage more than Aemeath's personal burst. | Primarily acquired while pushing higher. |
| RC5: Survival and Exploration | Adds revival, Shield, and flight-related utility. | Improves safety and exploration comfort, with almost no direct routine damage. | Do not stop here for damage. |
| RC6: Full Upgrade | Increases Resonance Liberation DMG, enables critical Tune Rupture and Fusion Burst DMG, and strengthens Trail generation. | Major mechanical and numerical upgrades raise both modes' damage ceiling. | Maximum-investment goal. |
Recommended Pulling Paths
- Free-to-play or limited resources: Base copy
- Low-budget investment: Base copy plus signature weapon
- Light-to-moderate investment: Resonance Chain 2 plus signature weapon
- Higher damage and team-building flexibility: Resonance Chain 3 plus signature weapon
- Maximum investment: Resonance Chain 6 plus signature weapon
Before committing Astrite, compare Aemeath's value with the current Wuthering Waves banner schedule. Players who choose to spend can also review the available Wuthering Waves top-up options before purchasing Lunites.
What Are Aemeath's Recommended Team Comps?

Tune Rupture Team: Aemeath+Lynae+Mornye
This is one of Aemeath's more consistent Tune Rupture teams, especially for single-target bosses and concentrated burst windows. The team builds around Rupturous Trail: Lynae and Mornye establish the required effects, then Aemeath converts them into focused damage. Lynae can inflict Tune Rupture: Shifting, while her Outro Skill grants Aemeath 15% All-DMG Amplification and 25% Resonance Liberation DMG Amplification. Mornye provides healing, Tune Break support, and team buffs, including 25% All-DMG Amplification for 30 seconds.
All three Resonators can participate in the Tune Rupture mechanic, allowing Aemeath to reach the maximum stacks of her Inherent Skill for up to 60% Crit. DMG and 25% DMG Amplification for Heavenfall Edict: Finale. After the setup is complete, Aemeath removes Rupturous Trail with two Seraphic Duets, then finishes the rotation with her enhanced Resonance Liberation.
Fusion Burst Team: Aemeath+Denia+Chisa
This is one of Aemeath's most complete Fusion Burst teams, combining strong single-target burst with area clearing. Chisa raises the effect's maximum stack limit, Denia repeatedly inflicts and strengthens Fusion Burst, and Aemeath then uses Seraphic Duet to trigger the stored damage. Denia's Outro Skill increases the Fusion Burst DMG taken by targets by 60% for 30 seconds and grants the next Resonator 15% All-DMG Amplification for 16 seconds. For her complete equipment, Echo, and rotation recommendations, see the Denia build guide.
Chisa's Outro Skill increases the maximum stack limit of the abnormal effect by three for 15 seconds, while Thread of Bane ignores 18% of the target's DEF, further increasing Aemeath's triggered damage. After the setup is complete, Aemeath's Seraphic Duet triggers Fusion Burst according to the effect's maximum stack limit without removing the existing stacks. During the enhanced state, the Fusion Burst DMG Multiplier against the main target is also increased by 200%. This team can use Denia's grouping to expand its area damage while relying on Chisa's stack-limit increase and DEF ignore to improve single-target burst, giving it strong internal synergy within the Fusion Burst archetype.
What Materials Do Aemeath and Everbright Polestar Need?
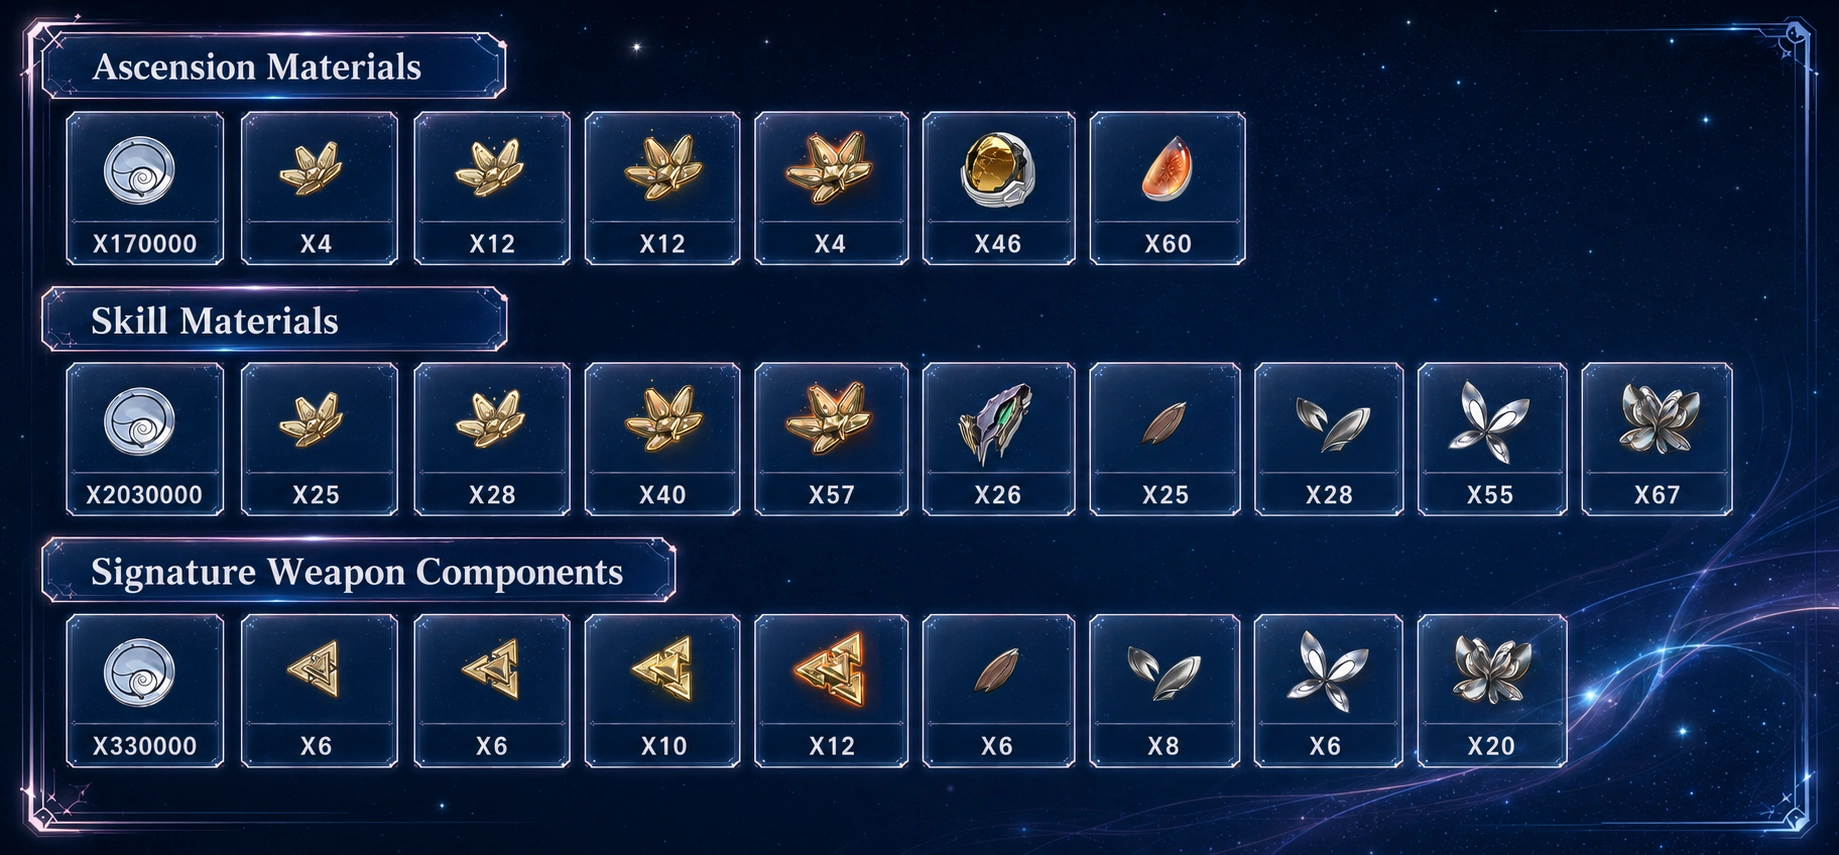
To fully prepare Aemeath, players need materials for her character ascension, skill upgrades, and signature Sword, Everbright Polestar. The lists below cover Aemeath's Level 90 ascension, full skill upgrades, and Everbright Polestar's Level 90 ascension.
Aemeath Level 1–90 Ascension Materials
Raising Aemeath from Level 1 to Level 90 requires:
- Shell Credit x170,000
- LF Exoswarm Core x4
- MF Exoswarm Core x12
- HF Exoswarm Core x12
- FF Exoswarm Core x4
- Our Choice x46
- Moss Amber x60
Aemeath Full Skill Upgrade Materials
Fully upgrading Aemeath's skills requires:
- Shell Credit x2,030,000
- LF Exoswarm Core x25
- MF Exoswarm Core x28
- HF Exoswarm Core x40
- FF Exoswarm Core x57
- Gold in Memory x26
- Broken Wing Polarizer x25
- Monowing Polarizer x28
- Polywing Polarizer x55
- Layered Wing Polarizer x67
Everbright Polestar Level 1–90 Ascension Materials
Ascending Aemeath's signature Sword, Everbright Polestar, to Level 90 requires:
- Shell Credit x330,000
- LF Exoswarm Core x6
- MF Exoswarm Core x6
- HF Exoswarm Core x10
- FF Exoswarm Core x12
- Broken Wing Polarizer x6
- Monowing Polarizer x8
- Polywing Polarizer x6
- Layered Wing Polarizer x20
The Polarizer series is primarily obtained from the corresponding Forgery Challenge. Exoswarm Cores drop from related mechanical enemies, while lower-rarity materials can be converted into higher-rarity versions through Synthesis. These figures cover weapon ascension only. Leveling Everbright Polestar from Level 1 to Level 90 also requires approximately 2.7 million Weapon EXP, or roughly 135–136 Advanced Energy Cores. Additional Shell Credits are required during weapon leveling, so the weapon's actual total cost is higher than the 330,000 Shell Credits used for ascension alone.
Total Aemeath and Everbright Polestar Materials
Aemeath's Level 90 ascension, full skill upgrades, and Everbright Polestar's Level 90 ascension require at least 2,530,000 Shell Credits in total. The combined materials are:
- LF Exoswarm Core x35
- MF Exoswarm Core x46
- HF Exoswarm Core x62
- FF Exoswarm Core x73
- Our Choice x46
- Moss Amber x60
- Gold in Memory x26
- Broken Wing Polarizer x31
- Monowing Polarizer x36
- Polywing Polarizer x61
- Layered Wing Polarizer x87
These totals include Aemeath's ascension materials, all skill upgrade materials, and Everbright Polestar's ascension materials. They do not include Resonator EXP materials, Echo upgrade costs, Weapon EXP materials, or the additional Shell Credits required to level Aemeath and Everbright Polestar. Players can also check the latest Wuthering Waves codes for newly released Astrite, Shell Credits, and upgrade-material rewards.
Frequently Asked Questions About Aemeath
Is Aemeath Worth Pulling on a Rerun?
Yes. She is especially valuable for players who want broader combat coverage across their account. Aemeath's strength is not limited to raw damage; she is highly adaptable to different encounters. Against high-HP bosses, she can concentrate damage on a single target. Against multiple waves, Fusion Burst lets her clear groups quickly. This ability to handle both single-target and multi-target content reduces the need to build a different Main Damage Dealer for every mode.
Her investment path is also flexible. Even without a complete Tune Rupture or Fusion Burst team, Aemeath can run a basic rotation with general-purpose supports. As more archetype-specific Resonators are added to the account, her team can be upgraded without discarding the original investment. For accounts with a smaller roster or limited resources, securing Aemeath first and completing the archetype later is relatively accessible.
Aemeath's dual-form mechanics also give her a distinctive playstyle. Her rotation has a clear burst rhythm while retaining mobility and strong visual feedback, so her gameplay is less likely to feel repetitive over long-term use. Considering her damage, adaptability, and future team potential, she can serve as a long-term core Main Damage Dealer for an account.
Why Does My Aemeath Deal So Little Damage?
Low damage is usually caused by an incomplete rotation rather than Aemeath's baseline strength. She should first cast Heavenfall Edict: Overdrive, then cast Seraphic Duet twice, use a Heavy Attack to finish restoring Synchronization Rate, and finally cast Heavenfall Edict: Finale. Casting the enhanced skills too early, failing to fill both resources, or missing teammate buffs on the finishing skill will all reduce her damage significantly.
Does Aemeath Require Quickswap Techniques?
No. Her standard on-field rotation can fully activate her own bonuses and works well in teams such as those with Lynae and Mornye. Quickswapping is mainly used to build Synchronization Rate earlier so that shorter teammate buffs cover Seraphic Duet and Heavenfall Edict: Finale. It has a higher execution ceiling, but it is also less forgiving.