


Claret is an S-Rank Electric Armorer in Zenless Zone Zero built around DEF-scaling Sharp DMG. The new Specialty changes several familiar rules at once: ATK is no longer her main damage stat, her resource does not behave like normal Energy, and CRIT Rate keeps gaining value after 100% because of her Laceration system.



The practical result is less complicated than the kit description makes it sound. Claret wants high DEF, extremely high in-combat CRIT Rate, and enough field time to cycle her enhanced Basic Attacks. Her long-term benchmark is around 200% CRIT Rate in combat, while 1,800 initial DEF is an important Drive Disc breakpoint. Once those ideas are clear, the actual rotation is mostly about entering Crimson Inscription, staying aggressive with Basic Attacks, detonating Gash when it is available, and setting up the next Stun window.










Claret Build at a Glance
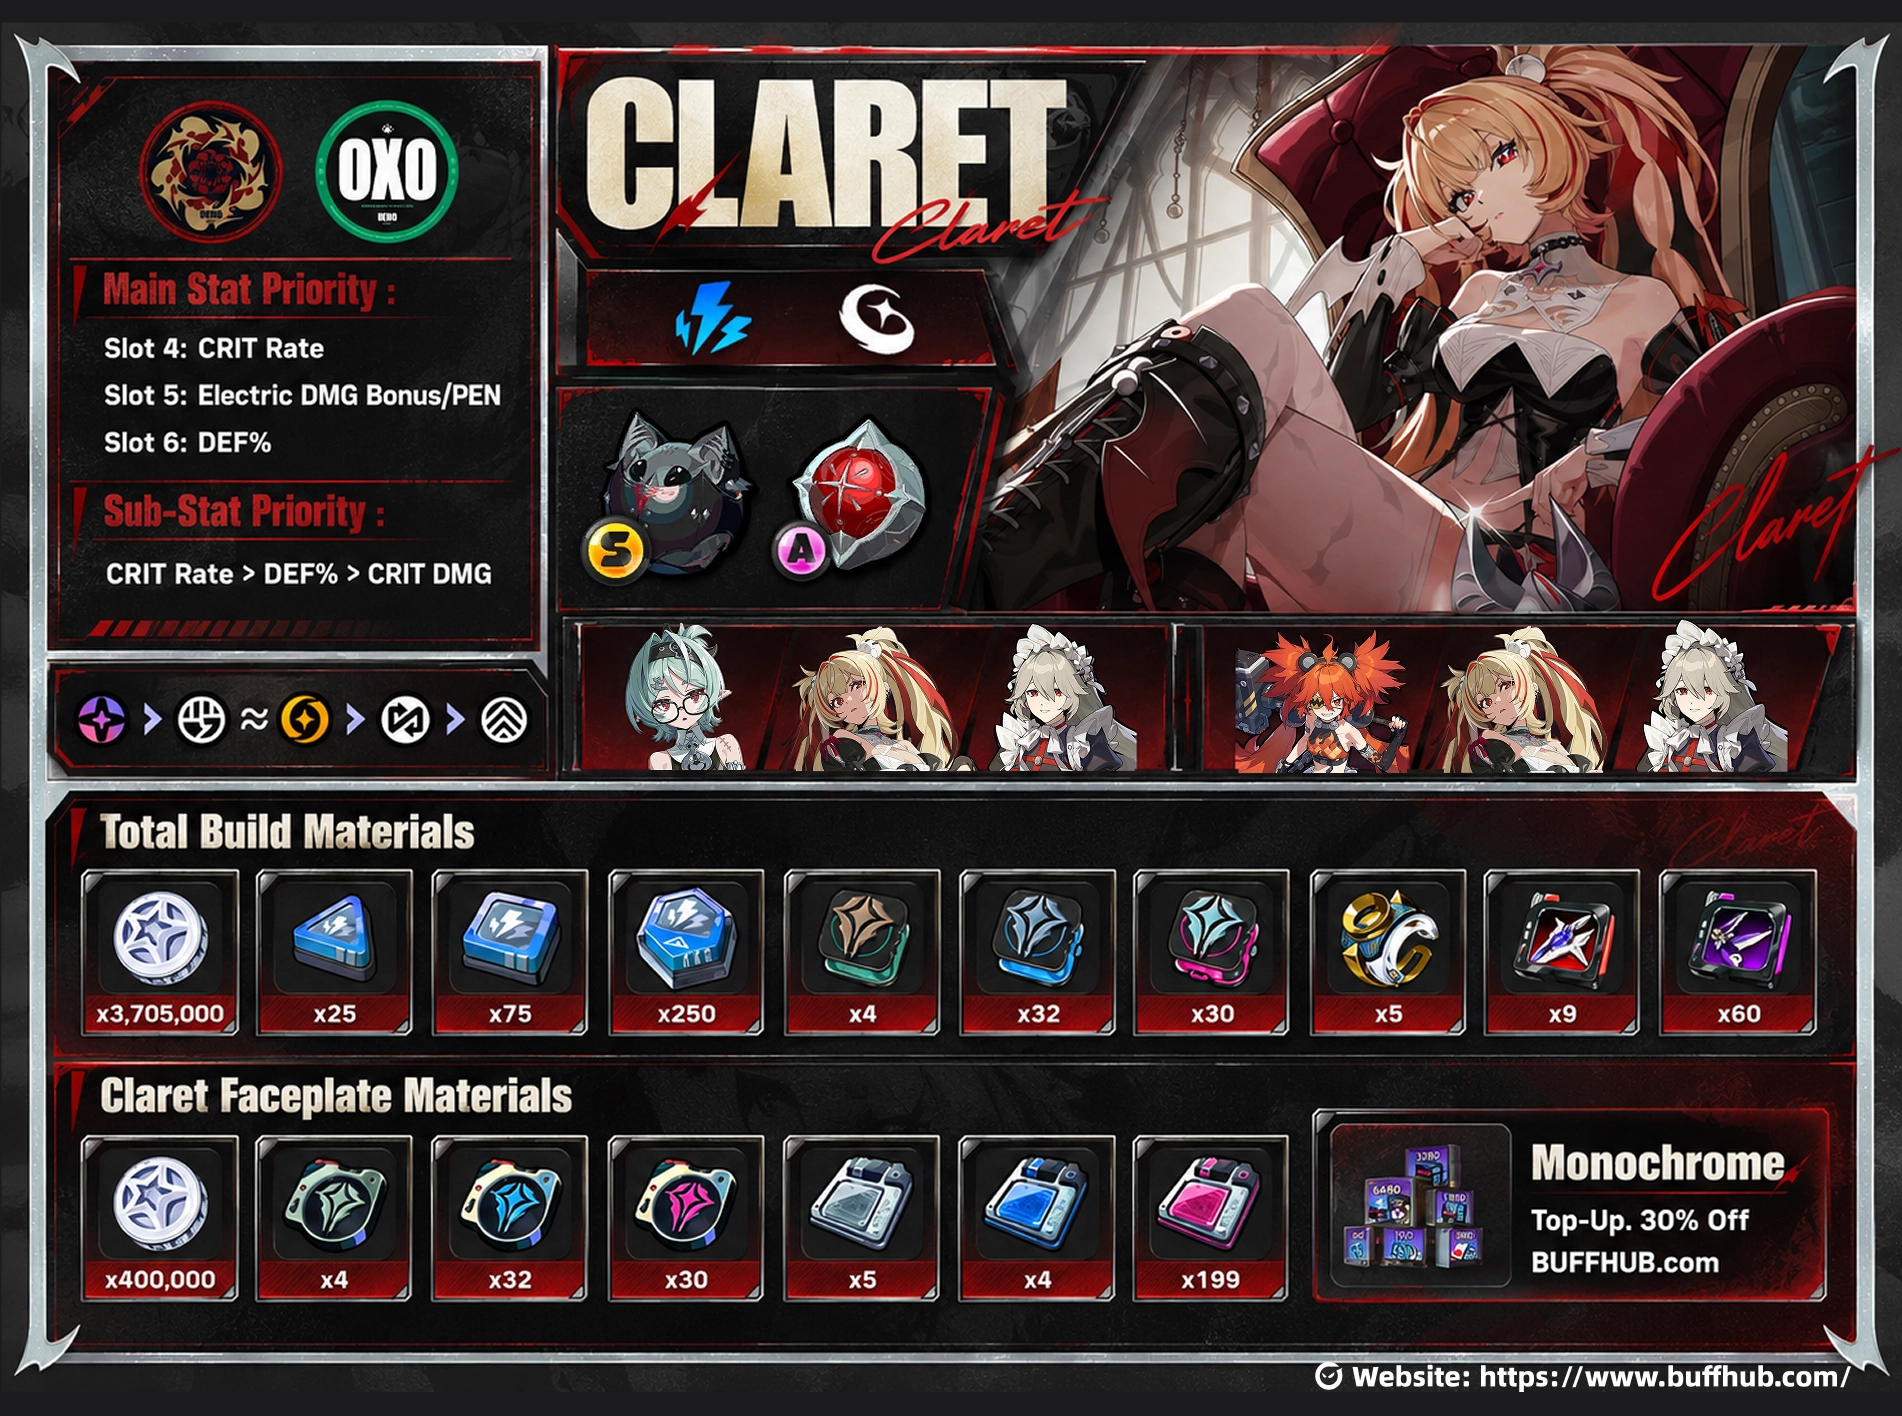
- Rank: S-Rank
- Attribute: Electric
- Specialty: Armorer
- Main scaling: DEF
- Main damage type: Sharp DMG
- Core mechanics: Laceration, Gash, Maim, Sharpness, Personal Resources, and Crimson Inscription
- Best W-Engine: Crimson Thirst
- Drive Discs: 4-Pc Thorned Rose + 2-Pc Woodpecker Electro
- Disc 4: CRIT Rate
- Disc 5: PEN Ratio
- Disc 6: DEF
- Sub-Stat Priority: CRIT Rate > DEF% > CRIT DMG
- Important DEF breakpoint: 1,800 initial DEF
- Endgame CRIT target: Around 200% CRIT Rate in combat
At Level 60, Claret has 5,651 HP, 626 ATK, 376 DEF, 93 Impact, 19.4% CRIT Rate, and 150% Laceration DMG. Those base stats do not tell the whole story. Her Core Skill, combat state, W-Engine, Drive Discs, and teammates add a large amount of the CRIT Rate needed for the finished build.
How Claret's Sharp DMG and Laceration Work
All of Claret's skill damage is treated as Sharp DMG and uses DEF as its main scaling stat. Normal offensive modifiers such as Electric DMG, PEN, and general damage bonuses can still matter, but conventional ATK buffs lose much of the value they would have on a normal direct-damage attacker.
Her critical-hit system is the bigger change. When Sharp DMG critically hits, the calculation uses Laceration DMG instead of normal CRIT DMG. Claret starts with 150% Laceration DMG, giving one successful Laceration check a multiplier of:
1 × (1 + 1.5) = 2.5x
CRIT Rate above 100% is not wasted. The excess percentage becomes the chance of a second Laceration check on the same damage instance. At 200% CRIT Rate, both checks can become consistent:
2.5 × 2.5 = 6.25x
Compared with the original 1.0x hit, that is equivalent to 525% additional damage. This is the source of the often-mentioned 525% figure. Claret does not literally have 525% CRIT DMG on her stat screen.
There is one more useful consequence: her fixed Laceration multiplier is not raised in the normal way by stacking CRIT DMG, and it is not affected in the same way as normal CRIT DMG by effects that reduce that stat. CRIT DMG is not completely dead, however, because Claret's Core Skill can convert part of it into initial CRIT Rate. Direct CRIT Rate and DEF% are still more valuable when choosing substats.
Sharpness Is Not Normal Energy
Claret uses Sharpness instead of normal Energy for her key combat loop. Sharpness does not automatically regenerate, and fixed stage Energy does not refill it either. Its recovery comes from Claret staying active and attacking enemies.
This removes most of the usual reason to build Energy Regen for a DPS. If Claret's Sharpness cycle feels slow, the solution is not an Energy Regen Disc; the issue is usually field time, rotation flow, or how often she is connecting attacks. That mechanic also explains why she is designed as a relatively long-field-time damage dealer.
How Gash and Maim Work
Sharp DMG builds a separate Gash gauge on the enemy. Filling the gauge creates a Gash stack, and up to three can be stored. Certain attacks then consume Gash to trigger Maim, one of Claret's largest concentrated sources of damage. Maim can also interact with the Laceration system, so getting those detonations inside a strong buff or Stun window matters more than simply filling the gauge for its own sake.
You do not need to wait for three stacks every time. Detonating one available Gash stack does not inherently lose damage compared with waiting to detonate several together. If the enemy is about to move, the Stun window is closing, or using one stack keeps Claret's loop moving, detonate it.
Holding the relevant Special Attack can consume multiple stored stacks when you actually want a larger detonation. The choice is therefore about timing, not a hidden reward for always sitting on three stacks.
The Armorer system also allows Armorer teammates to contribute toward the same Gash progress instead of restarting the gauge after a swap. This gives future dual-Armorer teams a natural way to share setup without rebuilding the mechanic from zero.
How Do Claret's Skills Work?
Crimson Inscription
EX Special Attack: Blood-Forged Edge consumes 60 Sharpness and activates Crimson Inscription, changing Claret's hammer into a blood axe and upgrading her Basic Attack. The activation attack deals 1,193.7% damage at Level 12.
Crimson Inscription starts with a limited duration, but Claret is more forgiving than that timer suggests. The timer stops while she is off field, so briefly swapping to refresh a support buff or use a Stun character does not burn through the remaining transformation. Killing an enemy can also extend the state.
Chain Attack can extend Crimson Inscription as well, helping Claret fit another Basic Attack sequence, Gash detonation, or finisher into the same damage cycle.
Basic Attacks Are the Core of Her Rotation
During Crimson Inscription, Claret's Basic Attack becomes Star Forge, a three-hit blood-axe combo. The final hit reaches 1,024.9% damage and 343.1% Daze at Level 12. The second and third parts of the string also contain defensive or dodge interactions, and holding the Basic Attack during the appropriate parts can extend the sequence.
The actual execution is much simpler than the description. After entering Crimson Inscription, the normal field loop is essentially EX Special → keep attacking → hold Basic where available. After certain Special Attack sequences, Claret can immediately enter a special Basic Attack follow-up and then continue into the later part of Star Forge.
Perfect Dodge is not just defensive here. Triggering the relevant dodge interaction during her Basic Attack string increases the remaining damage of that sequence by 15%, rewarding players who stay aggressive and use the built-in defensive windows instead of abandoning the combo every time the enemy attacks.
Blood Axe Return and Blood Burial Onslaught
After a Special or EX Special successfully triggers Maim, Claret can use Basic Attack: Blood Axe Return. At Level 12, it deals 650.8% damage and 214.5% Daze, with invulnerability during the animation. Swapping away immediately after Maim can therefore leave a useful follow-up on the table.
EX Special Attack: Blood Burial Onslaught is the Personal Resource finisher. It starts at a 1,711.2% damage multiplier and 838% Daze at Level 12, while each Personal Resource consumed increases its damage by another 6.5%. It consumes the stored resource when used.
Do not treat Blood Burial Onslaught like a button that should always be pressed the moment it becomes available. If another Maim can be generated inside the same safe damage window, building more Personal Resources first gives the finisher more value. If the enemy is about to leave or recover, spending early can still be the better call.
Chain Attack and Ultimate
Chain Attack: Blood Pact Resonance deals 2,162.1% damage and 396% Daze at Level 12. Its heavy hit applies Gash and it also helps extend Crimson Inscription, making Chain Attack part of Claret's resource loop instead of a separate burst button.
Her Ultimate reaches 4,841.5% damage and 608.7% Daze at Level 12 and also contributes Gash. Inside Stun, Chain Attack and Ultimate are especially useful because they let Claret generate another round of Gash quickly before deciding how many stacks there is time to detonate.
How to Use Claret's Counter Assist
Claret can respond to certain enemy Control Skills with a special Counter Assist instead of following the normal defensive sequence. This is the weapon-clash interaction in her kit, and on compatible boss mechanics it can let Claret interrupt or skip part of the usual sequence.
The timing is easy to miss. Reacting normally to the first purple warning can prevent the special interaction from appearing. Instead, wait through the initial control sequence until the specific parry or counter indicator appears, then use Claret's Counter Assist.
The safest way to learn it is not to mash the ordinary Defensive Assist as soon as the boss telegraphs the mechanic. Watch for the dedicated counter prompt first. Some older bosses can also interact with this system, but not every Control Skill should be assumed to work this way.
Claret Rotation and Stun-Window Setup
Claret's normal field loop is closer to a sustained DPS than a complicated quick-swap character. Outside Stun, the practical rhythm is enter Crimson Inscription, keep attacking, hold the appropriate Basic Attack inputs, and detonate Gash as it appears. One-stack detonations are perfectly usable, so there is no need to slow the entire rotation just to see three stacks on the gauge.
With Rina in the team, keep an eye on her buff instead of leaving her off field indefinitely. With a Stun teammate, use short swaps for parries, EX Specials, or other low-field-time utility, then return to Claret. Crimson Inscription pausing off field makes these brief swaps much less punishing.
Before an important Stun window, start thinking about Gash before the enemy is actually Stunned. Once the Daze gauge is already well advanced, begin preparing the resources needed for the burst instead of waiting for the Stun animation. The goal is to enter Stun with enough setup to get multiple Maim opportunities rather than spending the first half of the window building from zero.
- Use Claret on field to build Sharpness and Gash while progressing through her enhanced Basic Attack loop.
- Detonate individual Gash stacks when they become available if waiting would interrupt the rotation.
- Use your Stun character in short windows rather than giving them unnecessary field time.
- Refresh Rina's support before the important damage window when she is part of the team.
- As the enemy approaches Stun, begin preserving the resources needed for the incoming burst sequence.
- During Stun, use Claret's Chain Attack and Ultimate to add Gash quickly.
- Detonate the available Gash based on the time remaining. If three stacks fit, use three; if the window is nearly over, detonating two is better than losing them.
- Return to the normal EX Special + Basic Attack loop after the enemy recovers.
This is also where M1 becomes a comfort upgrade rather than just a spreadsheet increase. Slightly slow inputs or an imperfect pre-Stun setup can leave Claret short of the desired number of Gash stacks. Faster Gash generation at M1 helps recover those missing stacks and raises the rotation floor for normal players.
Best W-Engines for Claret
Crimson Thirst is still the best overall choice. Its value is not just raw damage: it gives Claret DEF, CRIT Rate, and Sharp/Electric-related offensive bonuses at the same time, which makes the 200% in-combat CRIT target considerably easier to approach.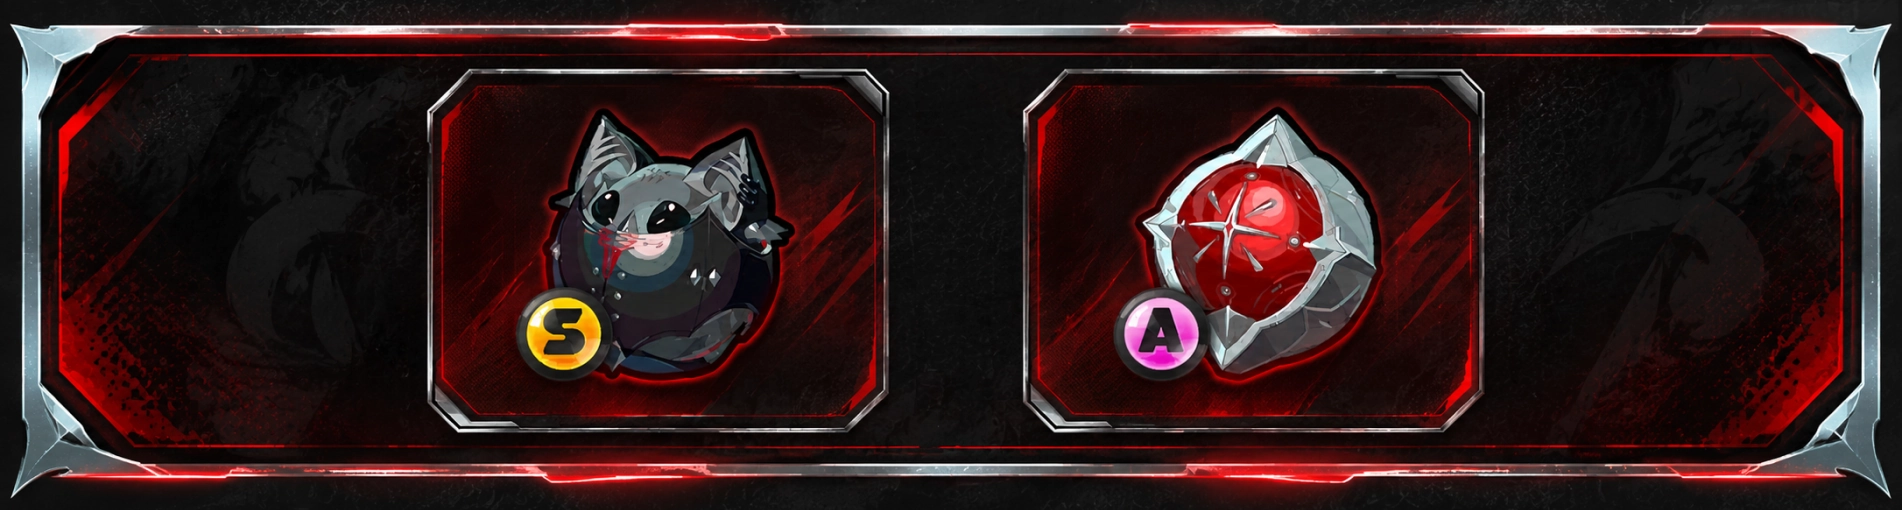
| W-Engine | What It Gives Claret | Verdict |
|---|---|---|
| Crimson Thirst | 416 Base DEF and 48% DEF at Level 60, plus CRIT Rate and Electric/Sharp damage bonuses. | Best overall and the first premium upgrade I would prioritize. |
| Bloodmarrow Coffer | 342 Base DEF and 20% CRIT Rate. Its passive further rewards high-CRIT builds. | Strong Battle Pass alternative. Especially useful because CRIT Rate is the hardest part of Claret's finished build. |
| Catty Luck | Heavy DEF-focused Armorer W-Engine available without pulling Claret's signature. | Practical F2P option. Easier to obtain, but leaves more of the CRIT requirement to Drive Discs. |
Why Crimson Thirst Is So Valuable
Crimson Thirst combines 48% DEF, substantial CRIT Rate, and Sharp-related offensive bonuses. That combination solves two problems at once: DEF directly scales Claret's Sharp DMG, while CRIT Rate moves her toward the second Laceration check.
The Sharp-specific damage bonus is particularly useful because it occupies a less common multiplier than standard DEF or generic damage bonuses. The signature therefore improves both gearing comfort and final damage rather than simply adding more of one stat.
Bloodmarrow Coffer
The Battle Pass W-Engine is a legitimate alternative rather than a placeholder. At first refinement, its performance can reach roughly 85% of Crimson Thirst, while maximum refinement can push it to around 92% under the same comparison conditions.
Actual results still depend on team buffs, enemy defenses, Drive Disc quality, and refinement. For account planning, the more useful point is that Bloodmarrow Coffer gives 20% CRIT Rate and can keep Claret competitive without immediately pulling her signature.
Catty Luck
Catty Luck focuses much more heavily on DEF. It sits noticeably behind the signature in damage, but remains the straightforward option for players who want to save pulls.
Its real downside is the missing CRIT Rate. With a DEF-focused W-Engine, more of Claret's 200% target has to come from Drive Disc substats and her other combat buffs.
Best Drive Discs and Stats for Claret
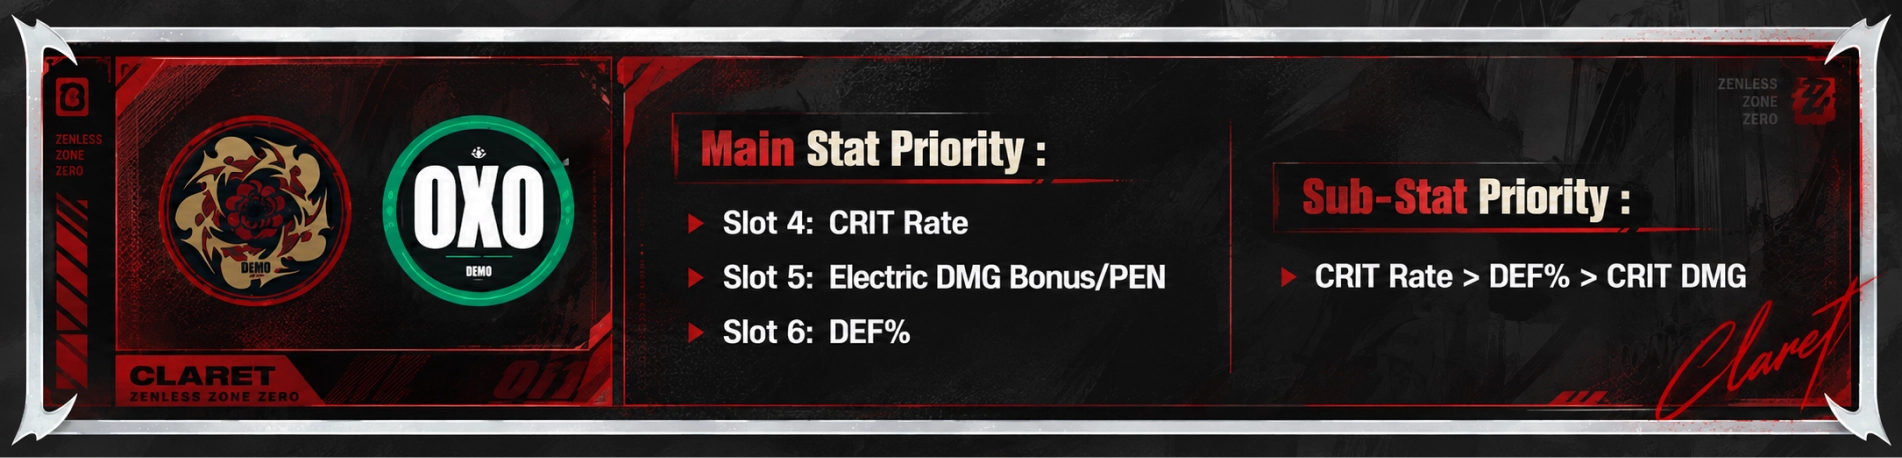
The recommended setup is 4-Pc Thorned Rose + 2-Pc Woodpecker Electro. Thorned Rose gives DEF and additional offensive value, while Woodpecker Electro supplies the CRIT Rate Claret needs in unusually large quantities.
- Thorned Rose 2-Pc: DEF +16%.
- Thorned Rose 4-Pc: Damage +15%. Reaching 1,000 or 1,800 initial DEF grants 8% or 16% CRIT Rate.
- Woodpecker Electro 2-Pc: CRIT Rate +8%.
The 1,800 initial DEF breakpoint is the number I would protect first. Claret absolutely wants CRIT Rate, but dropping below the stronger Thorned Rose threshold just to make the CRIT stat look cleaner is not automatically an upgrade.
Main Stats
- Disc 4 — CRIT Rate: the most direct way to work toward both Laceration checks.
- Disc 5 — PEN Ratio: particularly attractive in the Rina setup and can be adjusted around team composition and substat quality.
- Disc 6 — DEF: directly improves Sharp DMG and helps secure the 1,800 initial DEF threshold.
Sub-Stat Priority
CRIT Rate > DEF% > CRIT DMG
CRIT Rate is Claret's highest-priority substat because her Laceration system continues to benefit from CRIT Rate beyond 100%. DEF% comes next because it directly improves Sharp DMG scaling and helps with the 1,800 initial DEF breakpoint. CRIT DMG is lower priority, but it is not completely wasted because part of it can be converted into initial CRIT Rate through her Core Skill.
How Realistic Is 200% CRIT Rate?
It is a graduation target, not a starting requirement. Even after combining Claret's own CRIT, Core Skill, W-Engine, Woodpecker Electro, and a CRIT Rate Disc 4, a finished setup can still need roughly another 40–50 percentage points from substats and conversion effects.
For a normal account, getting as close as possible without breaking the DEF side of the build is more sensible than forcing 200% immediately. A build at 185–195% with proper DEF and good team buffs is not suddenly unusable because the second Laceration check is not mathematically guaranteed on every hit.
Best Team Structure for Claret

Claret wants to stay on field, so her current team logic is simple: Claret + a low-field-time Stun character + a support whose buffs actually work with DEF-scaling Sharp DMG. Rina is one of the cleanest support choices because PEN still benefits Claret and Rina does not need to occupy the field for long.
Rina shares PEN Ratio while Drusilla or Anastella is deployed. Her Core Passive provides 25% of Rina's own PEN Ratio plus 12%, up to 30%. Her Electric synergy can also extend Shock duration by three seconds and grants the squad 10% Electric DMG while a Shocked enemy is present.
For the Stun slot, Koleda and Trigger are both usable choices. The priority is not simply which Stun character has the biggest personal numbers; Claret benefits more from someone who can do their job quickly and return the field to her.
Roxy remains a natural higher-synergy partner because she can contribute Daze, Gash, and Maim-related utility while leaving Claret room to take the main damage window. Claret's team options should also become more flexible as the Armorer roster expands.
What If You Do Not Have Rina?
Nicole is a usable fallback, and her Cinema 6 CRIT Rate buff directly helps Claret's double-Laceration setup. Other support options can work as well, but they may require more investment or provide less direct value than Rina.
Rina is therefore the cleaner low-field-time option, not a mandatory requirement for making Claret function.
Claret Upgrade Materials
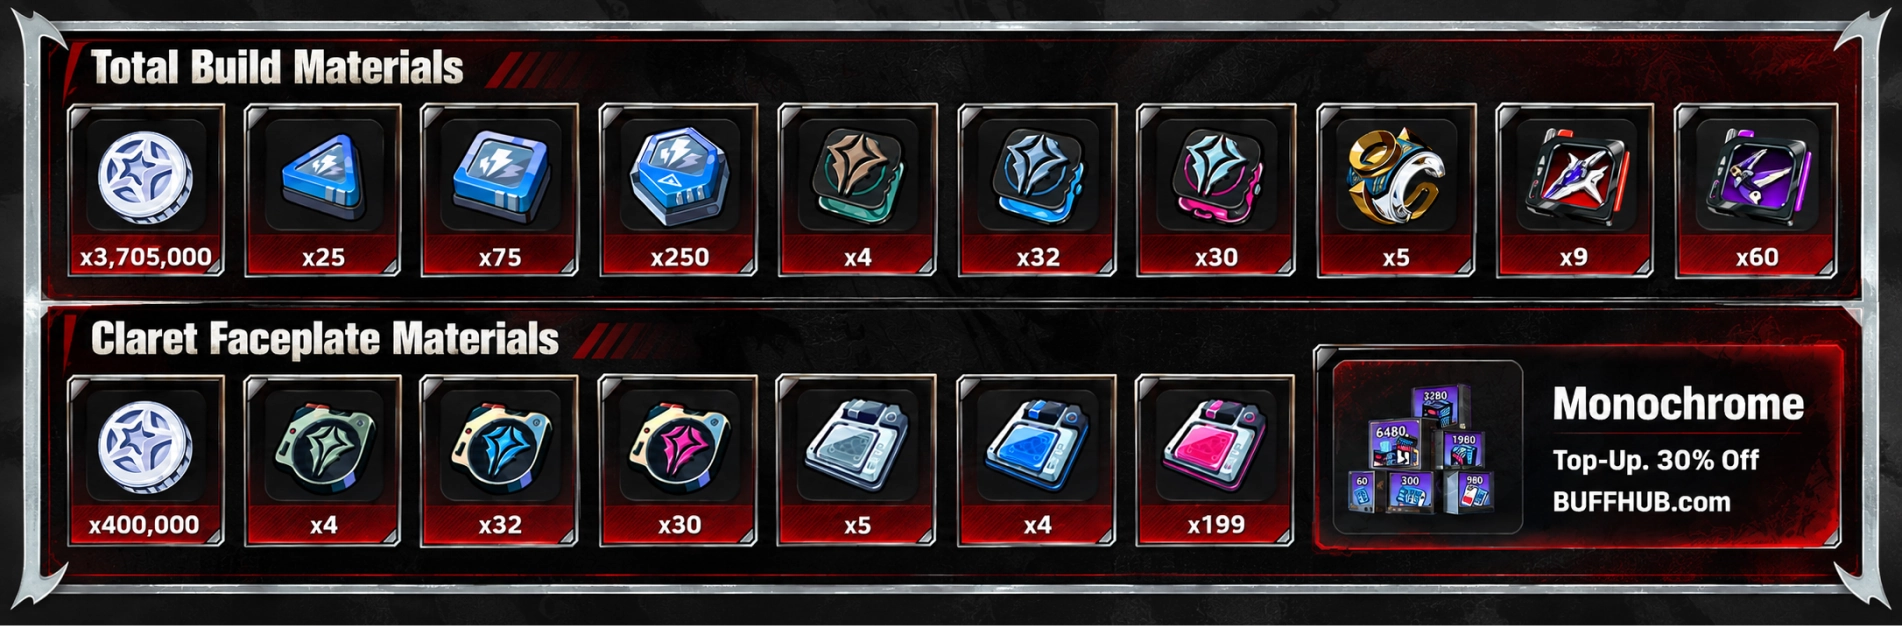
| Category | Material | Amount |
|---|---|---|
| Character | Denny | 3,705,000 |
| Character | Basic Shock Chip | 25 |
| Character | Advanced Shock Chip | 75 |
| Character | Specialized Shock Chip | 250 |
| Character | First Promotion Material | 4 |
| Character | Second Promotion Material | 32 |
| Character | Third Promotion Material | 30 |
| Character | Hamster Cage Pass | 5 |
| Character | Additional High-Level Material | 9 |
| Character | Additional Weekly Material | 60 |
| Crimson Thirst | Denny | 400,000 |
| Crimson Thirst | Stun Component | 4 |
| Crimson Thirst | Reinforced Stun Component | 32 |
| Crimson Thirst | Specialized Stun Component | 30 |
| Crimson Thirst | W-Engine Battery | 5 |
| Crimson Thirst | W-Engine Power Supply | 4 |
| Crimson Thirst | W-Engine Energy Module | 199 |
The listed character and W-Engine Denny costs total 4,105,000.
Which Claret Mindscapes Are Worth Getting?
Claret already has her core gameplay loop at M0. Her Mindscapes raise damage and make Gash management easier, but she does not need M1 just to function.
| Mindscape | Effect | Verdict |
|---|---|---|
| M1 | Laceration improves Gash buildup and increases Maim-related performance. | Good floor-raising upgrade. Helps recover missing Gash during imperfect rotations. |
| M2 | Extends the main empowered state by 2 seconds and grants 18% Electric RES ignore during the relevant empowered attacks. | Strong second breakpoint. Better uptime plus a valuable offensive multiplier. |
| M3 | Raises Basic Attack, Dodge, Assist, Special Attack, and Chain Attack levels by two. | Standard skill-level increase. |
| M4 | Extends the third Basic Attack's slashing duration and gives the third Basic Attack, Chain Attack, and Ultimate 20% more damage. | High-investment damage upgrade. |
| M5 | Raises Basic Attack, Dodge, Assist, Special Attack, and Chain Attack levels by two. | Standard skill-level increase. |
| M6 | Chain Attack and Ultimate can trigger an additional free single-target Maim. | Powerful capstone. Adds both mechanics and damage. |
M1 is useful for ordinary play because faster Gash buildup makes the Stun-window setup less fragile. Slightly slow inputs or an imperfect pre-Stun setup can leave Claret short of the desired number of Gash stacks, and M1 helps patch that problem.
However, if the decision is specifically M1 or Crimson Thirst, the signature should come first. Crimson Thirst can provide roughly 22% more damage than the compared Toy Store W-Engine, while M1 averages around 15% over M0. The exact gap depends on the final build, but the investment order is clear: W1 before M1 when choosing only one premium upgrade.
Is Claret Worth Pulling?
Claret is a strong pull candidate if your account needs a direct-damage carry who can form a functional team without immediately collecting several new limited characters. Her biggest strengths are high personal damage, a simple basic rotation once the mechanics are understood, and good performance at relatively low investment.
Her biggest limitation is not her own kit. Armorer is still a new system and its dedicated teammate pool is relatively small. An account with Rina and a suitable Stun character can already put together a practical team. A newer account without those pieces may have to spend more time building the team around her.
- M0 + Catty Luck / accessible A-Rank: viable if you want to minimize pull cost, but expect more CRIT pressure on Drive Discs.
- M0 + Bloodmarrow Coffer: a strong low-cost setup with useful CRIT Rate.
- M0W1: the first premium upgrade I would take. Crimson Thirst improves both damage and gearing comfort.
- M1W1: the strongest balance of damage, smoother Gash generation, and investment.
- M2W1: reasonable if you intend to keep investing in Claret and the Armorer team around her.
- M4 / M6: luxury targets for high-investment players or players who specifically want to maximize Claret.
For a low spender deciding what to do after pulling M0, I would go signature first, then M1. If the budget stops at M0, that is also fine: Claret's core Sharp DMG, double-Laceration, Gash, Maim, and Crimson Inscription loop is already present without Mindscapes.
Frequently Asked Questions
Does Claret Really Need 200% CRIT Rate?
Not to start playing her. Around 200% in-combat CRIT Rate is the finished-build benchmark because the first 100% covers the first Laceration check and the next 100% can guarantee the second. In practice, push CRIT as high as your build allows without giving up the DEF needed for her damage scaling and Thorned Rose breakpoint.
Why Do Players Say Claret Has 525% CRIT DMG?
It is shorthand for her double-Laceration calculation. With 150% Laceration DMG, one successful check gives 2.5x damage. Two successful checks give 2.5 × 2.5 = 6.25x, or 525% additional damage compared with the original hit. It is not a literal 525% stat on the character sheet.
Is CRIT DMG Useless on Claret?
No, but it is not a primary target. Normal CRIT DMG does not directly raise her fixed Laceration multiplier, while her Core Skill allows part of CRIT DMG to contribute to initial CRIT Rate. Direct CRIT Rate and DEF% remain the better rolls to chase.
Does Energy Regen Work on Claret's Sharpness?
No. Sharpness is a separate resource. It does not automatically regenerate and does not benefit from ordinary fixed stage Energy. Claret restores it through active combat and attacking enemies.
Should I Always Wait for Three Gash Stacks Before Maim?
No. Detonating one stack at a time does not inherently lose damage compared with holding several just for the sake of a larger detonation. Use the stack when it fits the current rotation, especially if the enemy is about to leave or the Stun window is ending.
Why Is Claret's Special Counter Assist Not Triggering?
On compatible boss mechanics, using the ordinary defensive response too early can miss the special duel interaction. Wait for the dedicated counter or parry prompt instead of immediately reacting to the first purple control warning.
Does Claret Need Crimson Thirst?
No. She can function with Bloodmarrow Coffer or Catty Luck. Crimson Thirst is still the most valuable premium upgrade because it combines DEF, CRIT Rate, and Sharp-related damage while reducing the amount of CRIT Rate you need to find from Drive Disc substats.
Should I Pull M1 or Crimson Thirst First?
If you can only choose one, Crimson Thirst comes first. Its damage increase over the accessible alternatives is larger than the average gain from M1, while also making Claret easier to build. M1W1 is the next strong stopping point once the signature is secured.