

Ashveil's build has not changed much, but the way you should judge him has. As a solo Hunt carry, he still hits one target hard and struggles to turn extra enemies into extra damage. What makes him more interesting in Version 4.5 is everything around those hits: frequent Follow-Up ATKs, 40% DEF reduction, and a huge CRIT DMG boost for teammates who also rely on follow-ups.



If you only want the short build, use 4-piece The Ashblazing Grand Duke, 2-piece Duran, Dynasty of Running Wolves, a CRIT Rate body, and an ATK rope. ATK boots are the default; SPD boots make more sense when Sunday is pulling Ashveil forward every turn. The Finale of a Lie is his easiest Light Cone to build around, but the gap between it and his alternatives changes a lot depending on whether your team can already push him close to 100% CRIT Rate.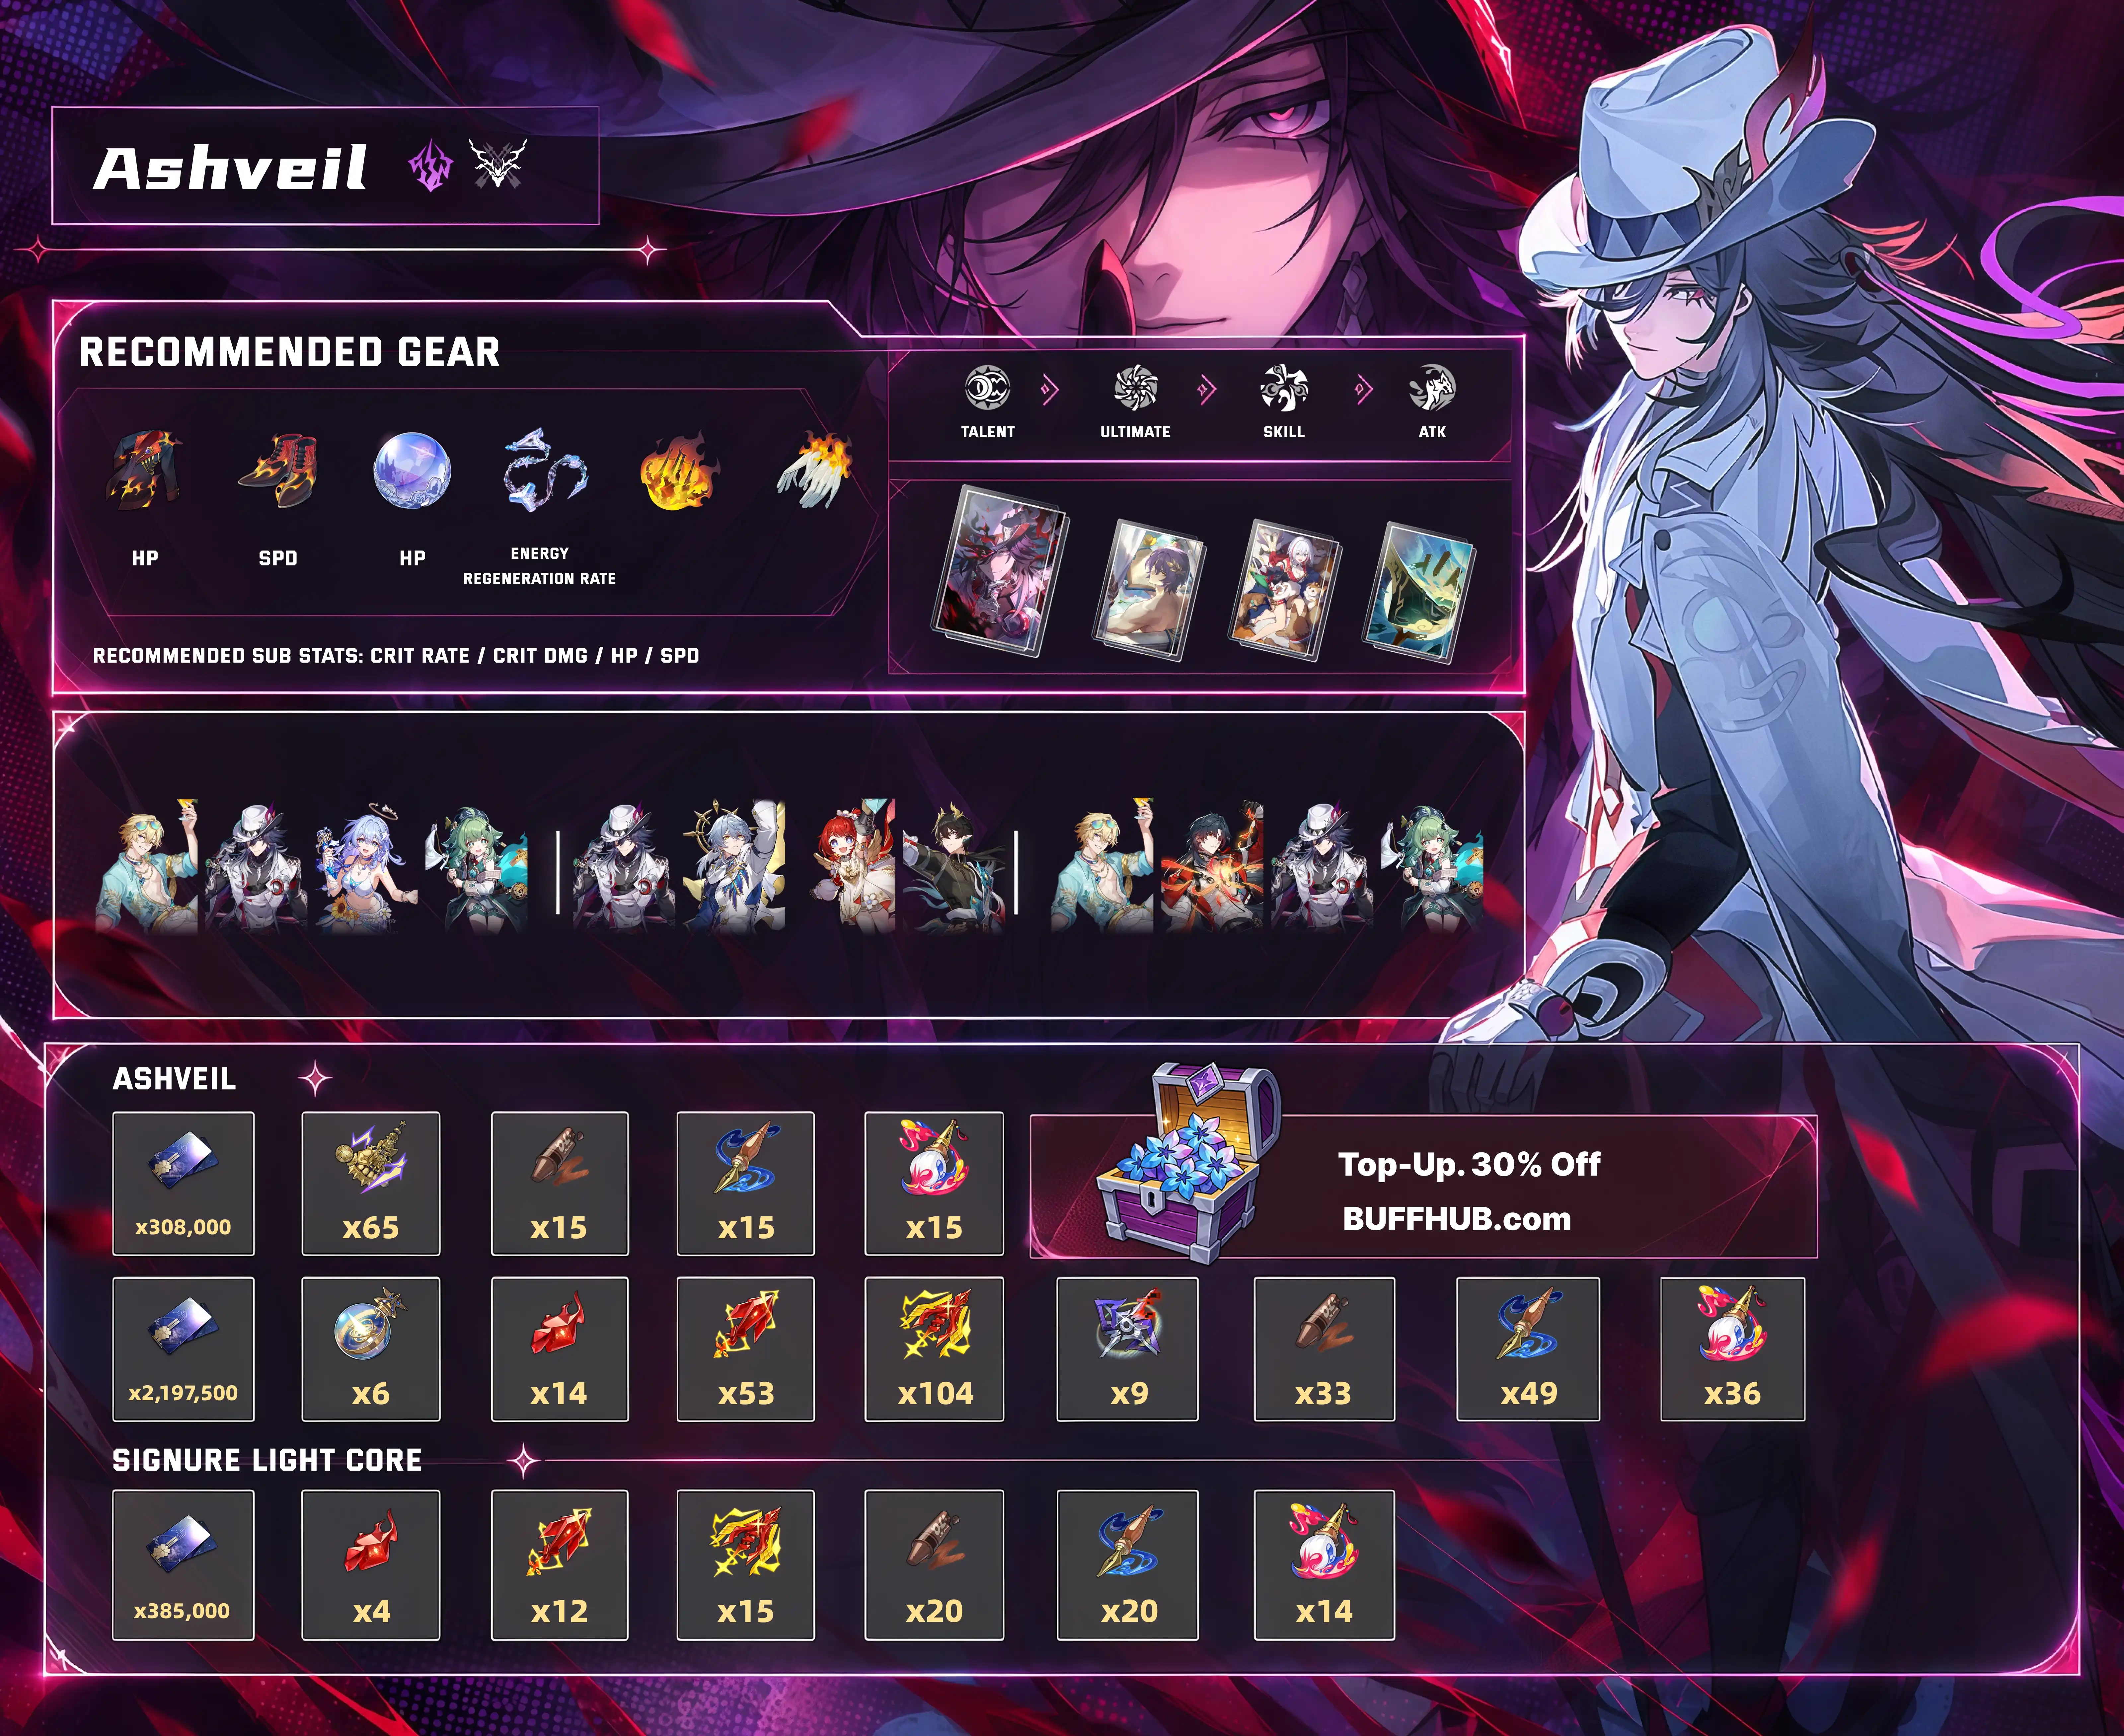









Is Ashveil Still a Main DPS in Version 4.5?
He can be, and a Sunday–Tribbie team still gives him enough turns and amplification to clear single-target stages. The awkward part is that Ashveil brings several team buffs while asking older supports to spend most of their resources on him alone. His damage also stays heavily single-target. When a stage adds four enemies, he does not suddenly deal five times as much damage; he simply gets more targets that can pull attention away from the boss.
The arrival of Aventurine • Waveflair gives Ashveil a second, and arguably more natural, job. Instead of carrying the whole team, Ashveil can sit beside another high-frequency attacker, contribute his own follow-ups, and amplify the attacks that come back at him. I would treat him as a flexible follow-up sub-DPS first if you own Waveflair, then fall back to the Sunday carry setup when the stage favors concentrated Lightning damage.
| Build Decision | Sunday Main DPS | Waveflair Sub-DPS |
|---|---|---|
| Boots | SPD, with Ashveil acting just before Sunday | ATK% by default; SPD only if it creates a useful extra action |
| Main goal | Give Ashveil more Skills and faster Ultimates | Keep Bait active and turn off-turn follow-ups into team fuel |
| CRIT Rate help | Sunday supplies 20% in combat | Relics and the Light Cone carry more of the burden |
| Preferred fourth slot | Dan Heng • Permansor Terrae or Huohuo | Huohuo for the stable version |
| Main weakness | Limited AoE and dependence on turn tuning | More expensive roster and overlapping damage-taken effects |
Bait Is the Rotation, Not Just a Mark
Ashveil's Skill makes one enemy the Bait and reduces every enemy's DEF by 40% while that target remains on the field. If he uses Skill on the enemy that is already marked, he deals an extra hit and recovers one Skill Point. After the first cast, Ashveil is therefore SP-neutral as long as you keep hitting the same Bait. He does not generate Skill Points for the rest of the team, but he also should not drain them every turn.
The mark decides where the rest of his kit goes. Ashveil starts with two Charges, or three after entering battle through his Technique. When another ally attacks the Bait, he restores a fixed 8 Energy, spends one Charge, and launches his Talent Follow-Up ATK. That follow-up then grants two Gluttony, so one correct teammate attack advances his damage, Energy, and Ultimate setup at the same time.
The automatic Bait can choose the wrong enemy
When no Bait exists, Ashveil automatically marks the enemy with the lowest current HP. That sounds convenient, but it can be actively unhelpful in a boss wave. If a weak add becomes the new Bait, your next teammate attack and Ashveil follow-up may both leave the boss untouched. Reapply Skill to the elite or boss before spending the team's important attacks; this one manual correction is often worth more than a small relic upgrade.
His kill transfer is not real AoE compensation
The enhanced follow-ups from Ashveil's Ultimate can move to a new Bait after killing their current target, and the sequence can continue into a new wave or boss phase. On paper, that sounds like a Hunt character who cleans up enemies as efficiently as a true finisher. In practice, the same pool of hits is only being redirected. Unless removing an add solves a mechanic or opens the next wave, focusing the main target is usually the better play.
Grand Duke Is Fixed; the Planar Set Is Not
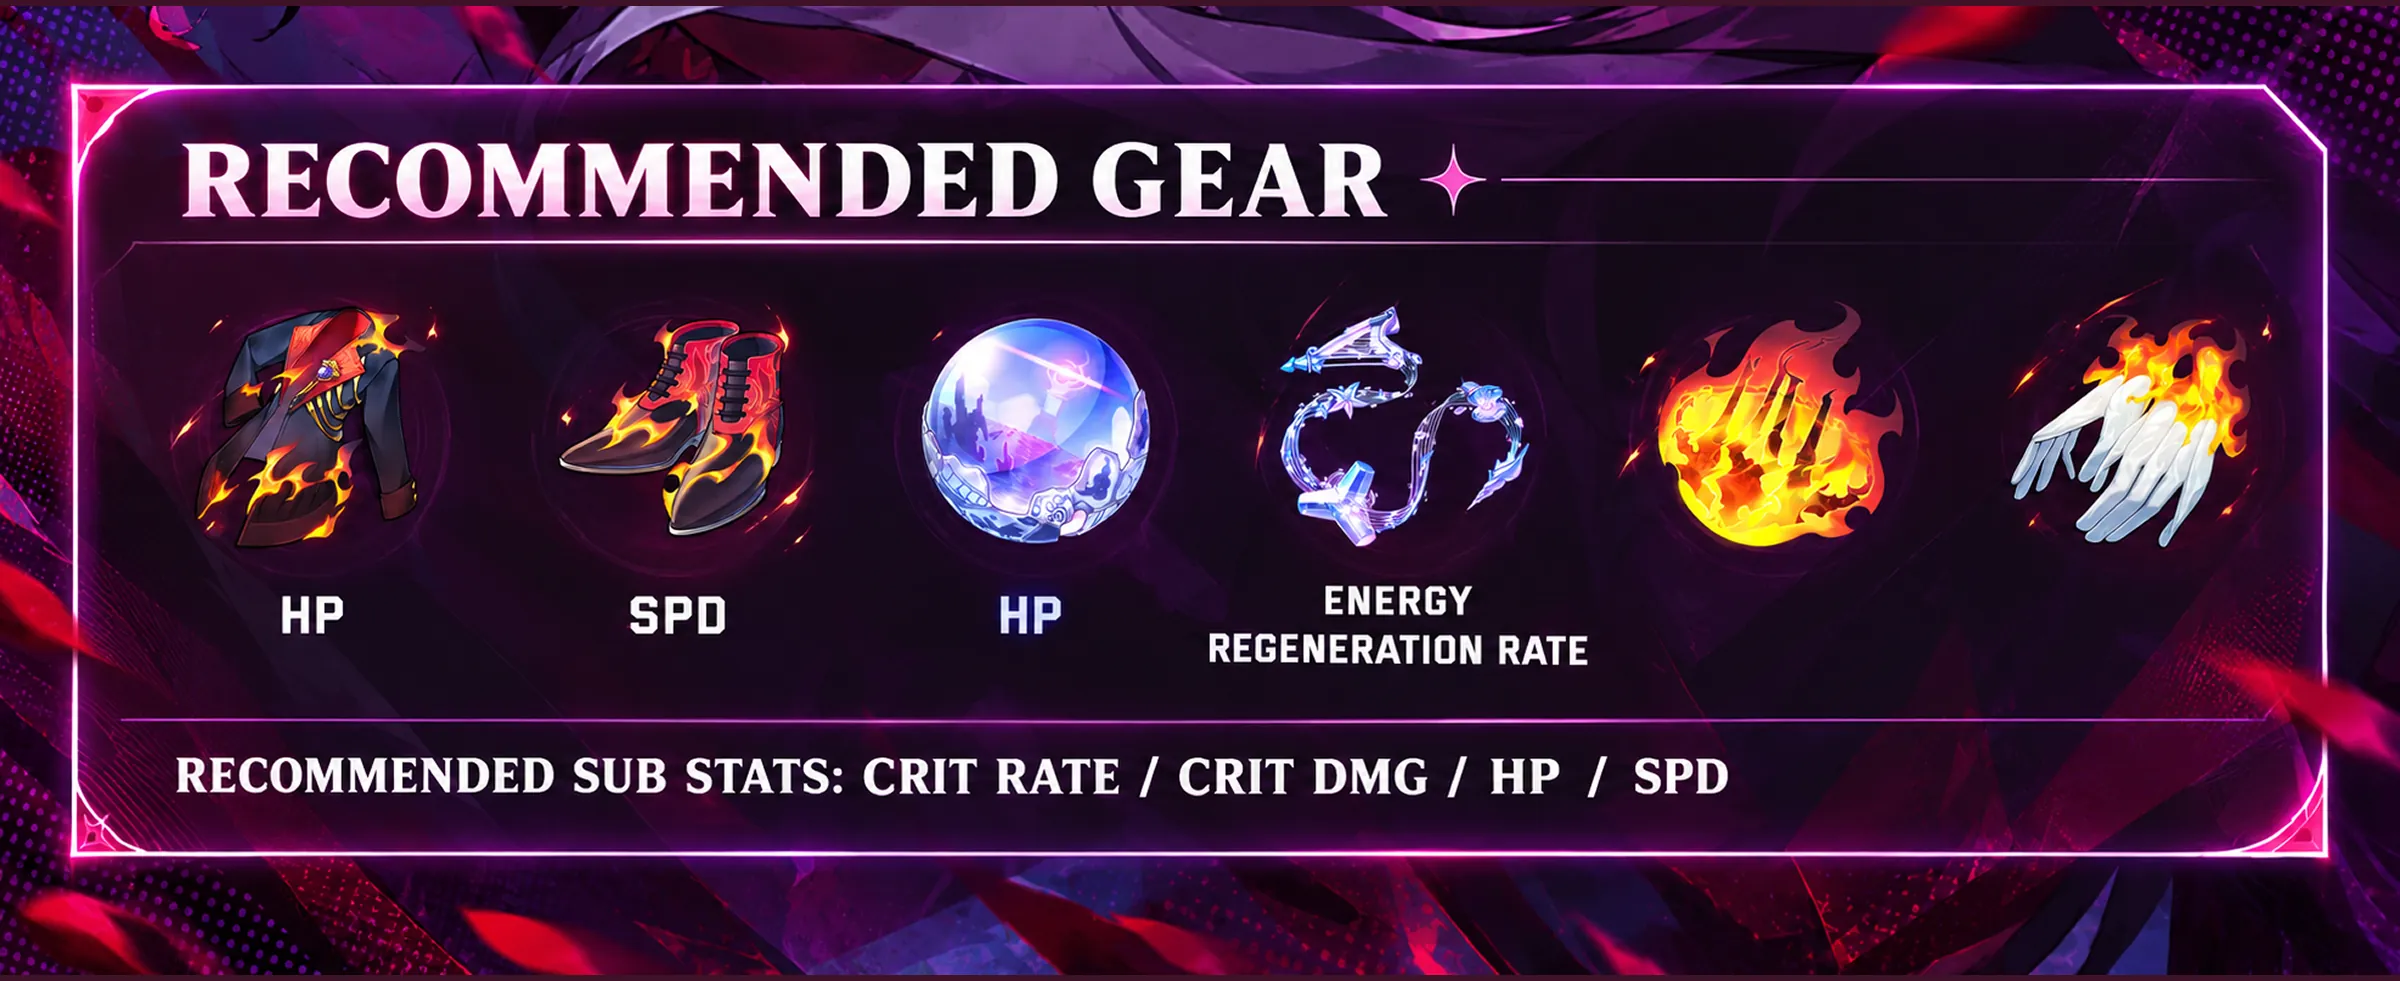
The Ashblazing Grand Duke fits the part of Ashveil's kit that matters most. Two pieces give 20% Follow-Up ATK DMG, while four pieces add 6% ATK every time a follow-up deals damage, up to eight stacks for three turns. His multi-hit follow-ups reach those stacks quickly. A mixed 2-piece build is fine while farming, but I would not break a finished Grand Duke set for a few prettier individual substats.
Duran, Dynasty of Running Wolves is the clean planar target because allied Follow-Up ATKs build Merit for the wearer. Once fully stacked, Ashveil gains Follow-Up ATK DMG and 25% CRIT DMG, and his usual teams can reach that point without changing their rotation. Inert Salsotto remains close enough to use when its substats are clearly better, especially if its CRIT Rate helps finish the build.
Revelry by the Sea is where I would avoid wasting Trailblaze Power. Ashveil gets the first 12% ATK, but the set's remaining bonuses increase DoT damage at 2,400 and 3,600 ATK. He does not deal DoT. Already own great pieces? Use them as a temporary stat stick. Starting a new farm for this set makes no sense when Duran directly improves his follow-ups.
How Much CRIT Rate and SPD Does Ashveil Need?
| Relic Slot | Recommended Main Stat | When to Change It |
|---|---|---|
| Body | CRIT Rate | Only consider CRIT DMG after the combat build can reach 100% CRIT Rate |
| Feet | ATK% | Use SPD when Ashveil needs to act immediately before Sunday |
| Planar Sphere | Lightning DMG Boost or ATK% | Take the one with better CRIT, ATK, and useful SPD substats |
| Link Rope | ATK% | Do not swap to ERR for his fixed Talent regeneration |
Ashveil's minor traces give 37.3% CRIT DMG, 14.4% Lightning DMG Boost, and 10% ATK, but no CRIT Rate. That is why the CRIT Rate body is not just a beginner recommendation. Until the build reaches 100% in combat, another CRIT Rate roll usually does more for his long follow-up sequence than another roll of CRIT DMG or ATK. Count Sunday's 20% buff and any Light Cone effects before deciding that the character screen looks too low.
Speed is more conditional. With Sunday, Ashveil should act first and Sunday should immediately pull him back up, so SPD boots and a simple one-point gap are useful. A 135 SPD Ashveil with a 134 SPD Sunday is the familiar Memory of Chaos example, not a rule you need to force into every mode. Without regular action advance, use ATK boots unless the extra SPD produces another meaningful action or helps complete an Ultimate cycle.
Lightning DMG and ATK spheres are close enough that substats should decide the piece. The rope is less debatable. The 8 Energy restored when an ally attacks Bait is fixed and does not scale with Energy Regeneration Rate, so an ERR rope gives up too much damage for too little return. Sunday and Huohuo are the practical ways to shorten Ashveil's 150-Energy Ultimate cycle.
Which Light Cone Solves Your Build?
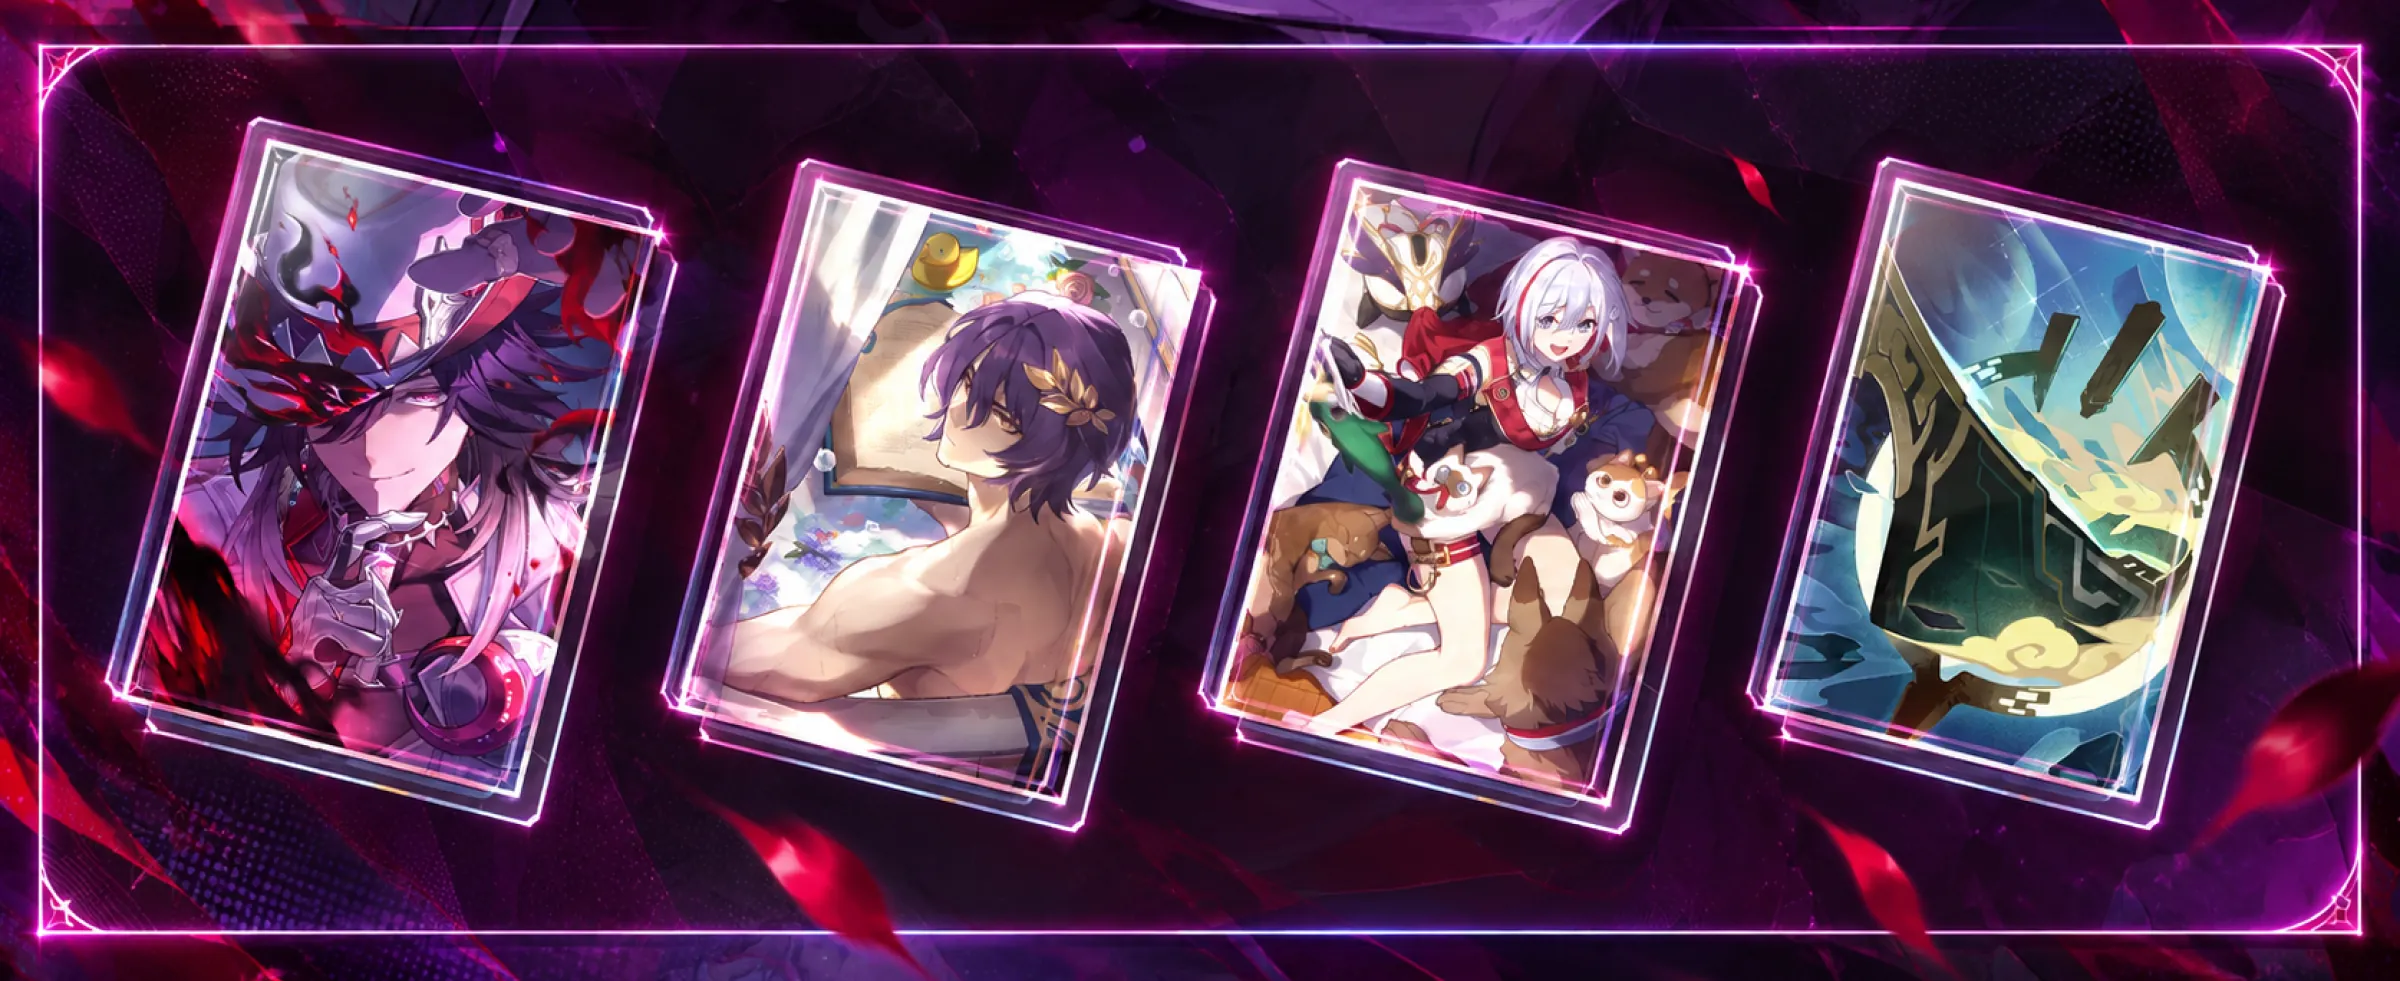
The Finale of a Lie is still the best all-purpose answer, but its most valuable line is not complicated: Ashveil badly needs CRIT Rate. At S1, the cone gives 18% before any condition. Umbra Devourer then activates at the start of battle or after every four Follow-Up ATKs, granting 40% ATK and making all enemies take 20% more damage for three turns. That last effect also helps his teammates, which keeps the cone relevant when Ashveil moves into the sub-DPS slot.
If CRIT Rate is already solved, Baptism of Pure Thought becomes much more competitive. It gives 20% CRIT DMG, gains additional value from debuffs on the target, and after the wearer attacks with an Ultimate, Follow-Up ATKs can ignore 24% DEF for two turns. The cone looks much worse on a build stuck at unreliable CRIT Rate, so do not compare it to the signature in a vacuum. Sunday, relic quality, and the number of debuffs in the actual team all change the result.
Worrisome, Blissful is the dual-DPS option. Its 18% CRIT Rate and 30% Follow-Up ATK DMG are already useful, while Tame lets allies deal more CRIT DMG to the marked enemy. Tame increases the CRIT DMG value of those hits; it is not the same as a general damage-taken debuff. That distinction matters once the team already stacks several forms of vulnerability.
Cruising in the Stellar Sea is the accessible fallback, not a fake version of the signature. Its unconditional CRIT Rate helps, but the extra CRIT Rate below 50% enemy HP and the ATK buff after a kill are unreliable in boss fights. Build Ashveil as if those bonuses are temporary. If they activate, take the upside; if the rotation needs them to function, the build is not stable yet.
Stop Waiting Forever for 12 Gluttony
Ashveil can hold 12 Gluttony at E0. Skill gives one stack, Ultimate gives two, and each normal Talent follow-up gives two; a follow-up kill can add one more. His Ultimate first deals a 400% ATK hit, marks the target as Bait, launches an enhanced follow-up, and restores all three Charges. For every four Gluttony available, the enhanced sequence can add another 200% ATK hit.
A full 12-stack Ultimate is the cleanest damage window, but waiting for it every time can backfire. If Ashveil is sitting at three Charges or close to full Energy, delaying the Ultimate may waste the next teammate trigger. I would use the Ultimate once the intended target is marked and the current wave can absorb the sequence. Save the perfect 12-stack burst for a boss phase that will survive long enough to take all of it.
- Use Ashveil's Technique before combat when the encounter allows it.
- Use Skill on the priority enemy to establish Bait.
- Let teammates attack that Bait and spend Ashveil's available Charges.
- Keep using Skill on the same Bait so the turn remains SP-neutral.
- Use Ultimate before Energy or Charges are wasted; do not hold it only to force 12 Gluttony.
- Reapply Bait manually when the marked enemy dies or the next boss phase begins.
Sunday and Waveflair Need Different Ashveil Teams

Sunday doubles Ashveil's useful turns
Ashveil / Sunday / Tribbie / Dan Heng • Permansor Terrae is the safer hypercarry version. Sunday supplies an immediate extra turn, 20% CRIT Rate, CRIT DMG, and at least 40 Energy through his Ultimate trace. Tribbie adds 24% All-Type RES PEN, a 30% damage-taken Zone, and another Follow-Up ATK after allies use their Ultimates. Dan Heng makes Ashveil the Bondmate, gives him ATK, protects the team, and lets Souldragon add attacks after the Ultimate.
Ashveil / Sunday / Tribbie / Huohuo trades shields for a smoother Energy loop. Huohuo restores 20% of each teammate's Max Energy, which gives Ashveil 30 Energy, and she also supplies healing, cleansing, and 40% ATK. Ashveil has 150 Max Energy, so he does not meet the 160-Energy condition for Huohuo's separate extra ATK bonus in the supplied kit. Use this version when incoming damage is manageable and a faster Ultimate matters more than shield protection.
Ashveil and Waveflair feed the same attack loop
Aventurine • Waveflair / Ashveil / Mortenax Blade / Huohuo is the most direct high-frequency version. Every Ashveil Follow-Up ATK counts as a teammate attack for Waveflair, building Fervor and Punchline while accelerating Aha in the solo-Elation setup. Waveflair's own attacks hit Bait and can trigger Ashveil while Charges remain. Neither character has to wait for the other to start; once Bait is active, each side keeps feeding the next attack.
Ashveil's support is unusually well matched here. Waveflair gains the universal 40% CRIT DMG, and when he is the team's only Elation character, his Elation Skill counts as a Follow-Up ATK and receives Ashveil's additional 80% Follow-Up ATK CRIT DMG. Adding another Elation character changes Waveflair's mode and removes that conversion. The team may still function, but Ashveil is no longer amplifying Waveflair's main attack in quite the same way.
Robin and Mortenax are not interchangeable
Robin • Summeretto is the flexible buffer. She advances one ally by 100%, restores 20% of that ally's Max Energy, and builds a Fever window with DEF ignore, enemy damage taken, and attacks from the Summer Songbirds. Her Ultimate should go to the character whose immediate action creates the better chain. Sometimes that is Ashveil with Charges and Bait ready; sometimes it is Waveflair one Skill away from a Fervor threshold.
Mortenax Blade is the stronger trigger engine when the fight lets him stay in his Zone. Ally attacks build his Charge, and the extra Skill gained at the threshold counts as a Follow-Up ATK. Balefire Bind also reduces enemy DEF and increases damage taken, while the Zone raises allied damage. The price is more pressure on the sustain slot: Mortenax spends HP and draws attacks, so Huohuo is much harder to replace in a long fight.
Where Should Your Trace and Pull Resources Go?
Level Talent and Ultimate first. Talent controls the regular follow-up that drives his Energy and Gluttony loop, while Ultimate refreshes Charges and converts stored Gluttony into his largest burst. Skill comes next because Ashveil uses it every turn and gains extra damage on the existing Bait. Basic ATK can wait; using it usually means the team has already lost control of its Skill Points.
Unlock all three major traces before polishing minor nodes. Damnation Trail supplies more Gluttony, Phantom Limb gives Ashveil 80% Follow-Up ATK DMG plus another 10% per current Gluttony stack, and First Fang gives the whole team 40% CRIT DMG plus 80% Follow-Up ATK CRIT DMG. Skipping First Fang is especially damaging in a Waveflair team because that team-wide follow-up buff is one of the main reasons to pair them.
E0 already contains the complete kit
E0 has Bait, three Charges after Ultimate, the full Gluttony loop, DEF reduction, and both team CRIT buffs. If the roster is missing Sunday, Tribbie, Waveflair, or a reliable sustain, I would finish the team before buying more copies of Ashveil. His vertical upgrades make a working engine stronger; they do not create the engine by themselves.
E1 is the first reasonable stopping point
E1 makes all enemies take 24% more damage, rising to 36% once they fall to 50% HP or lower. It improves Ashveil and every teammate without changing the rotation, although the effective gain drops when the team already has other damage-taken effects. Between E1 and S1, I would usually take E1 for broader team damage. The exception is an Ashveil build that genuinely needs the signature's 18% CRIT Rate to become consistent.
E2 sounds better than it usually plays
E2 raises the Gluttony cap to 18 and refunds 35% of the stacks removed after an enhanced follow-up. That can produce another hit, but only if the team has enough attacks and enough time to reach the new cap. Short fights may barely use the upgrade. E4's three-turn 40% ATK buff and E6's 20% All-Type RES reduction are stronger luxury steps, but E1 remains the sensible stop for most invested accounts.
Which Ashveil Materials Should You Farm?
| Upgrade | Required Materials |
|---|---|
| Ascension from Level 1 to 80 | 308,000 Credits; 65 Thunder Strum; 15 Whimsy Wax; 15 Dreamweave Steel; 15 Lucid Awl |
| Basic ATK 1–6 and Skill, Ultimate, Talent 1–10 | 2,197,500 Credits; 6 Tracks of Destiny; 12 Grit of Strife; 53 Resin of Valor; 101 Lance of Retribution; 9 weekly boss materials; 33 Whimsy Wax; 46 Dreamweave Steel; 28 Lucid Awl |
| Ashveil total for the listed upgrades | 2,505,500 Credits; 6 Tracks of Destiny; 65 Thunder Strum; 12 Grit of Strife; 53 Resin of Valor; 101 Lance of Retribution; 9 weekly boss materials; 48 Whimsy Wax; 61 Dreamweave Steel; 43 Lucid Awl |
| The Finale of a Lie to Level 80 | 385,000 Credits; 4 Grit of Strife; 12 Resin of Valor; 15 Lance of Retribution; 20 Whimsy Wax; 20 Dreamweave Steel; 14 Lucid Awl |
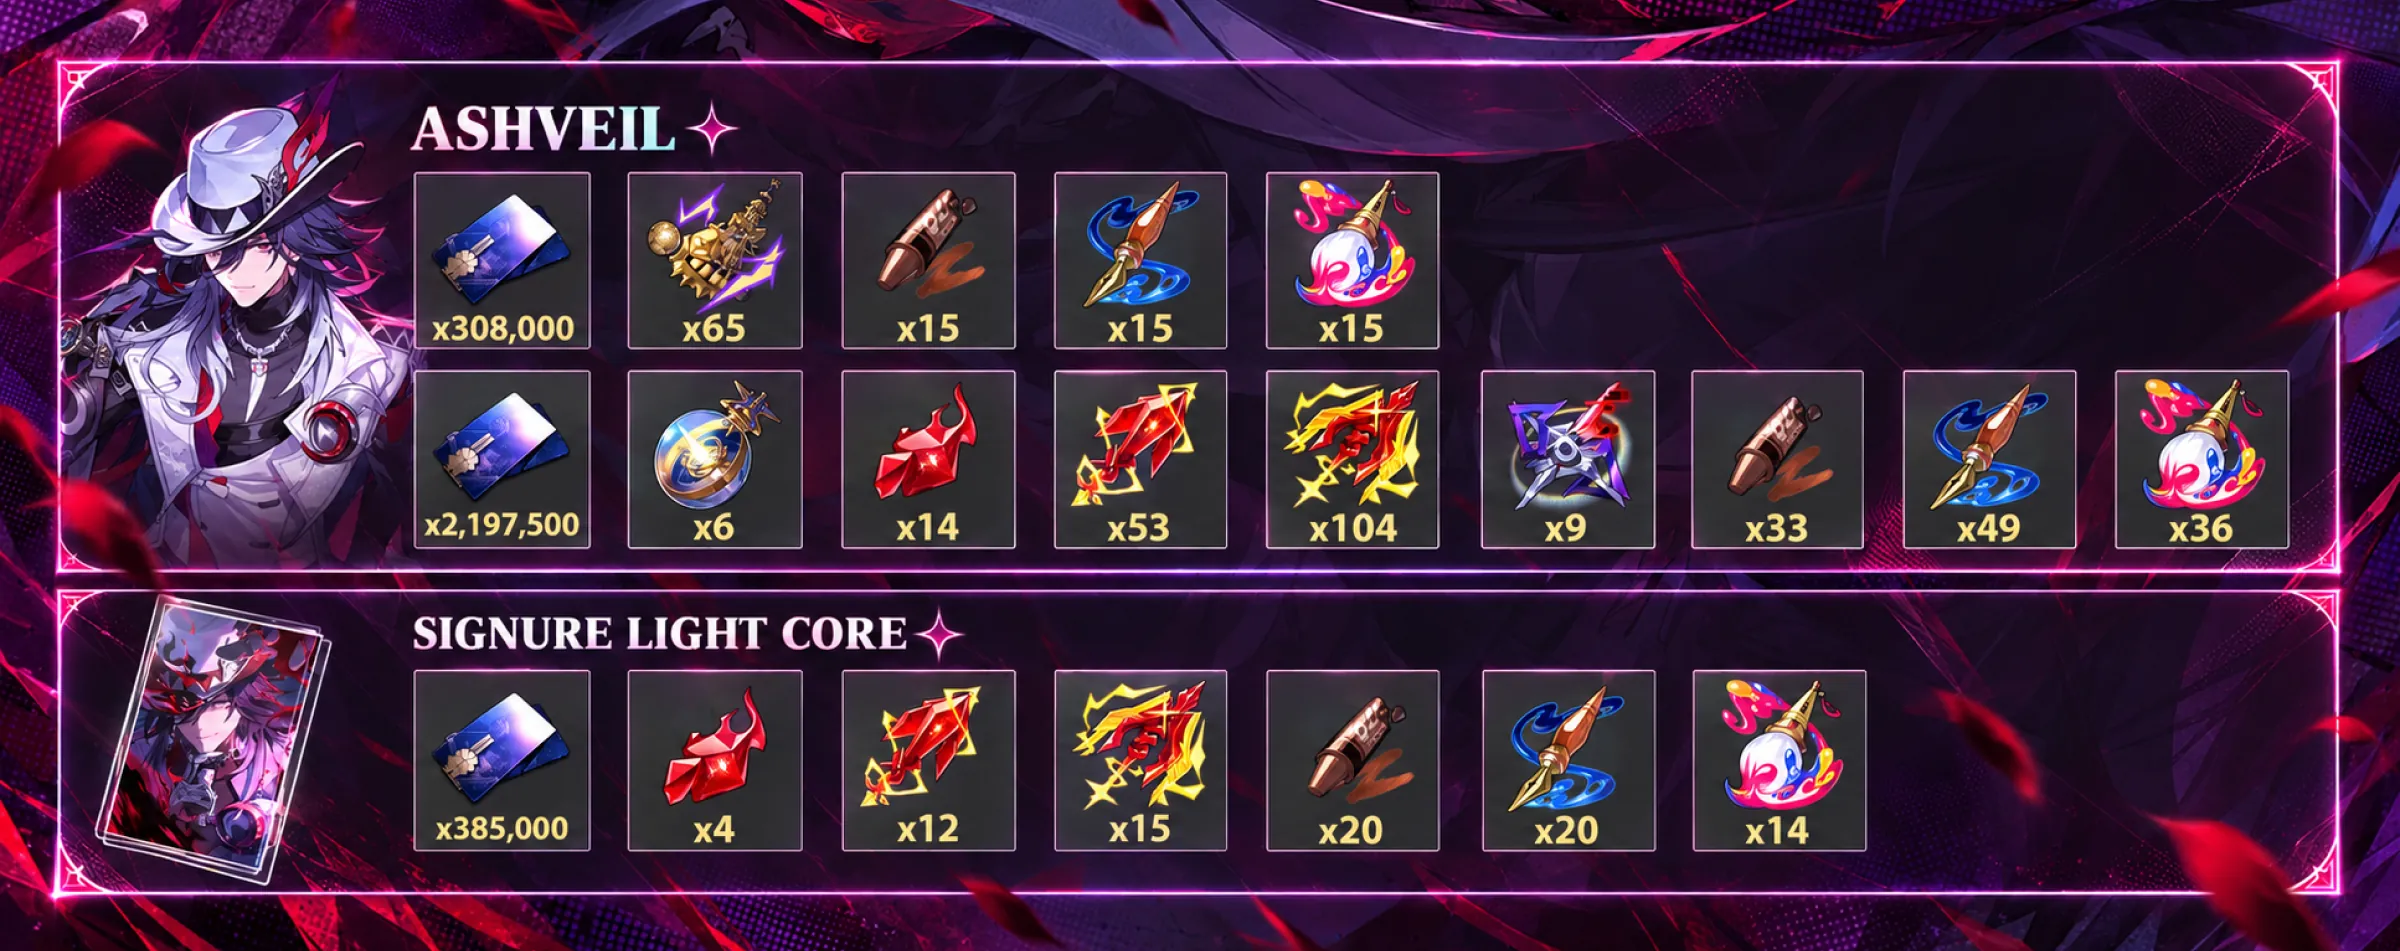
The supplied database displays the nine weekly boss materials as an ellipsis instead of a confirmed English item name. I would not guess the translation and send you into the wrong Echo of War. Check Ashveil's live Trace screen before spending the weekly attempts. The Credit totals above also exclude Character EXP items and the separate Credits consumed while applying EXP.
If you are short on resources, farm the confirmed enemy drops and Hunt trace materials first. Unlock the three major traces, raise Talent and Ultimate, then bring Skill up behind them. Basic ATK is the easy place to stop. Building Ashveil and The Finale of a Lie together requires 16 Grit of Strife, 65 Resin of Valor, and 116 Lance of Retribution across both upgrade tracks.
Frequently Asked Questions
Ashveil benefits from 100% CRIT Rate
His traces already give a large amount of CRIT DMG, and missing a crit during the enhanced follow-up sequence hurts more than adding another small CRIT DMG roll helps. Treat 100% in combat as the endgame target, not a requirement before the character is usable. Remember to include Sunday's 20% and all active Light Cone effects in the calculation.
An ERR rope does not fix his Ultimate
The 8 Energy restored when another ally attacks Bait is fixed and does not scale with Energy Regeneration Rate. Giving up an ATK rope therefore weakens every damaging part of his kit without meaningfully improving the main source of his recovery. Use Sunday, Huohuo, faster ally attacks, and better Charge management instead.
ATK and SPD boots belong to different teams
SPD boots are for the Sunday tune, where Ashveil needs to move immediately before the action advance. ATK boots are better when he does not gain another useful action from the extra Speed. A general SPD build can cover both roles if you hate changing gear, but it will not be the highest-damage option in every Waveflair team.
Revelry by the Sea is only a temporary set
The 12% ATK works, but the DoT bonuses do not. Use excellent pieces that are already on the account, especially while farming Duran, but do not mistake usable substats for real set synergy. Ashveil has no reason to chase the 2,400 or 3,600 ATK DoT thresholds.
What Should You Change First?
Do not start by chasing another 10% CRIT DMG. First, make sure Bait stays on the enemy your team is actually attacking, then stop Charges from sitting at the cap. If Sunday is in the team, fix the Ashveil-before-Sunday turn order; if Waveflair is the carry, keep him as the only Elation character when you want his Elation Skill to receive Ashveil's follow-up buff. Once those parts work, finish the combat CRIT Rate and improve Duran pieces. E1 can wait until the four-character team already runs cleanly.